In this tutorial we show you how to add an outline or border to sticker designs in Photshop. Many of the stickers have a slightly thick white outline that separates the image from the edge of the sticker. That white strip is what we will learn to do.
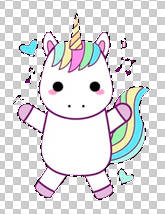
The design for the sticker that we will be using is the one we share in our collection of unicorn vectors, and you can download here.
Table of Contents
Step 1: Select layout
We are working with a design with a transparent background. We are going to click with Control (or Command) on the layer image. This will automatically select our image.
If you want, you can use the wand and select the transparent background, and go to Select> Invert. This will give you the same result.
Step 2: Create the outline space for stickers
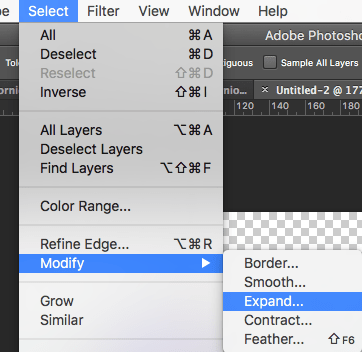
Now let’s Select> Modify> Expand. A window will open where we will place, in this case, 5px. This may vary depending on the size of your sticker.
Step 3: Create the border layer and fill it
We proceed to create a new layer (Shift + Command + N / Shift + Control + N), and we drag it under our design. It would look like this:

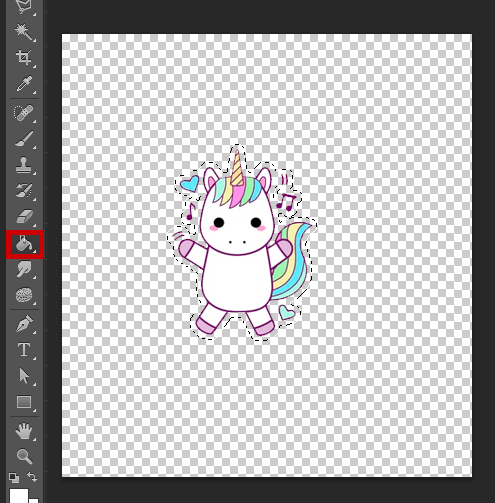
Now, selecting the new layer, we use the Paint Bucket Tool and we fill the selection with white color, #ffffff.
Step 4: Give some touch-ups
With that, officially, we are done. We already have a sticker with a white outline. In some cases, depending on the shape of the sticker, there will be areas that are not filled. I prefer to fill in these areas so that everything looks uniform. I do this with the small brush.
I show you the tweaks we made:

And that would be all! Next, I show you the final result, with the layers that I am using.
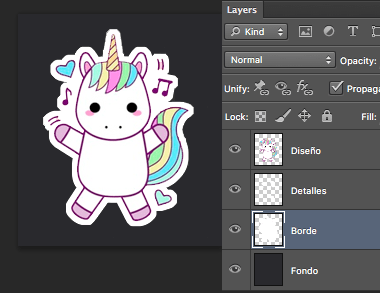
Remember that I have only placed the background so that the white border can be seen, but it is not necessary. This created contour can also be done according to the tutorial to add contour to objects in Photoshop.
You might also be interested …

How to blur in Photoshop: parts and the whole image

How to make a photo collage in Photoshop?
How to change in Photoshop from RGB to CMYK?

How to create a clipping mask in Photoshop?

How to Crop an Image in Photoshop


