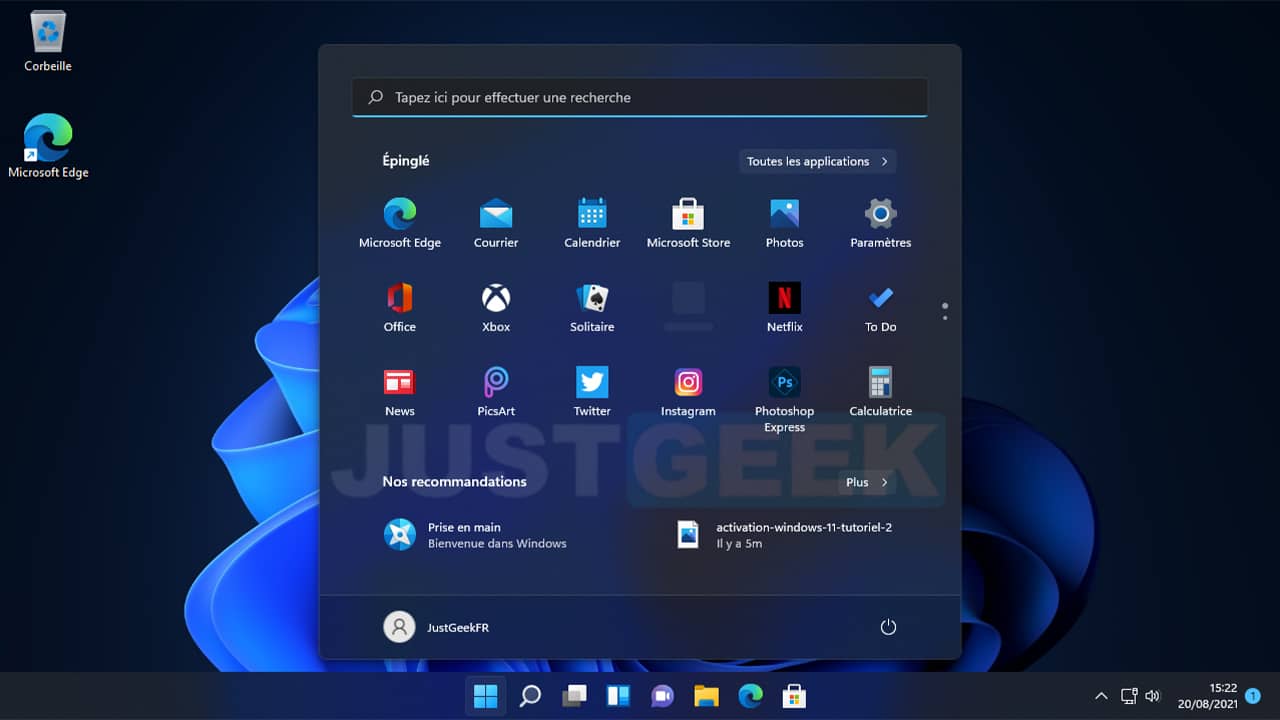
Yesterday, Microsoft has published a new blog post in which he announces the posting of Windows 11 Insider Preview Build 22000.132 ISO images. In other words, you can download and install Windows 11 beta on your computer without going through the Windows Insider program.
In this article, we will see together how download Windows 11 beta ISO image, but also and mostly how to install windows 11 beta on your computer. Let’s go !
Table of Contents
Minimum System Requirements
Above all else, it is imperative to check if your PC is compatible with Windows 11. To do this, I suggest you use the free Checkit program. With just a few clicks, you will know whether or not your PC meets the minimum system requirements to install Windows 11.
- Processor : 1 GHz or more, with at least 2 cores on a compatible 64-bit processor or a system on a chip (SoC)
- RAM : at least 4 GB of RAM
- Storage : 64 GB or more storage device
- System firmware : UEFI-compliant secure boot
- TPM : Trusted Platform Module (TPM) version 2.0
- Graphic card : Compatible with DirectX 12 or later with WDDM 2.0 driver
- Screen : High definition display (720p) with a diagonal greater than 9 ″, 8 bits per color channel
- Internet connection and Microsoft accounts : Windows 11 Home requires Internet connectivity and a Microsoft Account to complete device setup on first use.
Prerequisites
- A PC connected to the Internet (optional depending on the edition chosen)
- A minimum 8 GB USB key
Download Windows 11 beta ISO image
To create an installation USB key, you need to download theWindows 11 Insider Preview ISO (Beta Channel) – Build 22000.132 from our hosting server or from Microsoft’s official website using the method described below.
1. Go to the page Windows Insider Preview Downloads from the Microsoft site.
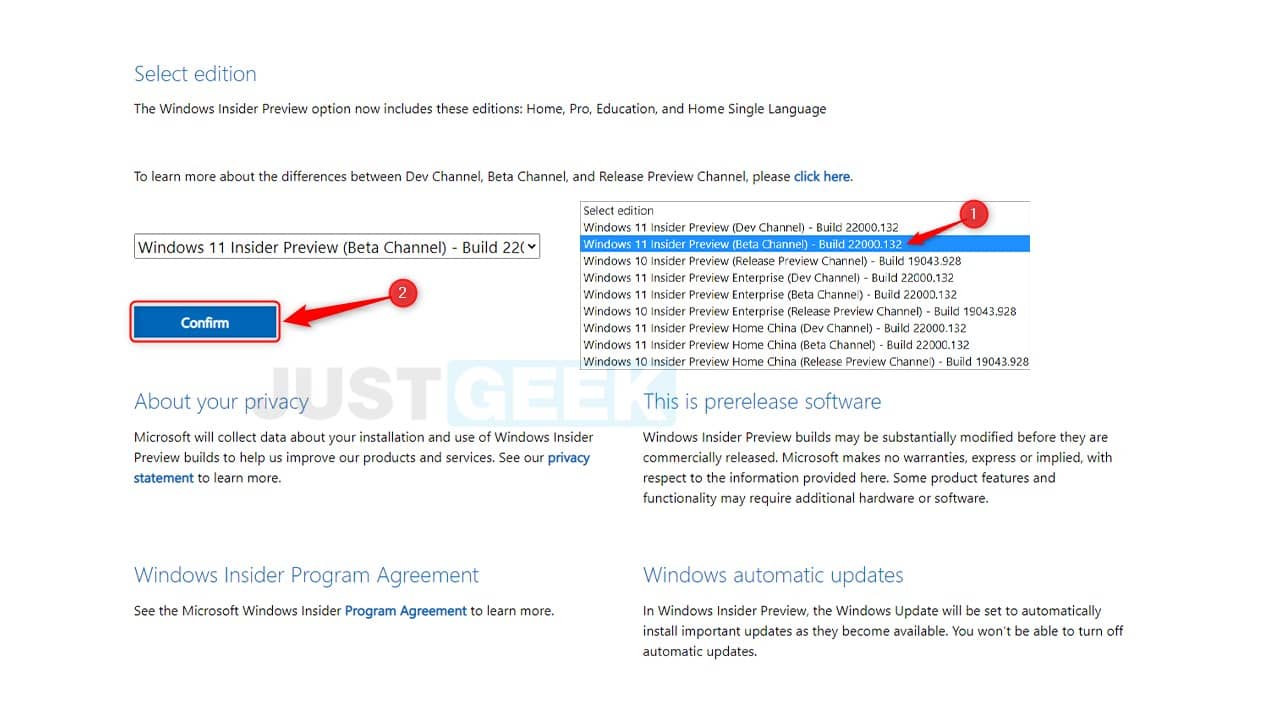
2. At the bottom of the page, select from the drop-down menu ” Windows 11 Insider Preview (Beta Channel) – Build 22000.132 “, Then click on the” Confirm “.
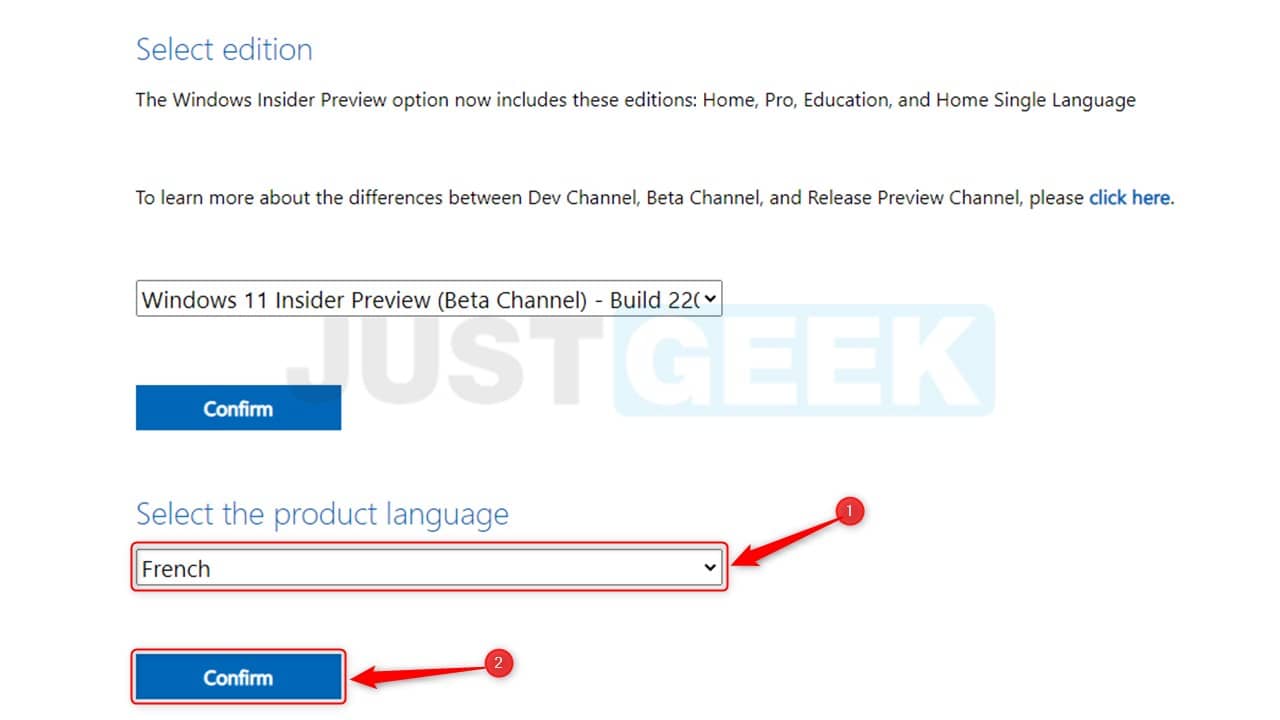
3. Then select the language: ” French “For French and click on” Confirm “.
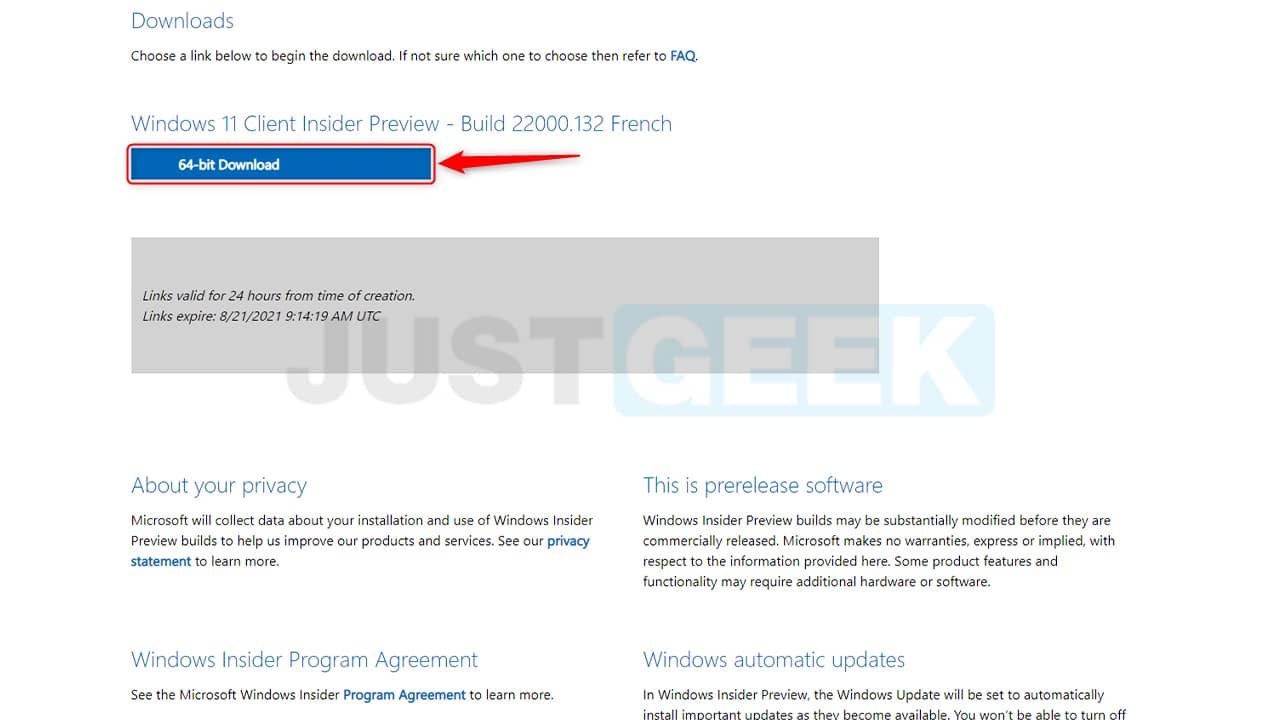
4. Finally, click on the ” 64-bit Download »To download the ISO Windows 11 Insider Preview (Beta Channel) – Build 22000.132.
Create an installation USB key
Once the ISO image is downloaded, you need to create a Windows 11 installation USB key. To do this, I invite you to follow the few steps below:
1. Start with download free software Rufus which allows create the bootable USB stick. Note that you can download the portable version which does not require installation on your computer.
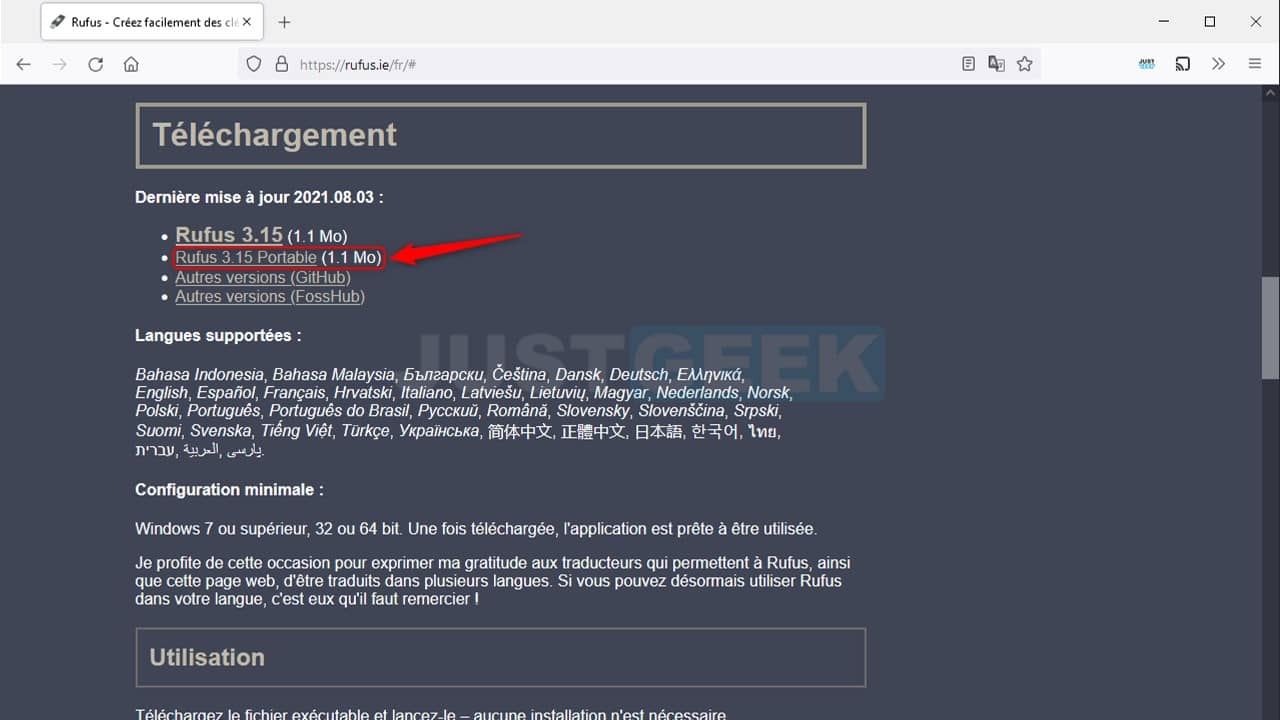
2. Then run the Rufus software and select the following options:
- Peripheral : select your USB key.
- Start type : Disk or ISO image.
- Click on the button ” SELECTION And select the Windows 11 ISO image on your computer.
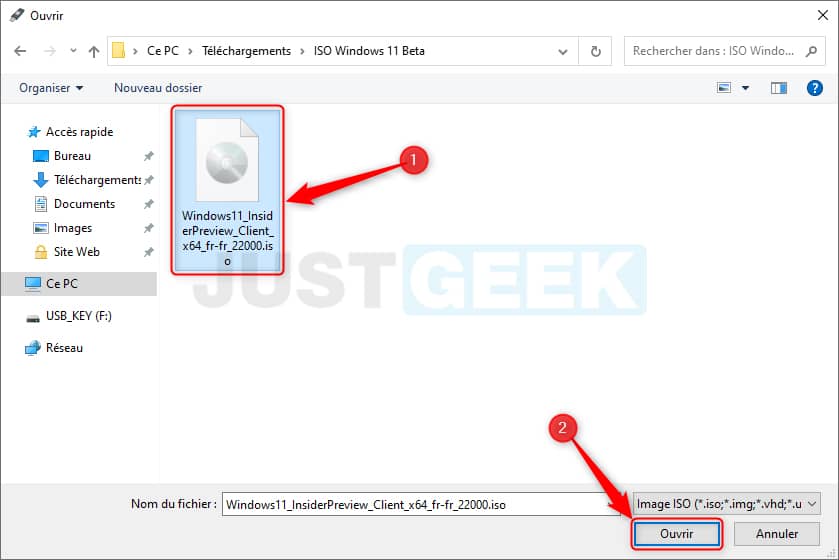
- Partition scheme and Destination system : select the appropriate options according to the firmware (BIOS or UEFI) of your motherboard.
- MBR + BIOS (or UEFI non-CSM) : the USB key will be bootable in BIOS mode only (even on UEFI systems).
- GPT + UEFI (non-CSM) : the USB key will be bootable in UEFI mode only (and not at all bootable on a BIOS system).
- Volume name : name your bootable USB key whatever you want. You can leave the default.
- File system : select ” NTFS “.
- Allocation unit size : leave the default value.
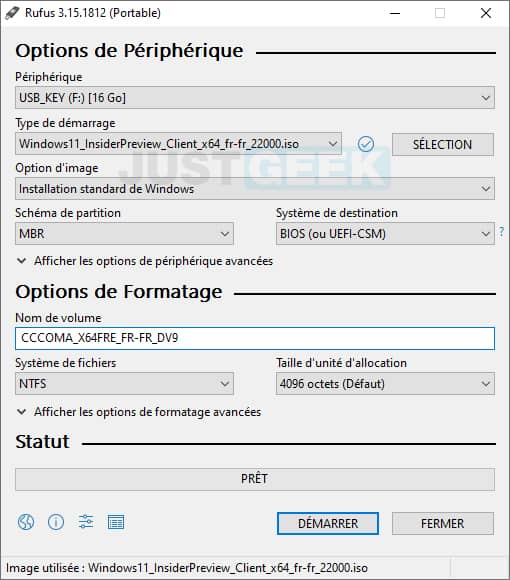
3. Then click on ” TO START UP », Then wait for the Windows 11 Beta bootable USB key creation.
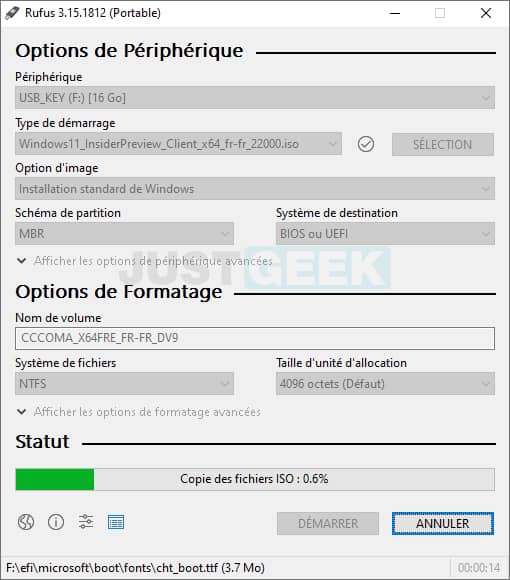
4. As soon as your bootable USB drive containing the Windows 11 installation files is ready, you can close the program and move on.

Start your PC on the installation USB stick
To install Windows 11 on your computer, all you need to do is start your computer from the bootable USB drive you just created. To do this, when starting the PC, press the keys F8, F11 Where F12 (depending on your motherboard model).
Also, if you are unable to open the boot menu, you can change the computer’s boot sequence. To do this, enter the BIOS or UEFI of the motherboard using the key F2, Of the. Where Delete keyboard then, in the Boot Menu (or boot menu), select the USB key so that it is taken into account first in the sequence.
Then proceed to install Windows 11 Beta on your PC.
Install Windows 11 Beta on your computer
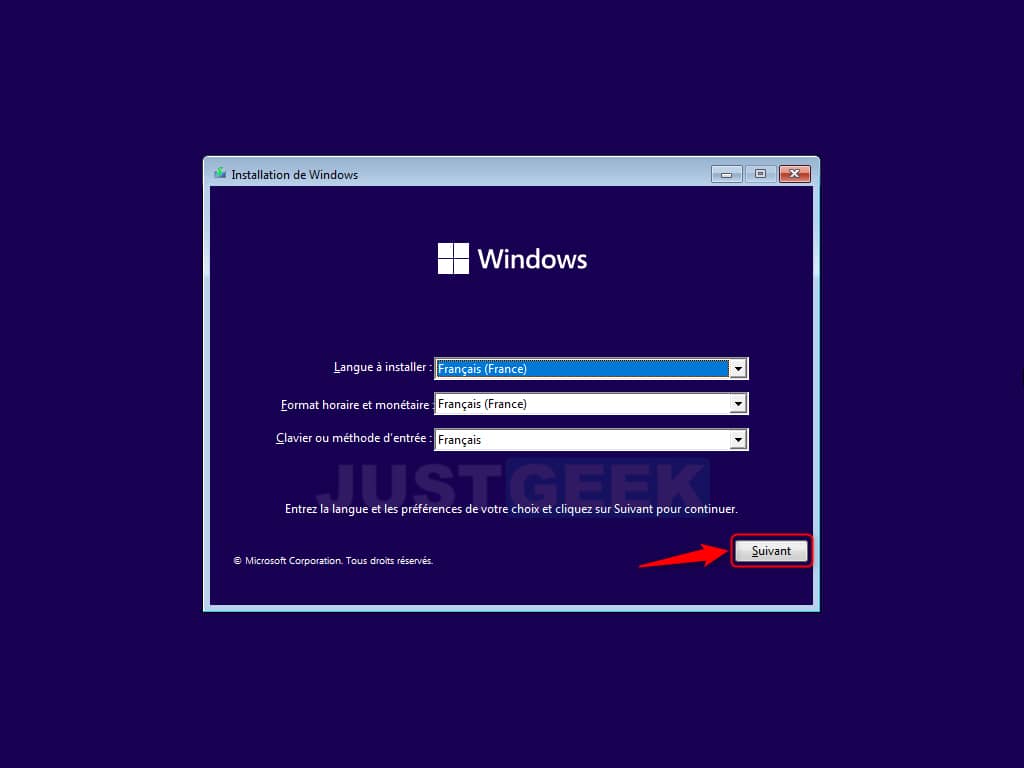
1. Select the language ” French France) “, Then click” Following “.
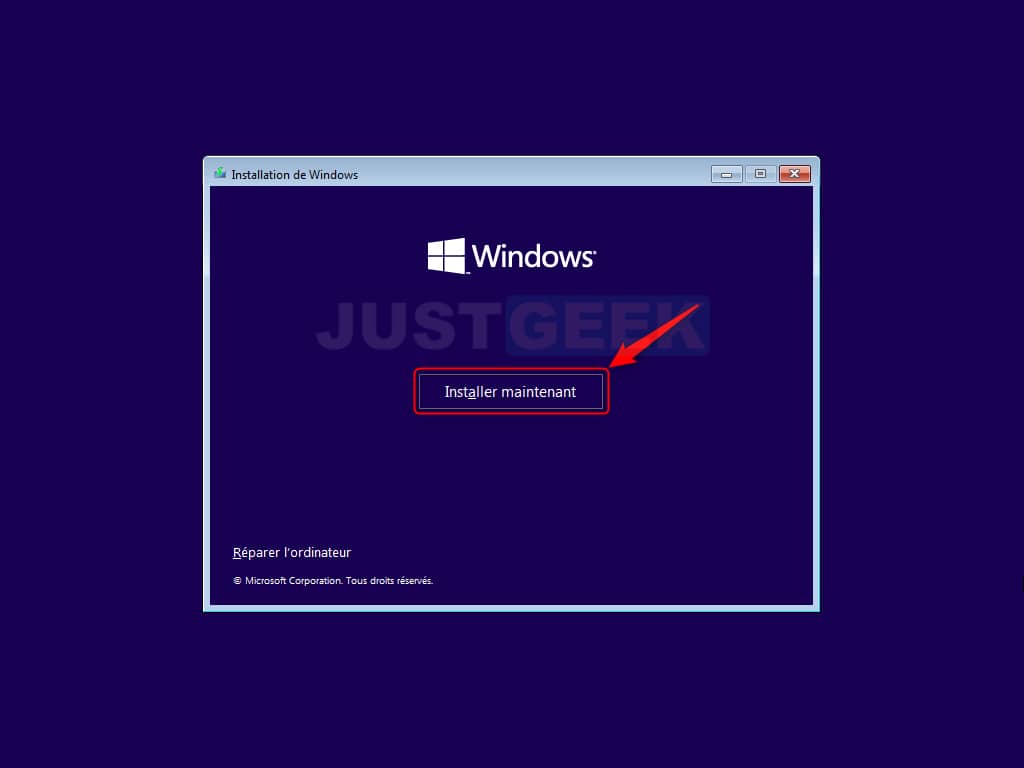
2. Click on ” Install now “.
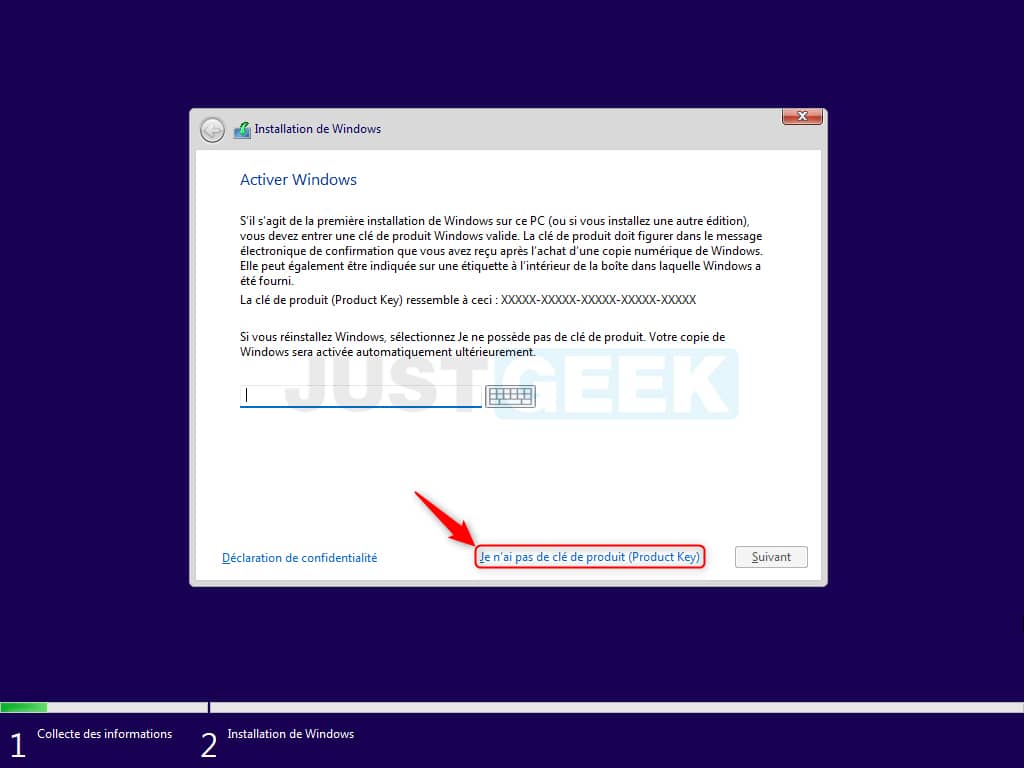
3. Click on ” I don’t have a Product Key “.
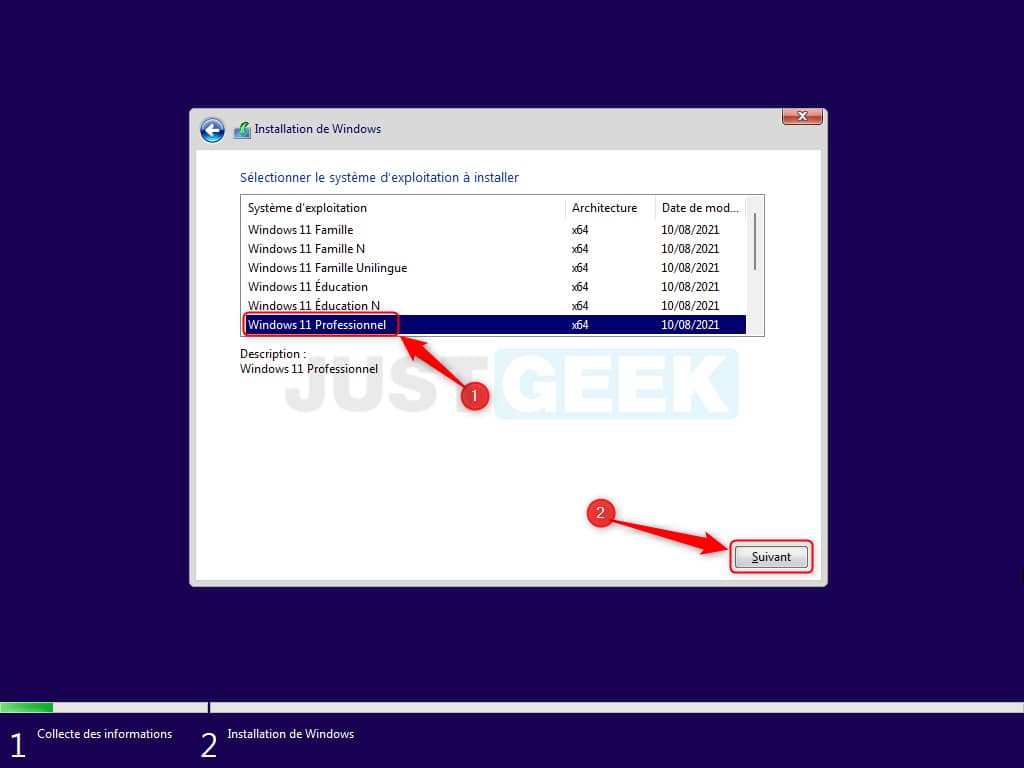
4. Select theWindows 11 edition you want to install, then click ” Following “.
5. Check the box ” I accept the terms of the Microsoft software license agreement “, Then click” Following “.
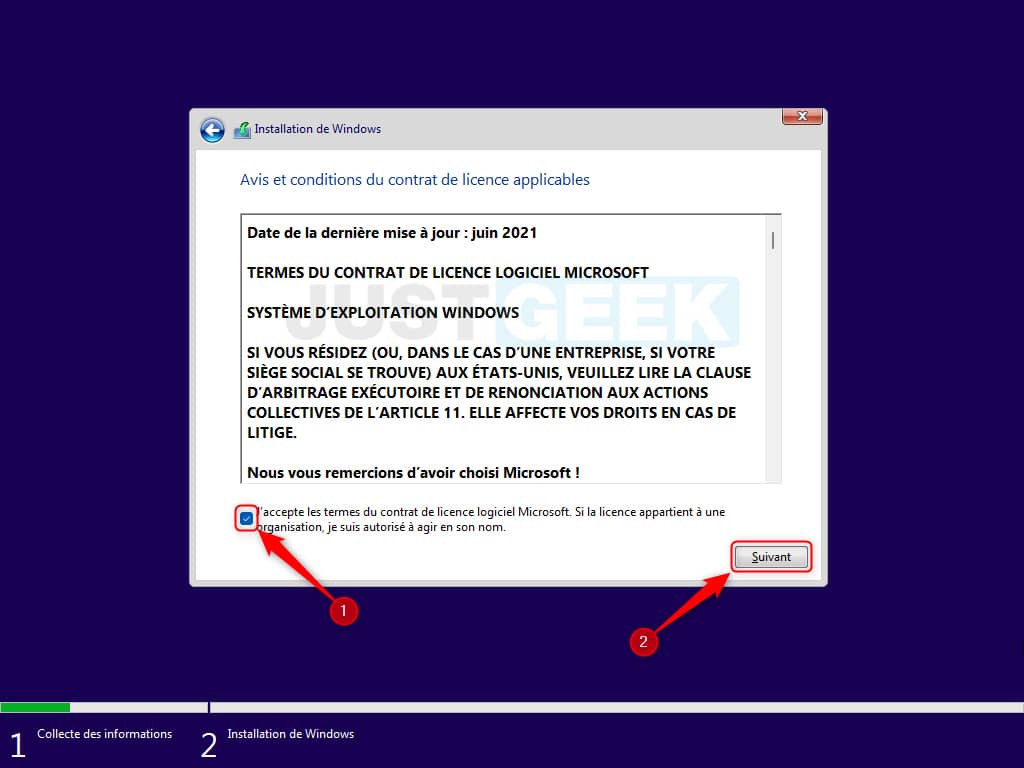
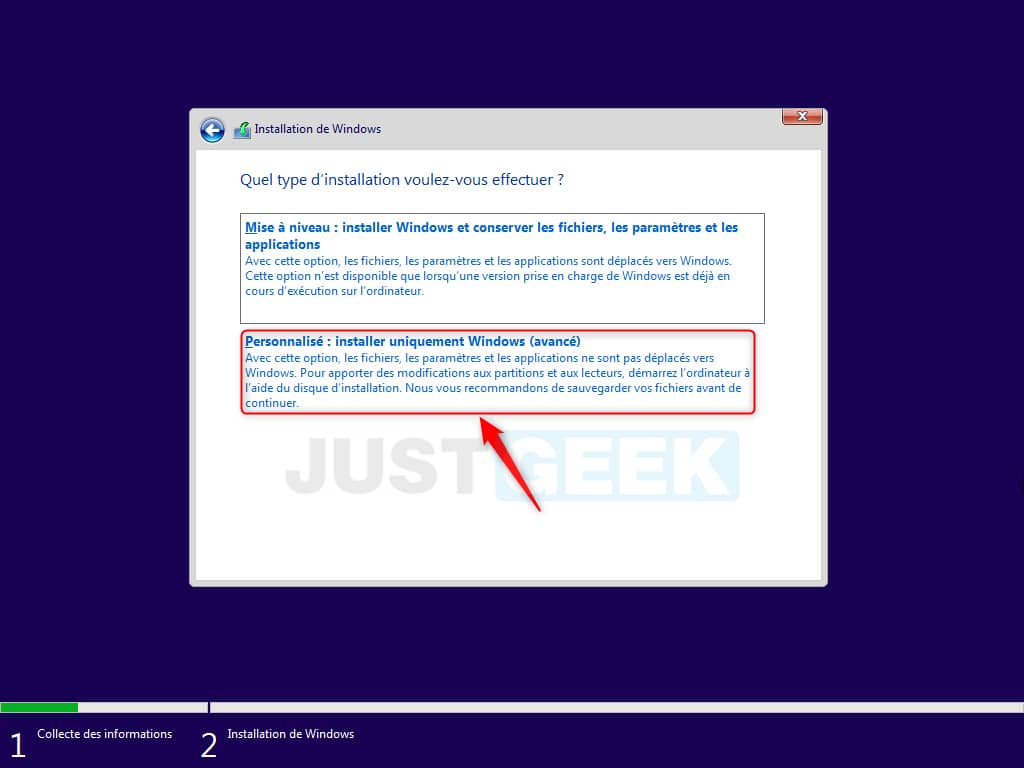
6. If it is a new installation (as in my example), click on ” Custom: Install Windows Only (Advanced) “. On the other hand, if you have already installed Windows 10 and want to migrate to Windows 11 Beta, click on ” Upgrade: Install Windows and Keep Files, Settings, and Apps “. However, note that I do not recommend this option at this time because it is a Beta version and there may be programs that do not yet work with Windows 11. It is therefore preferable to do a clean install on a blank disk.
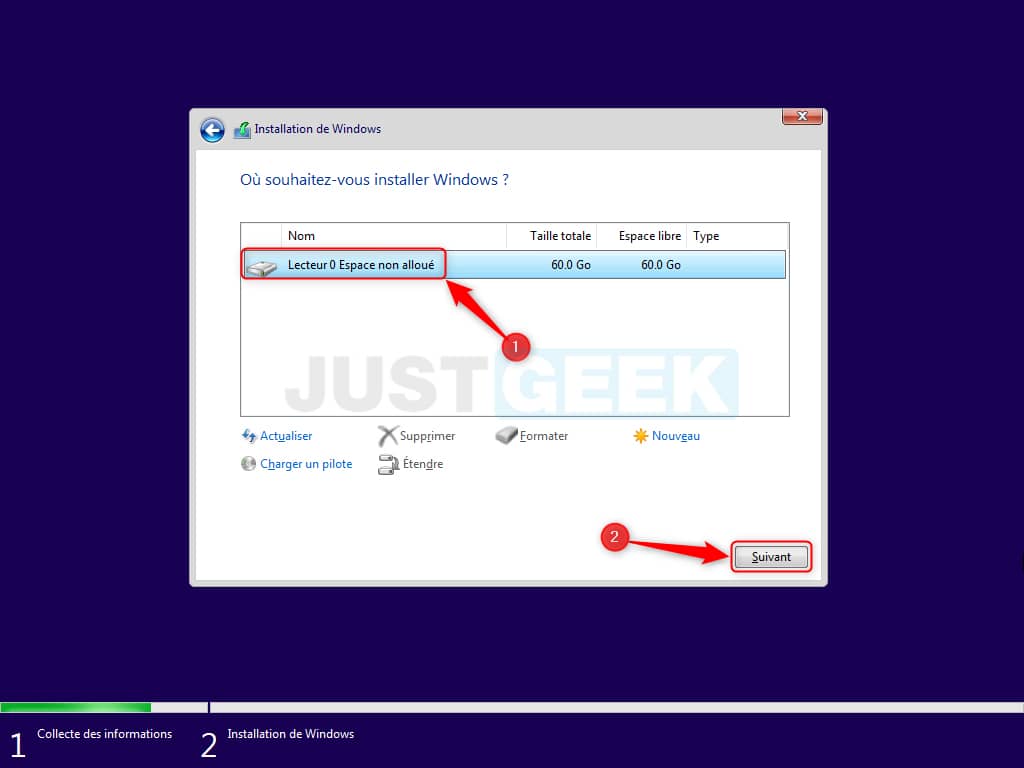
7. In the case of a new installation, select hard drive or SSD on which you want to install Windows 11 Beta, then click ” Following “.
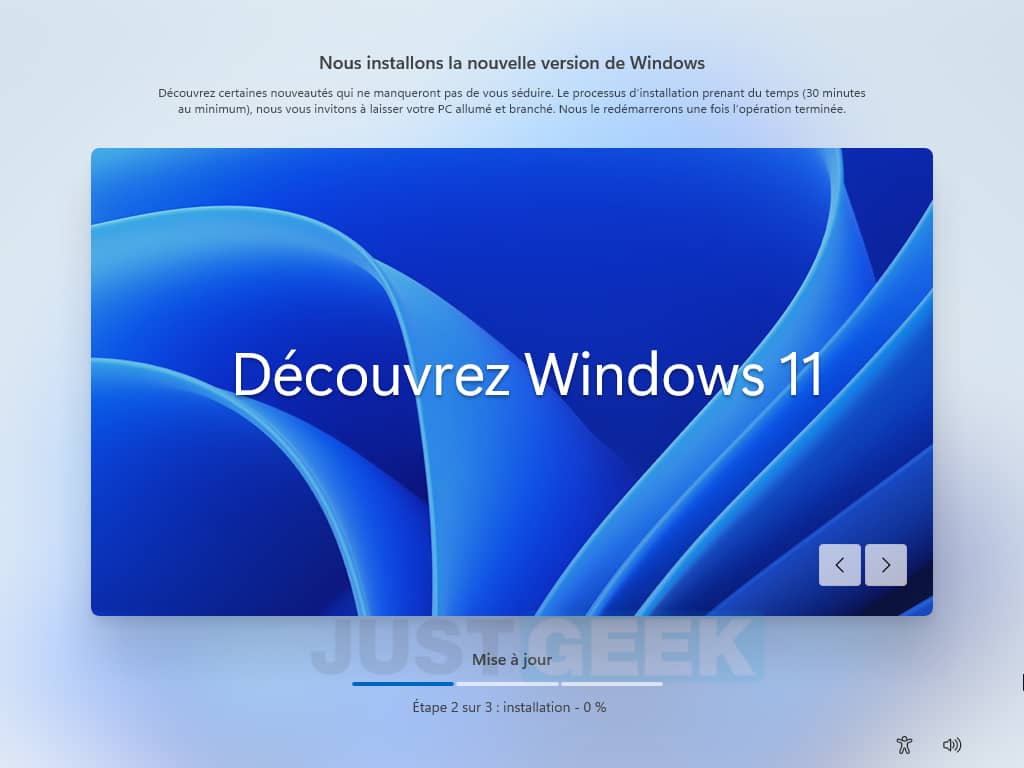
8. And let’s go for theinstalling Windows 11 Beta. Wait until the installation process is complete.
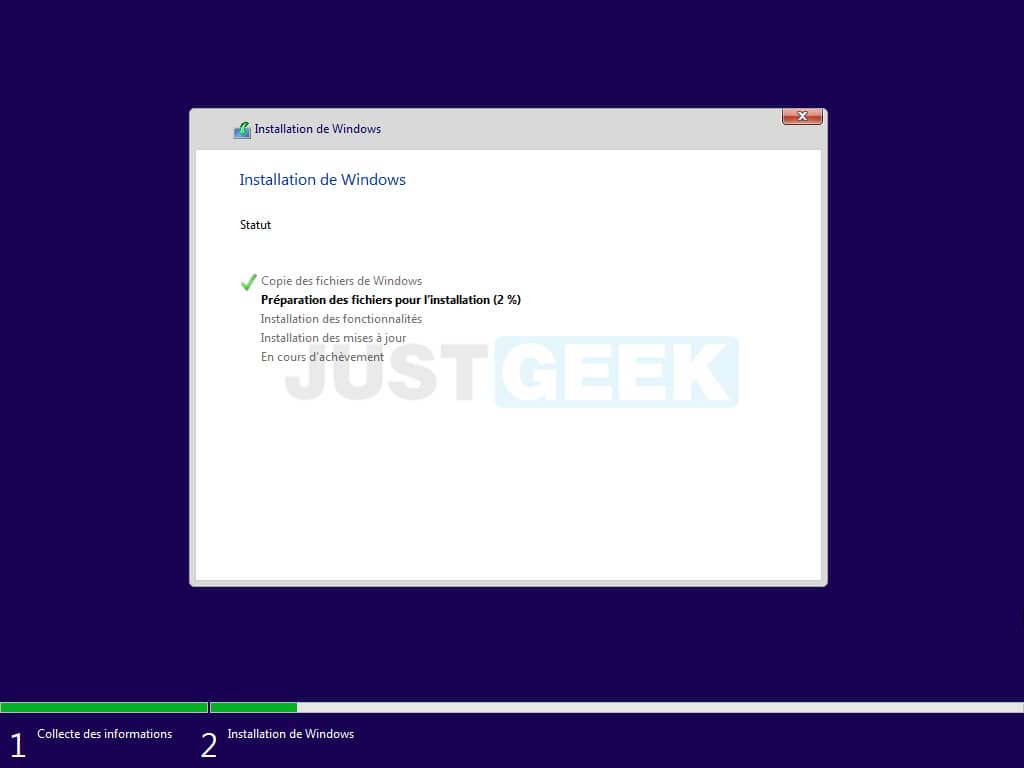
✅ Once the operating system is installed on your computer, you must now go to the long run Windows 11 setup.
Windows 11 Beta setup
In my example, I’ll set up a local account and turn off all telemetry options. Afterwards, you don’t have to do like me. You can set up Windows 11 using your Microsoft account and choose the options you want.
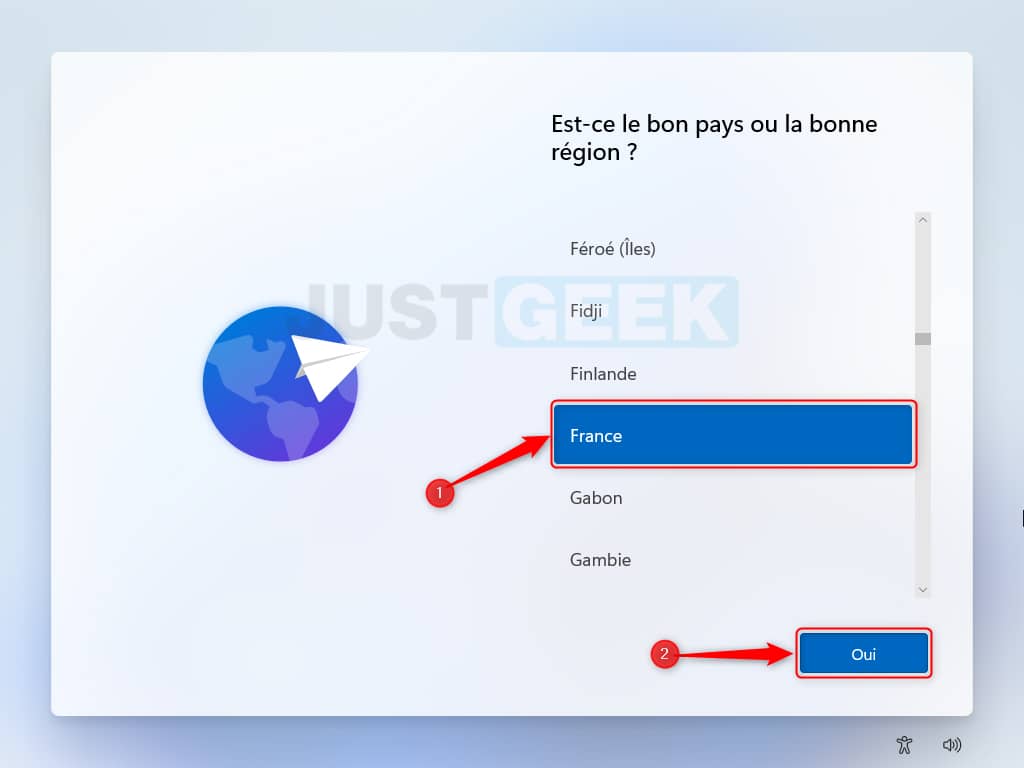
1. Choose your country ” France “, Then click” Yes “.
2. Choose the keyboard layout ” French “, Then click” Yes “.
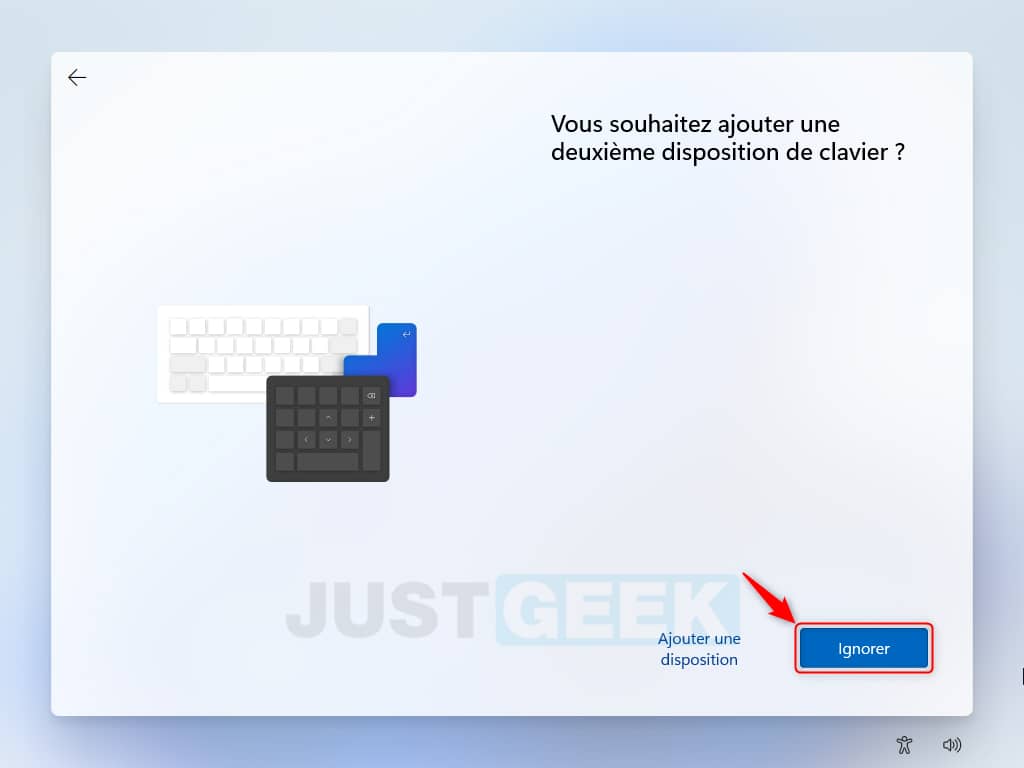
3. You then have the option of adding a second keyboard layout. If you are not interested, click on ” Ignore “.

4. Then wait a few seconds for the system to download the latest updates.

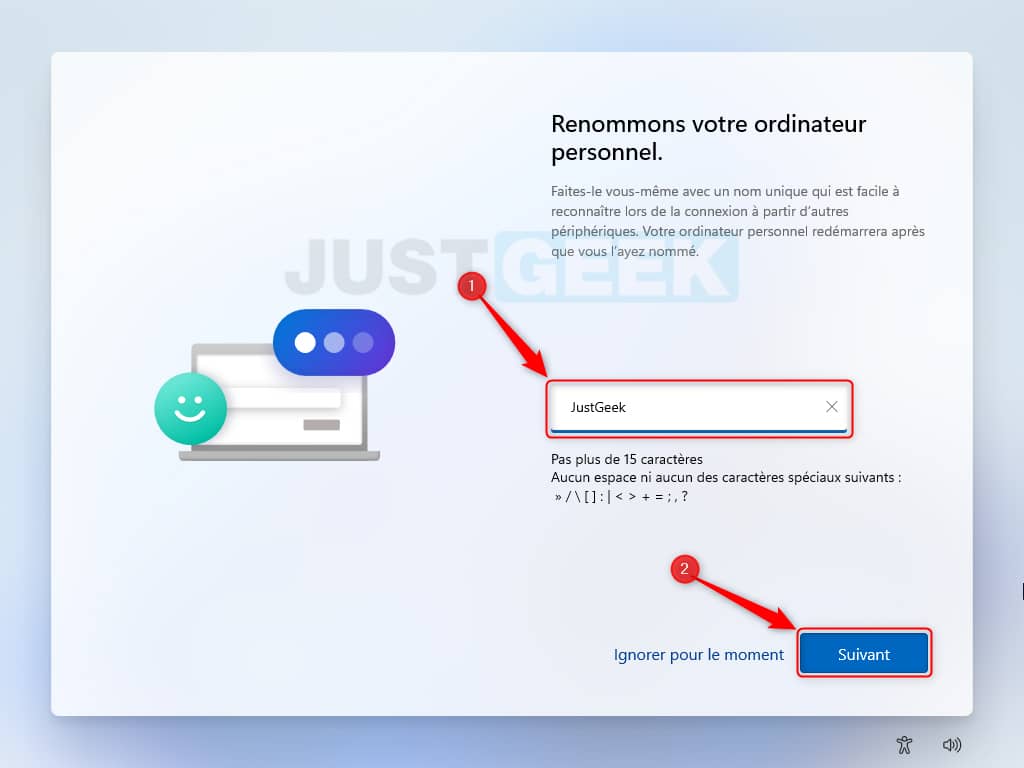
5. Small novelty with Windows 11, you have the possibility to rename your computer directly in the configuration wizard, then click on ” Following “.
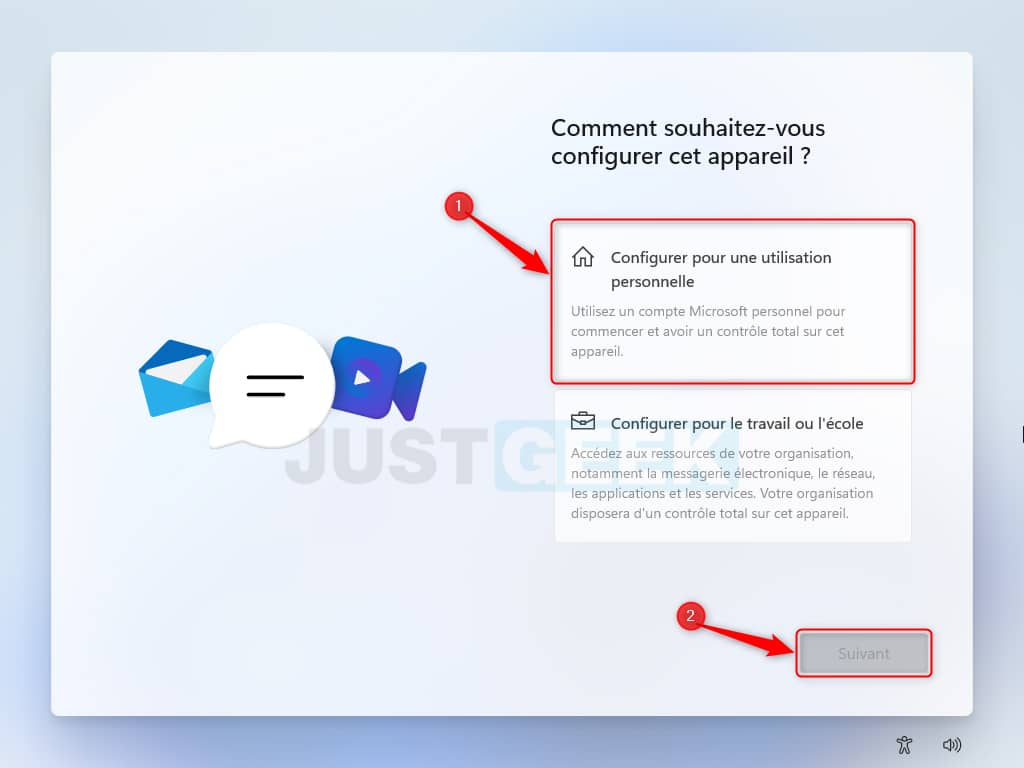
6. Then click on ” Configure for personal use “, Then on” Following “.
7. To create a local account, click on ” Connection options “.
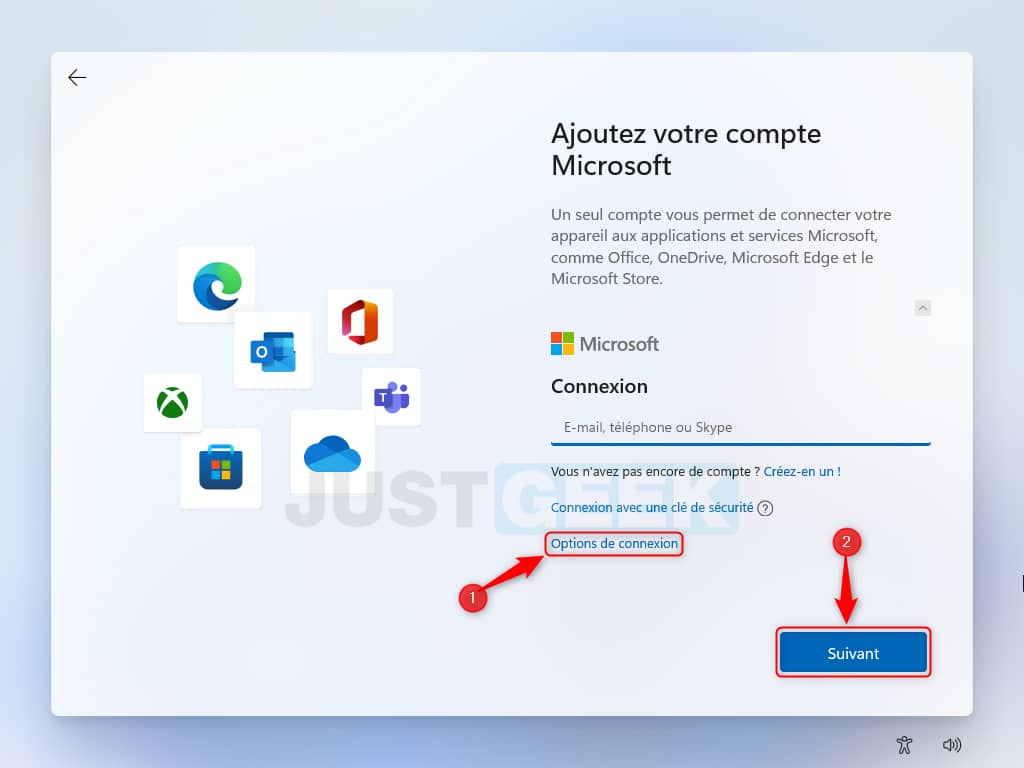
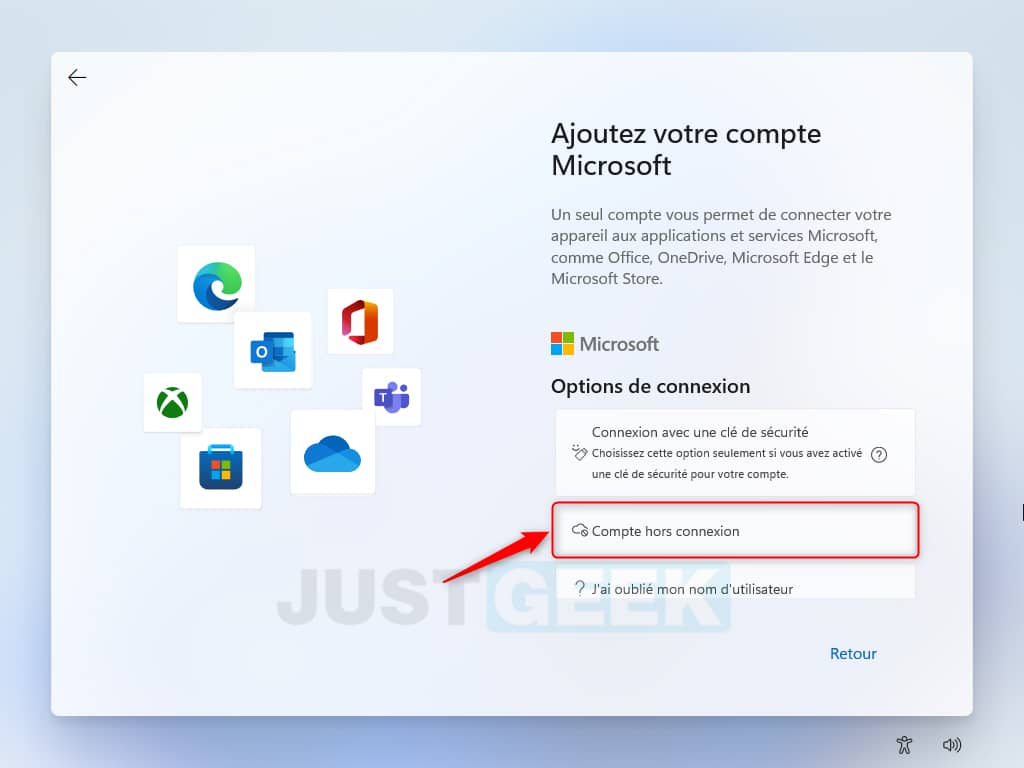
8. Then on ” Offline account “.
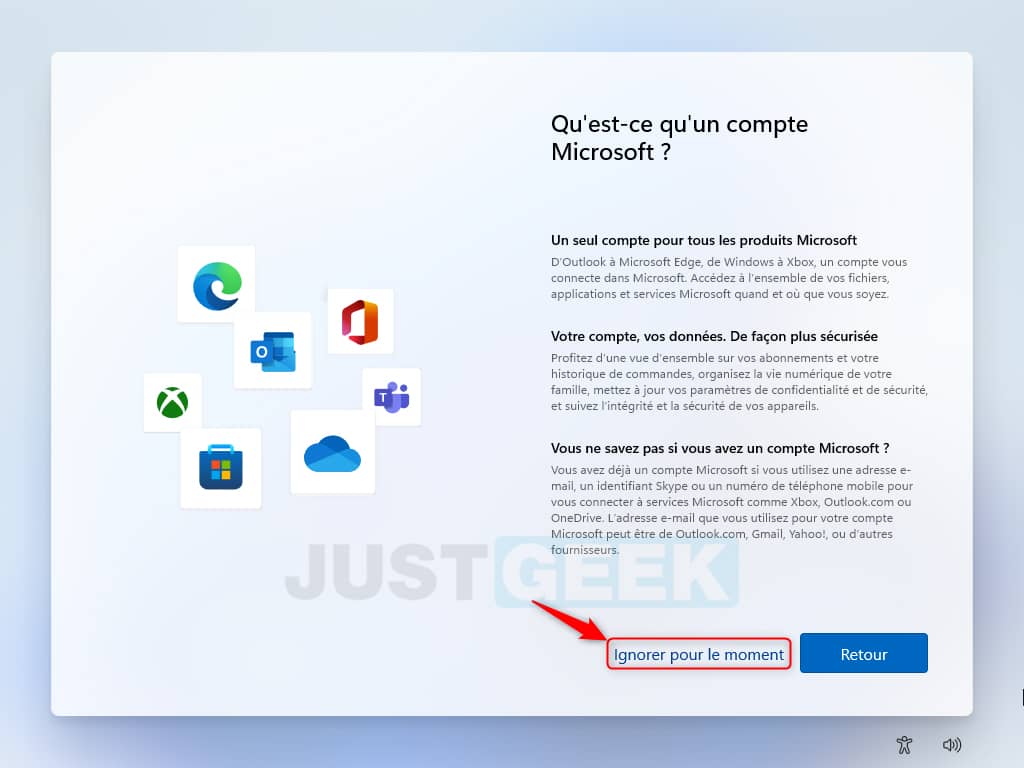
9. Microsoft then prompts you to create a Microsoft account, but you can ignore the message by clicking ” Ignore for now “.
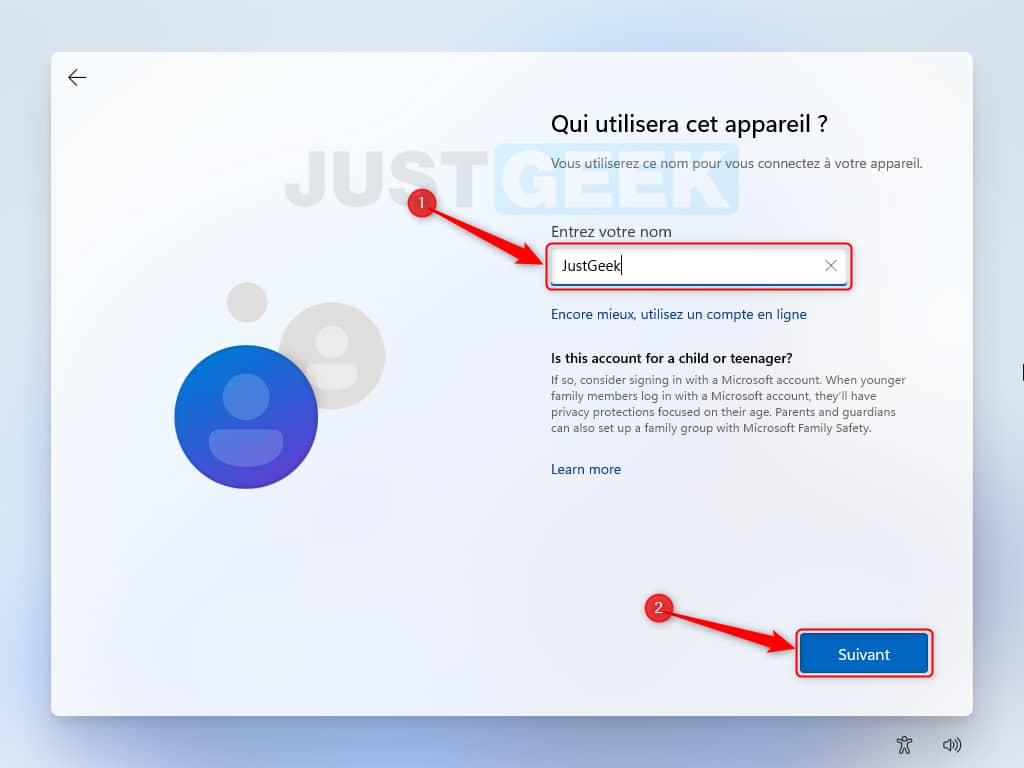
10. Choose a name for your local account, then click ” Following “.
11. Then set a password, then click ” Following “.
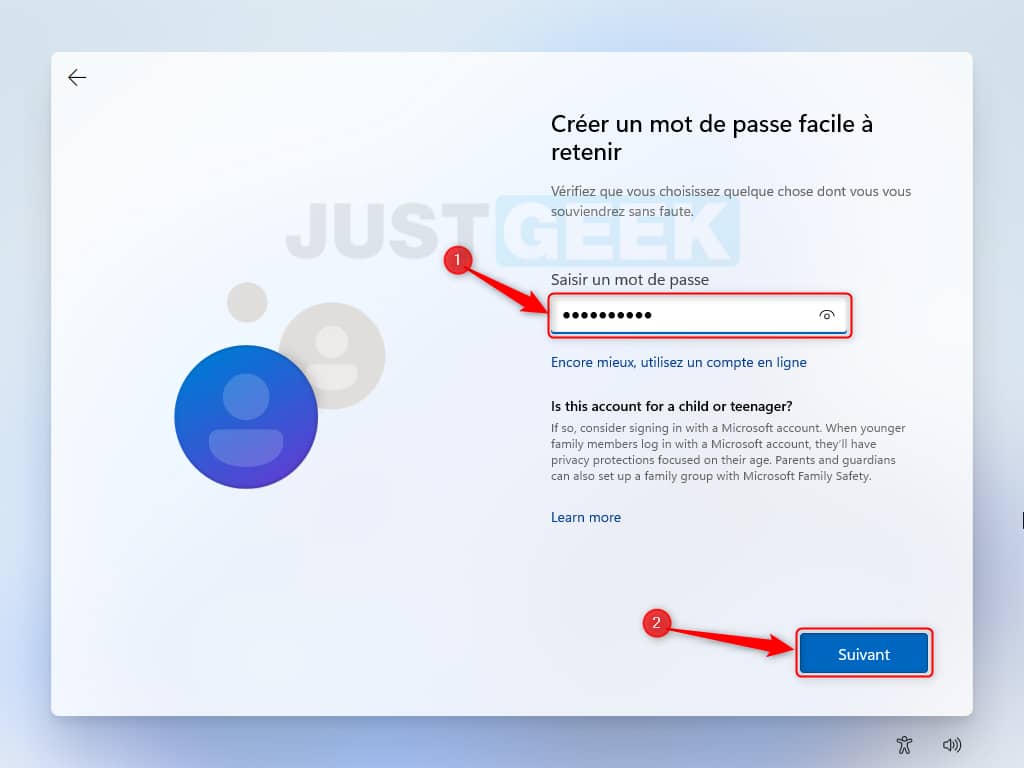
12. Confirm your password … and click on ” Following “.

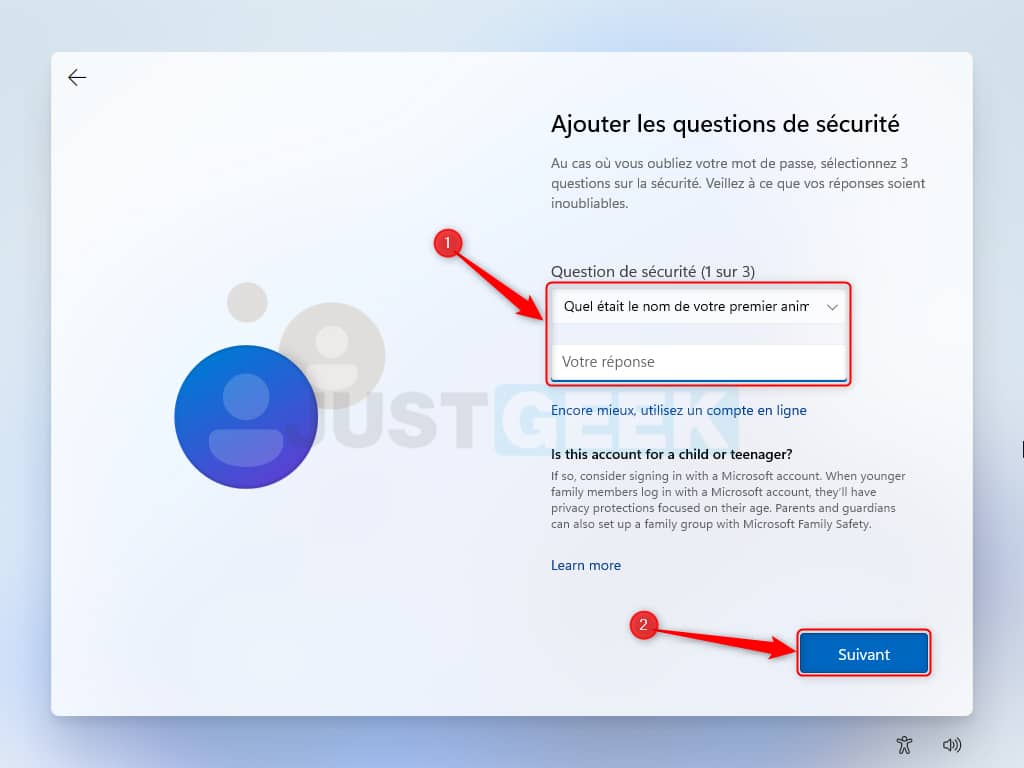
13. Answer the security questions if you forget your password, then click on ” Following “.
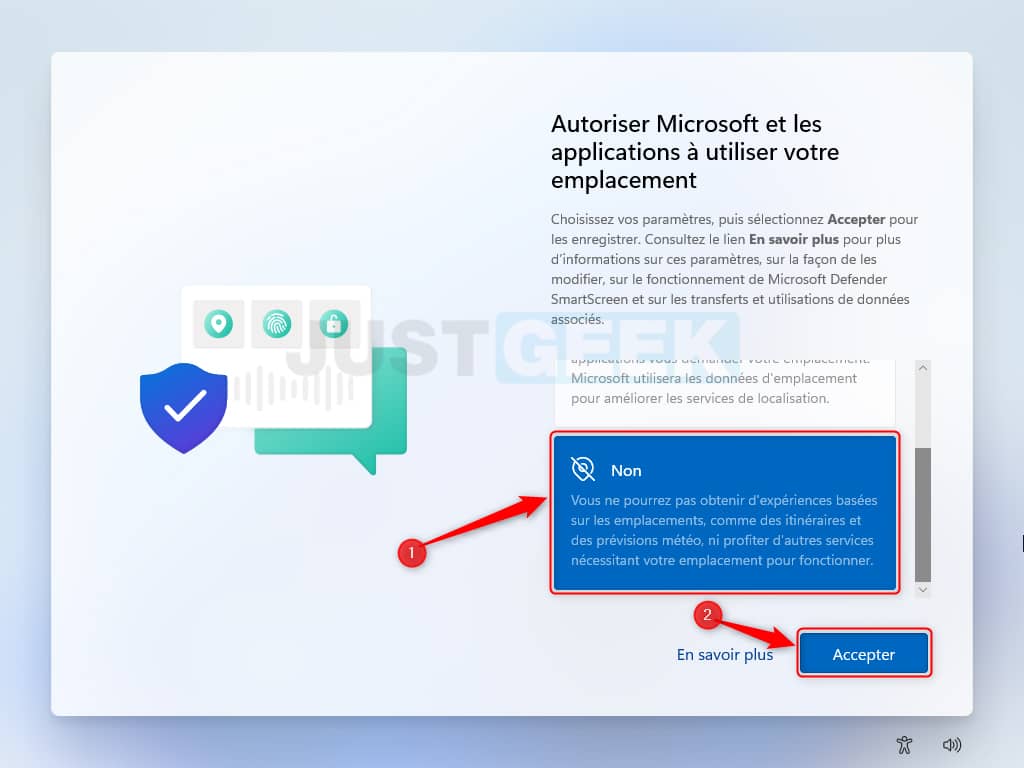
14. And let’s go for the telemetry options. You are first asked if you want to allow Microsoft and applications to use your location, click on ” No “, Then on” Following “.
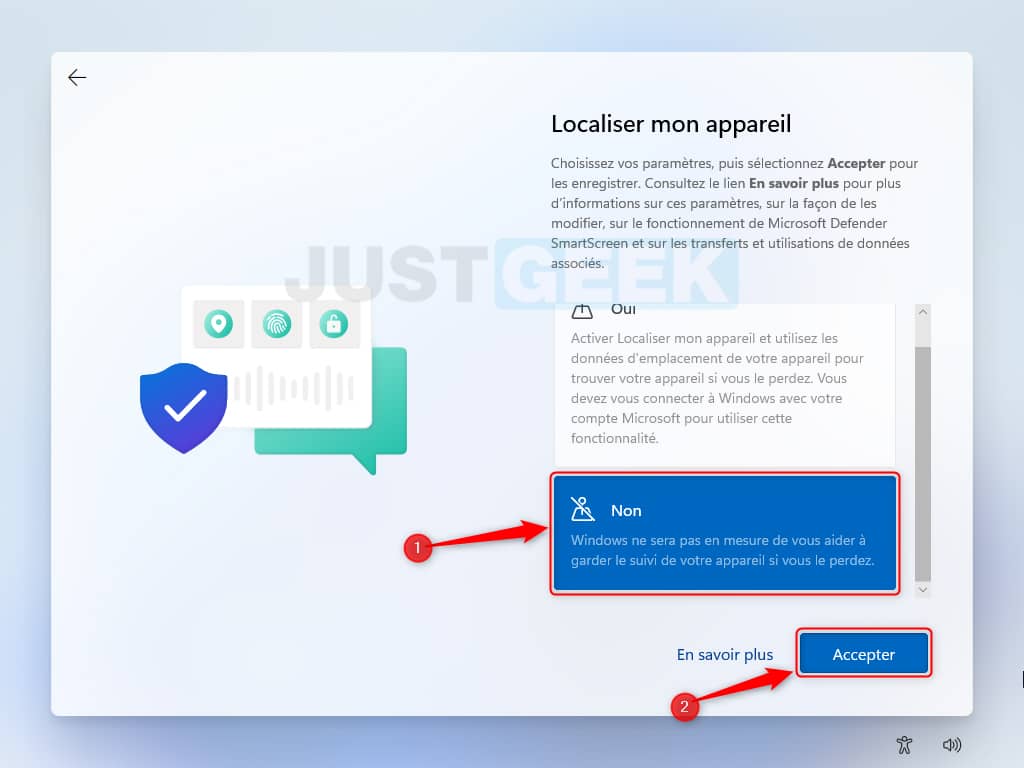
15. Then, if you allow Microsoft to locate your device, click ” No “, Then on” Following “.
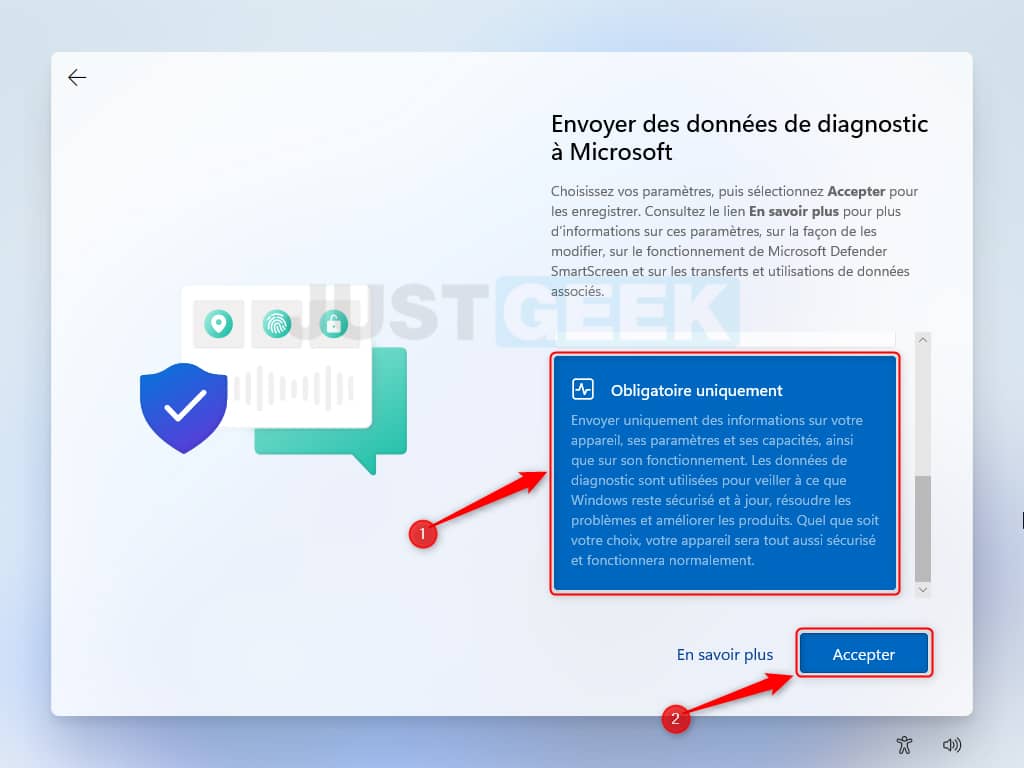
16. Microsoft then asks you if you want to send diagnostic data to its servers, click ” Mandatory only “, Then on” Accept “.
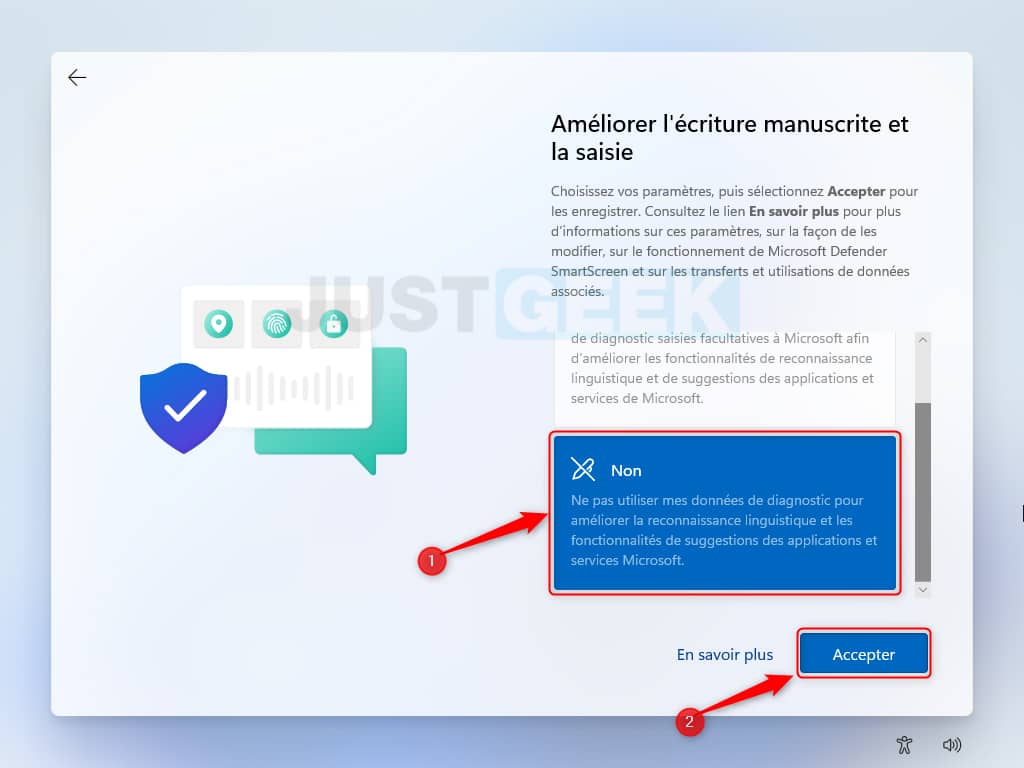
17. Microsoft then wants to know if you want it to record everything you type into the system to improve language recognition and suggestion features. Answer ” No “, Then click” Accept “🤔.
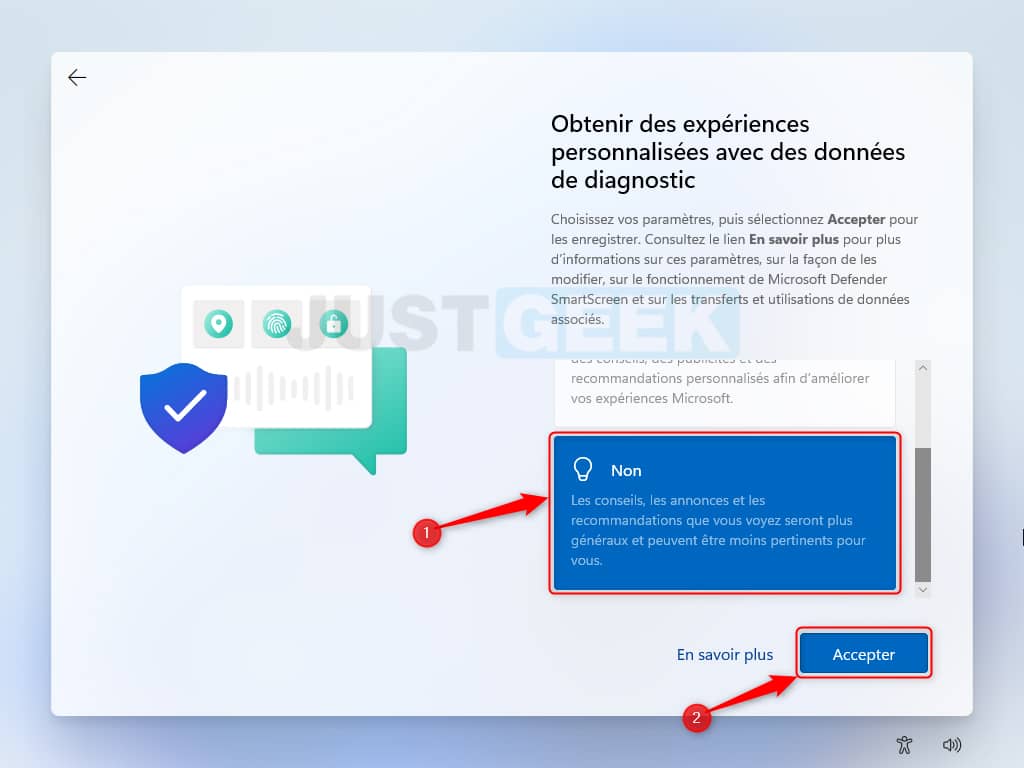
18. Under ” Get personalized experiences with diagnostic data “, click on ” No “, Then on” Accept “.
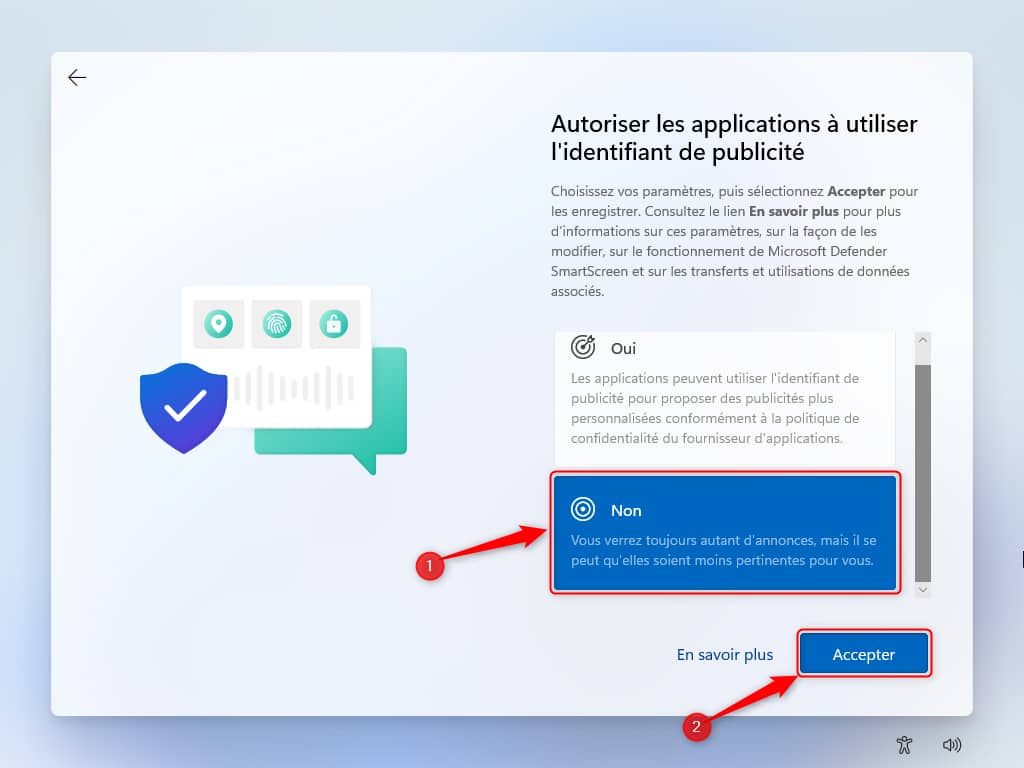
19. Finally, you are asked if you want to allow applications to use the advertising identifier, click on ” No “, Then on” Accept “.
20. Then wait a few moments while the setup wizard finalizes the Windows 11 setup.
21. ✅ And you are finally on Windows 11 Beta! Yeh!
