Sometimes, accessing certain websites is particularly slow or even impossible. To remedy this, a few modifications of the network settings used by default on your PC are sufficient. You can in particular change DNS on your Windows 11 PC to make your faster and safer navigation. In this article we will see together what is a DNS for and how change DNS on Windows 11. Follow the guide !
Table of Contents
What is DNS?
the domain name system (Where DNS for Domain Name System) is an essential part of the web. Without DNS, no internet. Its servers, spread around the world, play the role of directories. When you type the address of a website into your web browser, the request is sent to a DNS (Domain Name System) server which in return provides the IP of the server that hosts the page you are looking for. This is to say if they are essential.
By default, you use those chosen by your Internet Service Provider (ISP), which are not necessarily the fastest. Indeed, as many Internet users use the DNS of their ISP, you may notice slowdowns during peak hours. In addition, some websites may be inaccessible due to voluntary DNS blocking by your ISP. This is particularly the case for illegal download sites which are generally blocked by ISPs.
To remedy these various problems, you can change DNS on your Windows 11 PC. To do this, I invite you to follow the few steps below.
Change DNS on your Windows 11 PC
As a first step, I suggest you download the DNS Jumper tool to find the best DNS server for your location. After you identify the fastest DNS, you need to change the network configuration on your computer. Here is how to do it.
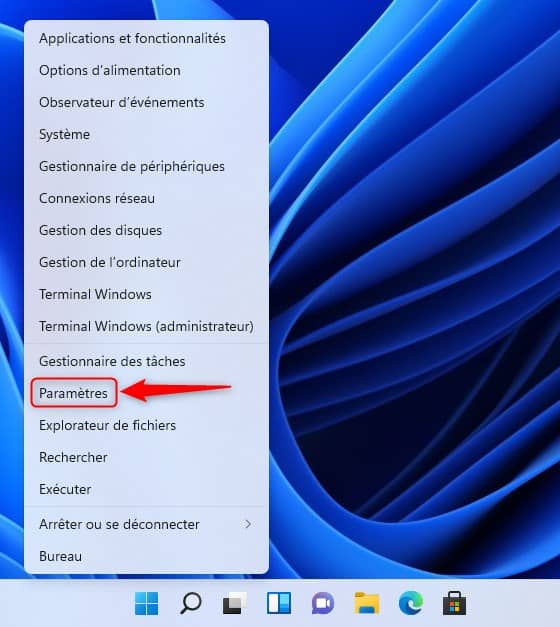
1. Go to the settings of Windows 11. To do this, right-click on the Start menu, then click on ” Settings In the context menu. You can also use the keyboard shortcut Windows + I to access the “Settings” application.

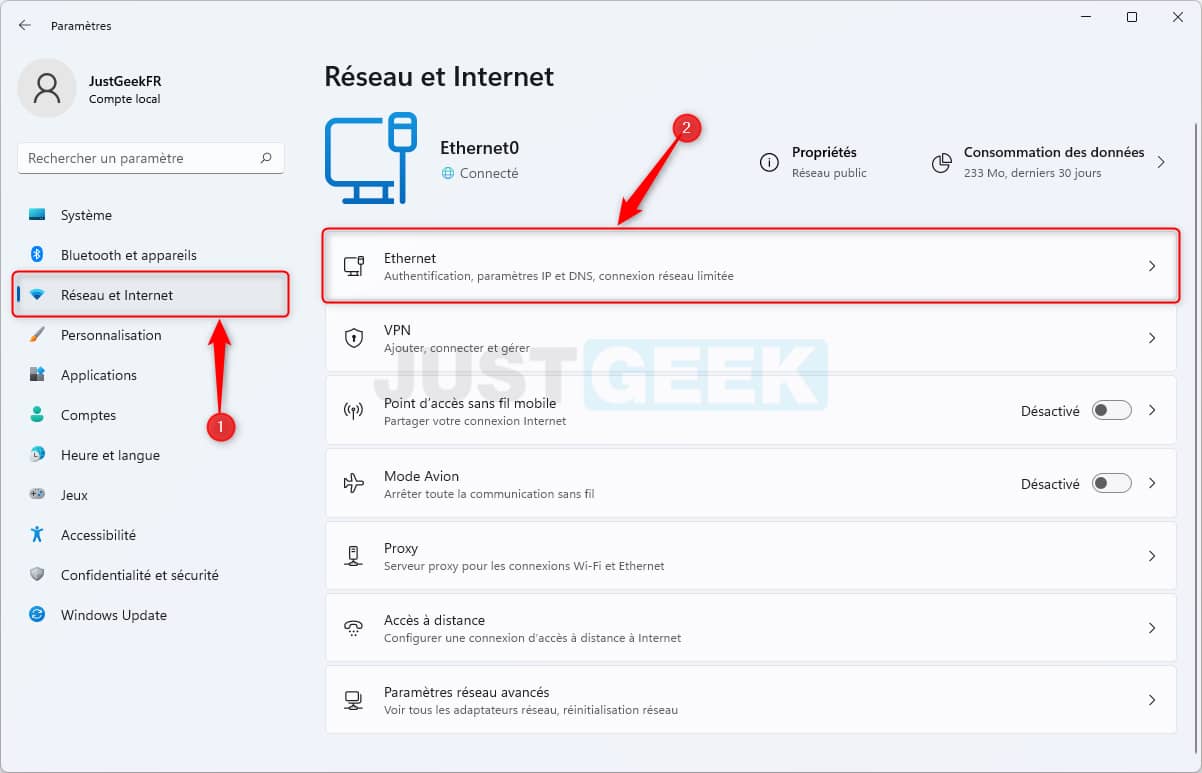
2. In the left pane, click on Network and Internet, then in the right part, click on ” Ethernet ” Where ” Wireless »Following how your computer is connected to the Internet.

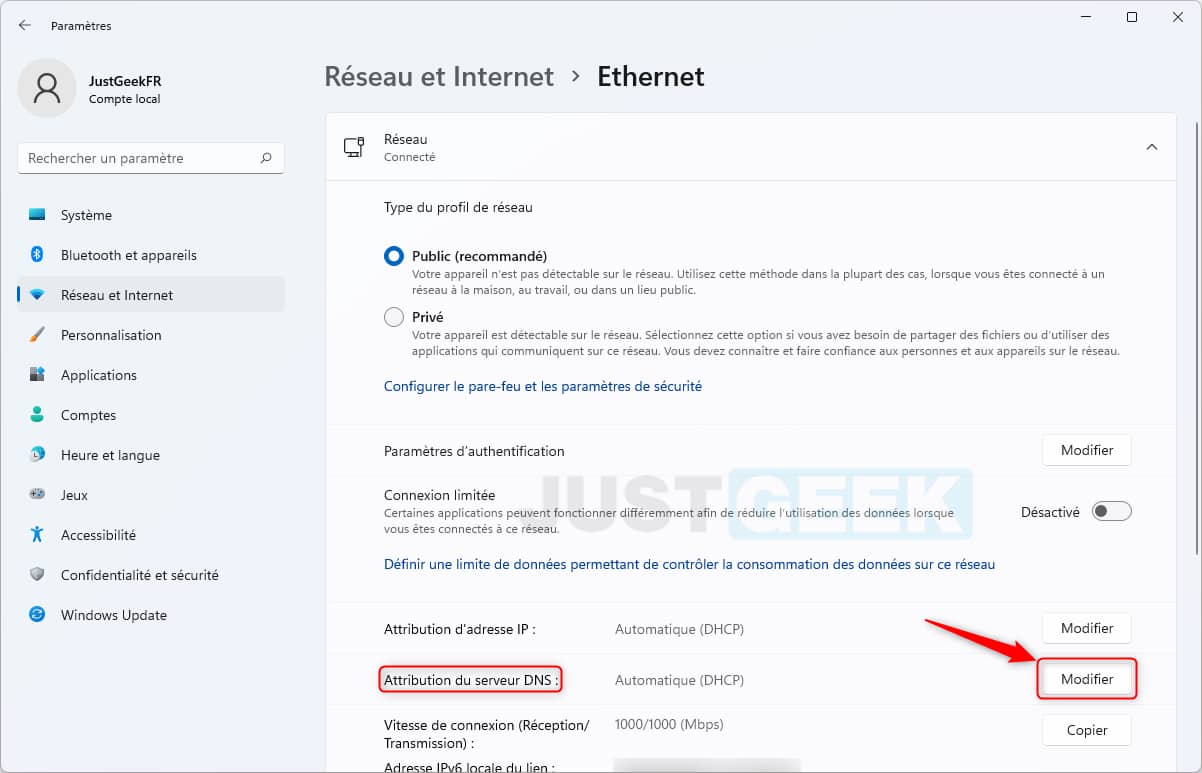
3. Beside ” DNS server assignment “, Click on the button ” To modify “.

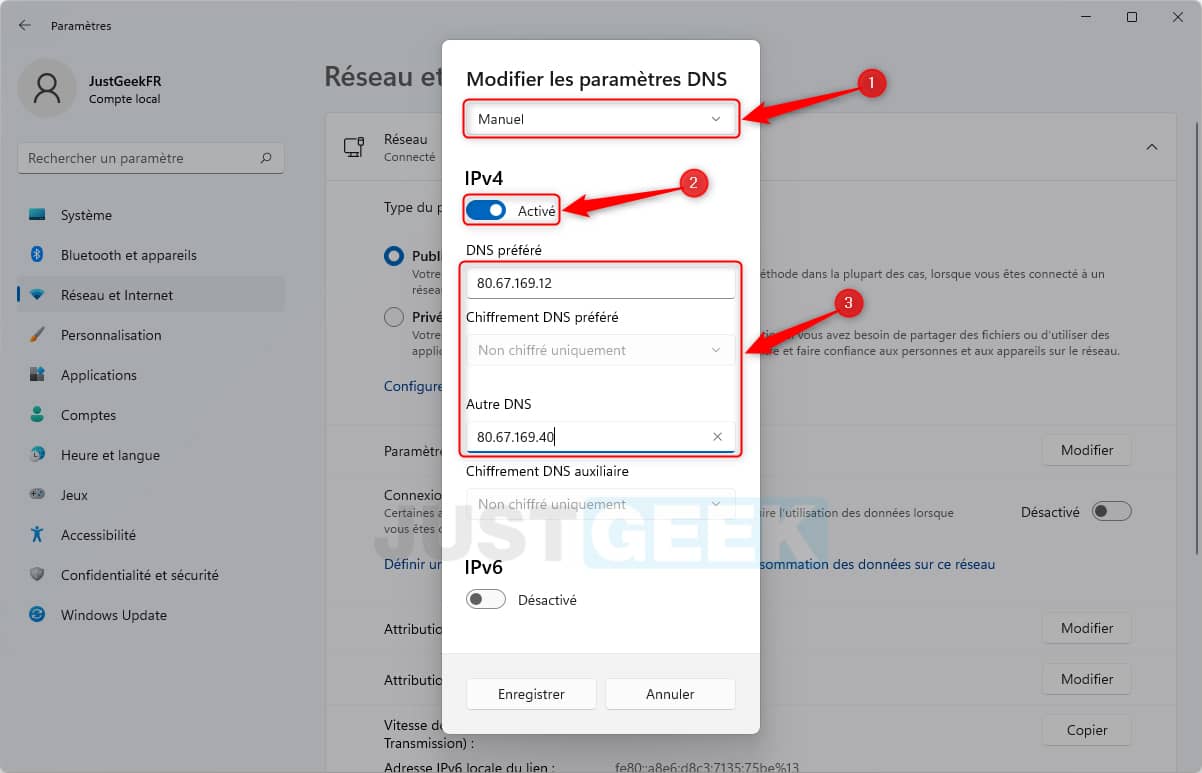
4. From the drop-down menu, select ” Manual “. Then activate the switch ” IPv4 ” Where ” IPv6 »According to the protocol used by your box. If in doubt, you can check if you have IPv4 or IPv6 connectivity to this address.
Finally, enter the new DNS under ” Preferred DNS ” and ” Other DNS “, Without forgetting to save the modifications by clicking on” Save “. For my part, I use those of the FDN for their speed and their respect for privacy. Now it’s up to you 😉 You can also read my article on the fastest and most secure DNS servers.

✅ There you have it, you have just changed the DNS on your Windows 11 PC. If after several hours of browsing, you notice that the browsing is slower than before, try to change DNS again or go back to the default values.


