home
>
Blog
>
Design
>
Create incredible pieces in Photoshop with the Iso-painting technique!
Create amazing pieces …
Good! Graphic design brings with it innumerable techniques that allow us to obtain truly incredible results. One of these techniques is Iso-painting.
Through the isometric perspective, the Iso-painting technique in Photoshop will become your best ally for give a different and unique touch to your graphic pieces. Don’t you want to have an incredible project in your portfolio? And speaking of portfolios, learn how to create them with these incredible pages.
In this article we will show you how the main Photoshop tools will allow us to create incredible pieces using the Iso-painting technique. Are you ready to take your skills to the next level? Join us!
Index:
- What is the isometric perspective?
- What is the Iso-painting technique in Photoshop?
- What Photoshop tools are needed for Iso-painting?
- How to create an isometric plane in Photoshop?
- In which projects can I apply Iso-painting?
To understand the Iso-painting technique in Photoshop, the first thing to do is understand the concepts, which will serve as a starting point for the execution.
Etymologically, the word “isometry” comes from the Greek “isos” (equal) and “metron” (measure), so it is defined as “equal measure”. With this preamble, we can now enter a technical definition.
Isometric perspective is the visual representation of a three-dimensional object in two dimensions, in which when projected the three main orthogonal axes form 120 ° angles.
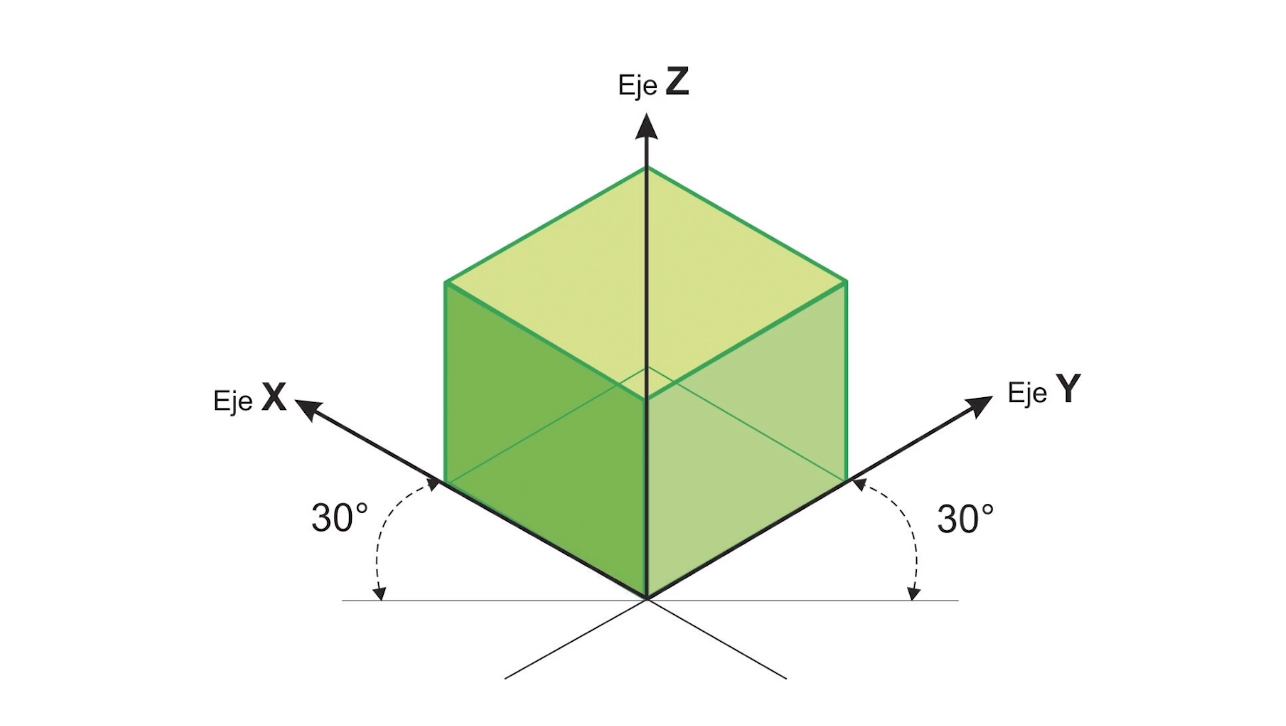
Image: Crehana
Rubén Valle, teacher of our online course Discover Iso-painting in Photoshop and create authentic pieces, helped us to define the isometric perspective in a more friendly way.
“Thanks to the isometric perspective, the elements, we place them where we place them, will have the same measure, which will help the artist to combine objects or move them. If we apply another perspective, the objects would have to be resized and made more Steps”.
Now that we understand what the isometric perspective consists of, it’s time to talk about the Iso-painting technique in Photoshop.
Learn to do magic in your designs with these online digital retouching courses!
Wait! Before talking about Iso-painting in Photoshop it is necessary to remember another technique of which you have surely heard: the matte painting. Sergio Pastor, professor of our course on Photomontage and Retouching Matte Painting helps us define it.
“Matte painting is a technique that is part of the special effects. It is used in film and television to digitally recreate very expensive scenarios or in which it would be impossible to shoot.”
Surely you are wondering why we mention matte painting and here comes the answer: the Iso-painting technique in Photoshop is the union between isometric perspective and matte painting. As simple as that.
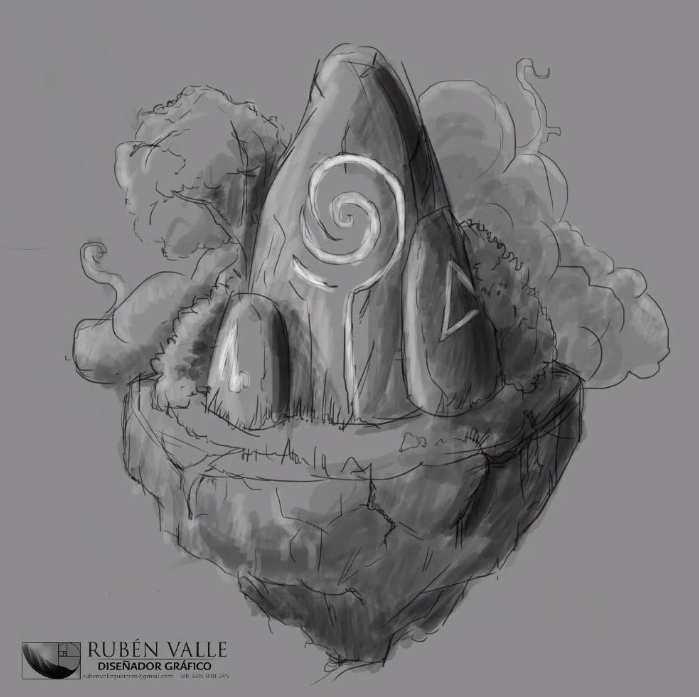
Image: Rubén Valle / Discover Iso-painting in Photoshop and create authentic pieces
Now to start applying this Photoshop technique it is necessary to have previous experience. If you are just starting out in this program, before continuing reading we will tell you everything you can do with Photoshop.
Of course, it must be borne in mind that to apply the Iso-painting technique in Photoshop your creativity will be of the utmost importance so that the result is incredible. Our teacher Rubén explains it to us better.
“I always say that 50 percent is the use of the tool and the other half is the creative side. It is useless to be very good at imagining if you cannot create it later and vice versa.”
You already know that Photoshop tools are many, but to apply the Iso-painting technique we will only need a few. We tell you!
As we discussed above, Photoshop is characterized by having innumerable tools for creating and editing our graphics. Therefore, before continuing, we invite you to know the most useful tools in Photoshop.
To start applying the Iso-painting technique in Photoshop we will not use all the tools, but only some that we will mention below.
-Filters: Photoshop tool that allows you to clean or retouch your images, as well as apply special effects.
-Selection: With this tool you can select some regions of the active layer to work on them without affecting the selected area.
-Trim: As its name implies, it is a useful Photoshop tool that will allow us to apply cutouts in our projects.
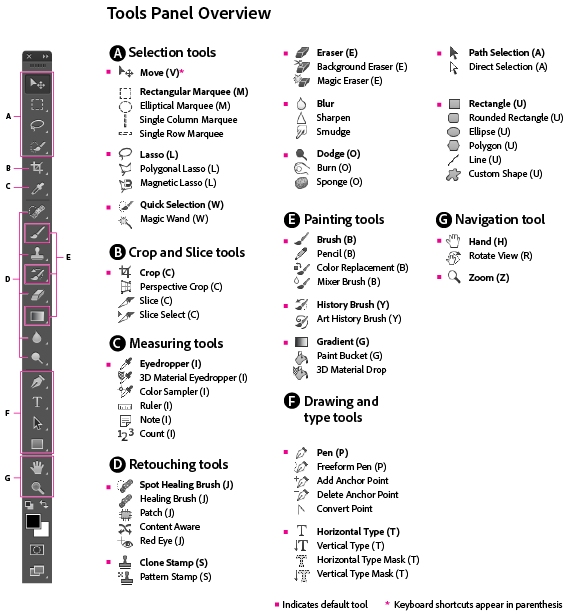
Image: Adobe
-Move: This Photoshop tool will allow you to drag a selection to a new location.
-Raised hand: You will be able to control the smoothness of the curved lines you are drawing, as well as add segments to existing lines.
-Magic wand: With this Photoshop tool, you can select a consistently colored area without having to trace its outline.
-Dropper: You can take color samples in order to designate a new foreground or background color.
-Brush: This is one of the most important Photoshop tools to apply the Iso-painting technique. You can paint custom brush strokes and as if you had made them by hand.
Download this pack of skin brushes for free and achieve incredible effects on your skin!
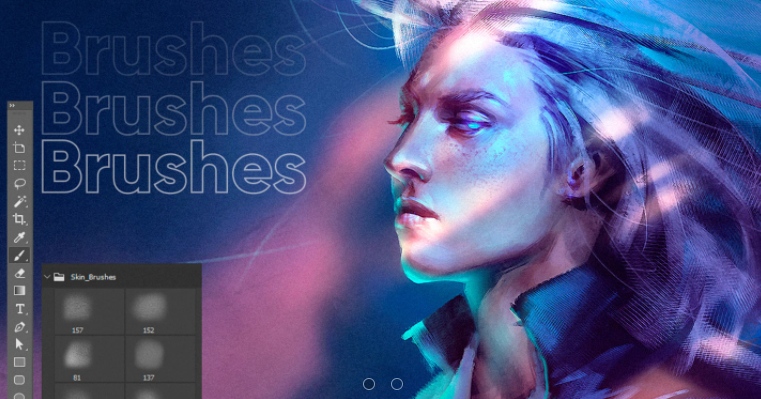
-Cloner buffer: Photoshop tool with which you can correct defects by cloning some parts of the graph.
-Draft: As obvious as it may sound, this Photoshop tool allows you to erase part of an image, although it will only have an effect within the selected layer. In addition, it has different modes.
-Degraded: A Photoshop tool with which you can create a gradual blend between colors.
-Text: With this Photoshop tool you will be able to easily insert text into your images.
-Feather: You can create and modify paths precisely
It is important to mention that, although these tools are the main ones to start with the Iso-painting technique there is nothing written and the use of all of them (or others) will depend on what you want to achieve. In graphic design, sometimes it comes in handy to break the rules to get even more incredible results.
The time has come! We already have a good foundation in Photoshop tools to get started with the Iso-painting technique, so it’s time to take the next step: create an isometric plane.
To achieve an incredible project with the Iso-painting technique you must be based on an isometric plane, which you must create by doing some simple steps in Photoshop. Let’s go!
1. Create a new document (300px / inch).
2. Then go to Gradient / Paint Bucket and choose your primary and secondary colors.
3. Create a new layer.
Four. Create a fine selection and fill it with black.
5. Use the Move + Alt tool and drag the selection.
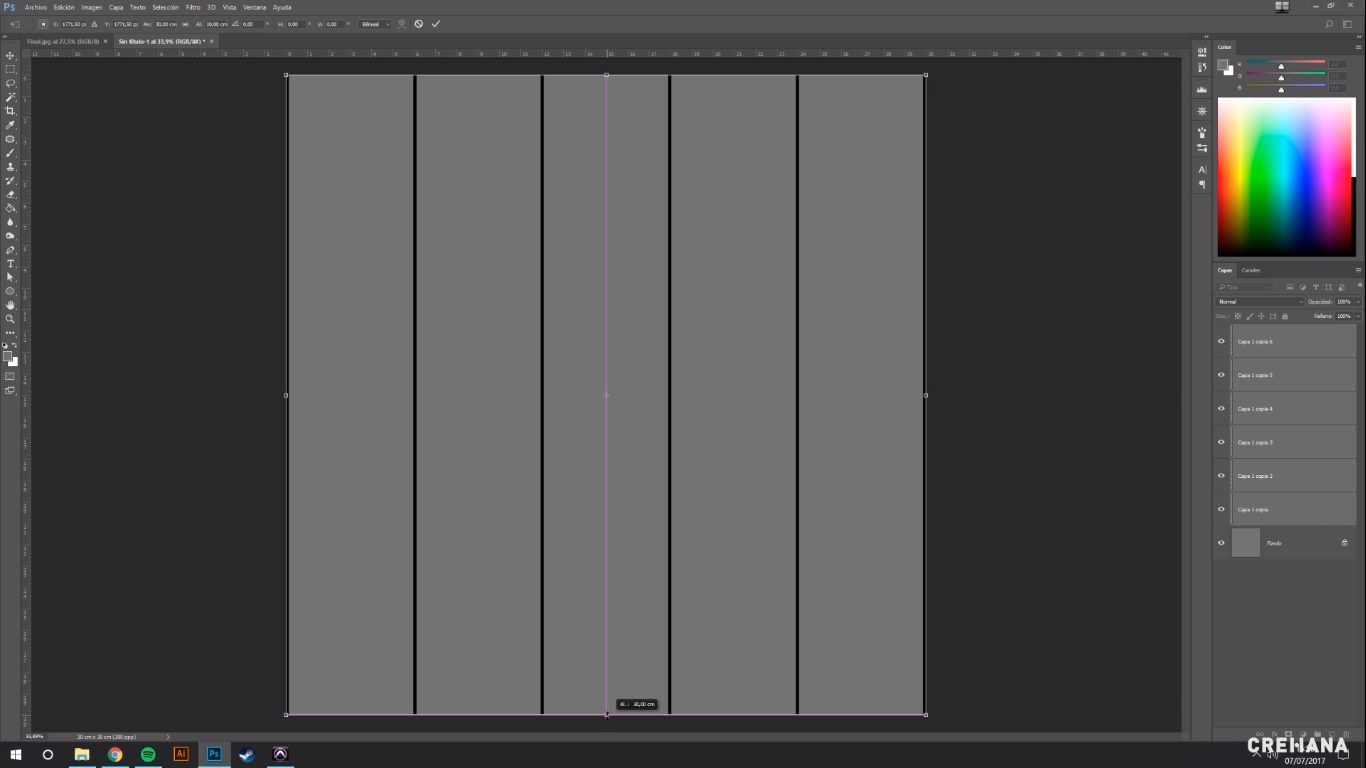
Image: Course Discover Iso-painting in Photoshop and create authentic pieces
6. Combine the layers.
7. Duplicate the selected layer.
8. Rotate the lines 90 degrees. At that point you will have a perfect grid.
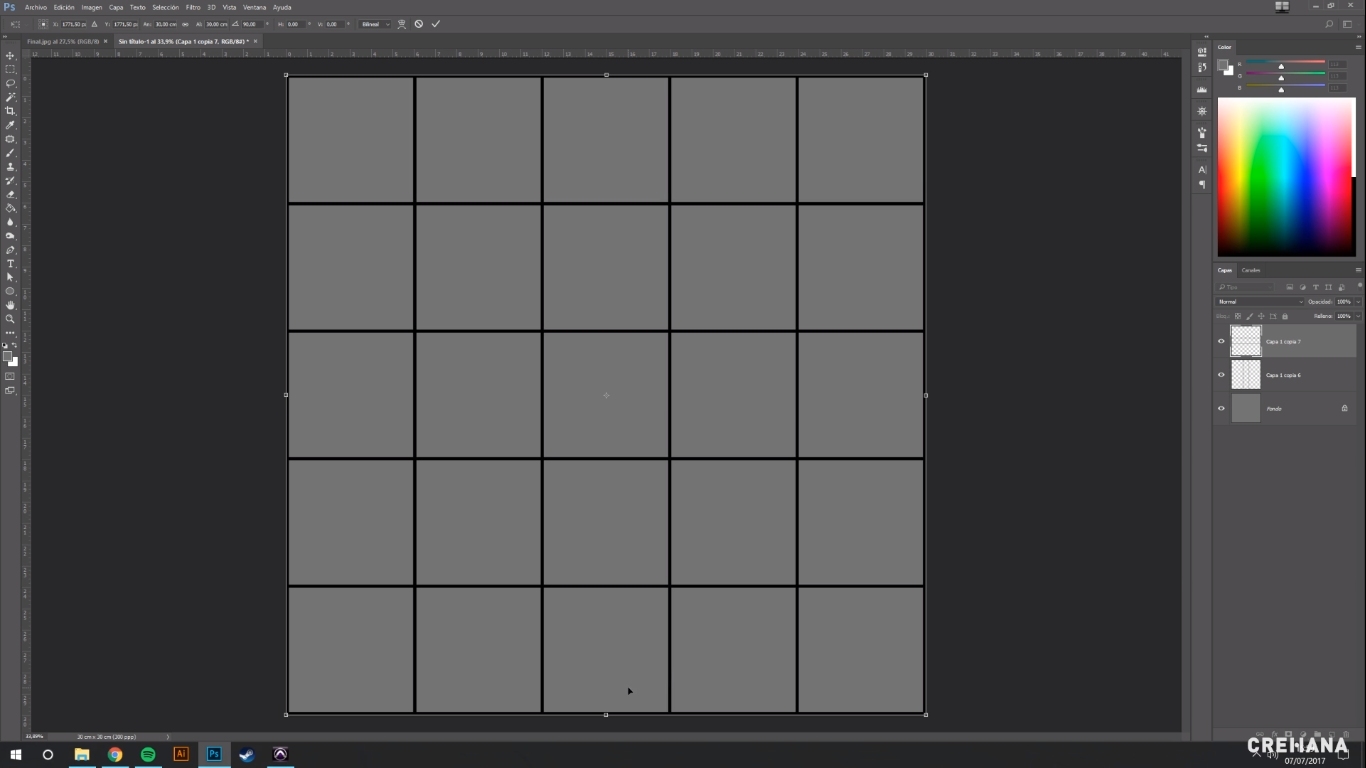
Image: Course Discover Iso-painting in Photoshop and create authentic pieces
9. Select both layers and combine them.
Become an expert in Photoshop with this incredible online course!
10. Press Shift + Alt and shrink the grid.
eleven. Use the turn tool + Shift and make three turns to the left.
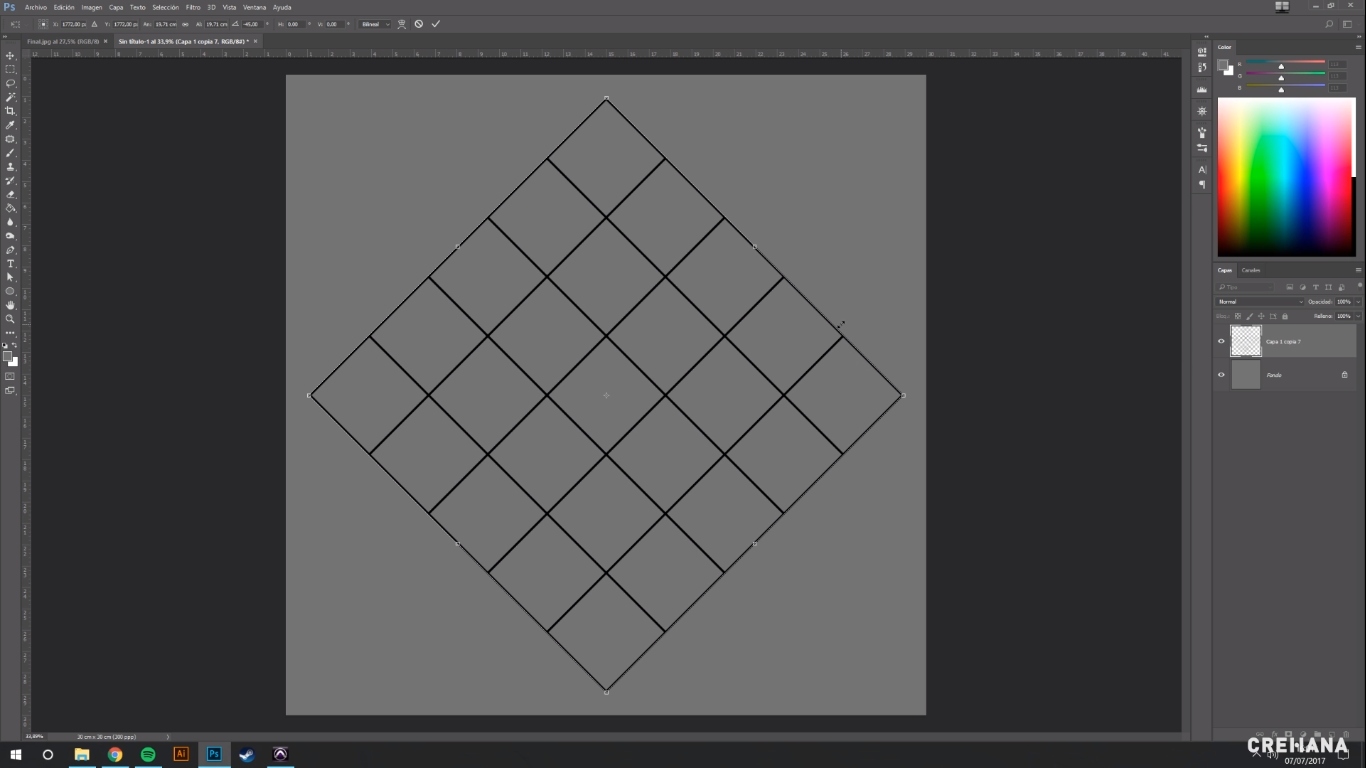
Image: Course Discover Iso-painting in Photoshop and create authentic pieces
12. Press Shift + Alt and move down to create perspective.
13. Lower the grid almost to the bottom of the document.
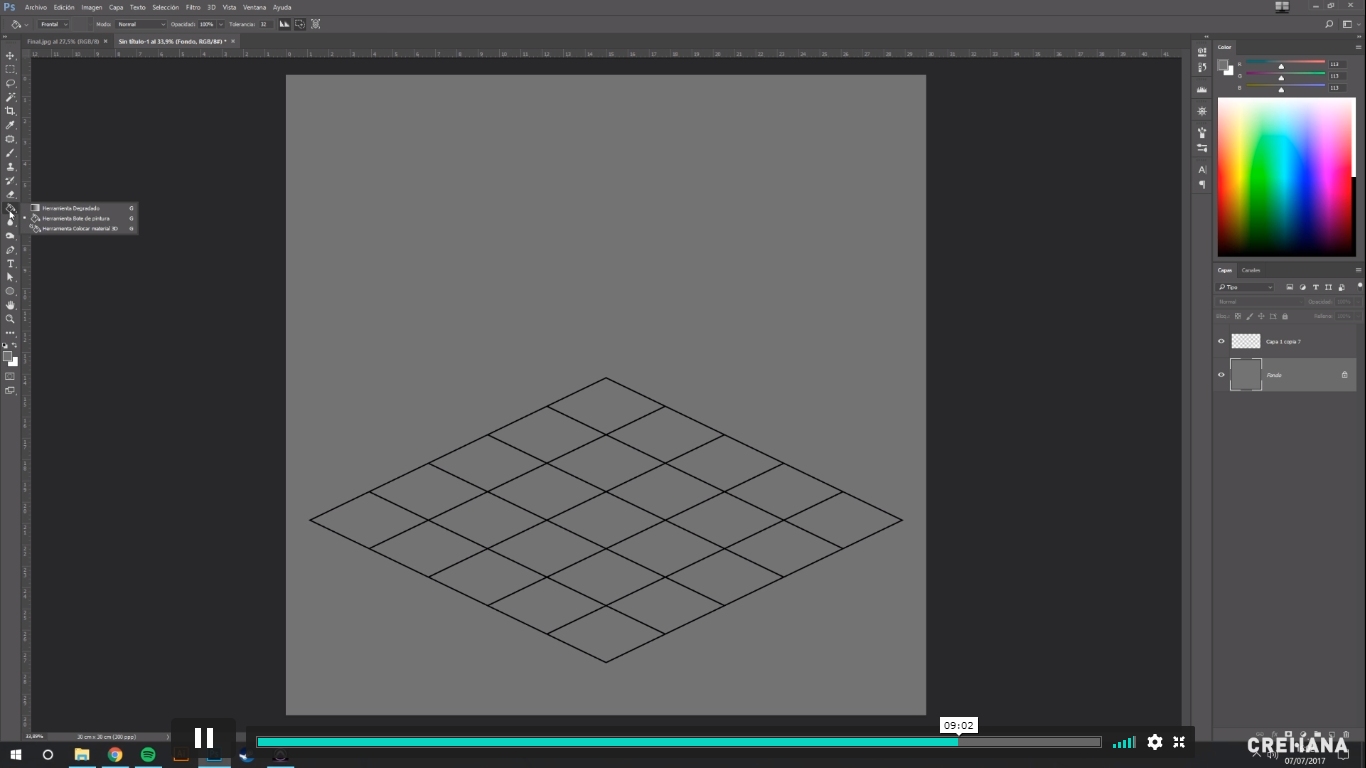
Image: Course Discover Iso-painting in Photoshop and create authentic pieces
14. Choose the two colors of the gradient and draw a line.
fifteen. Change the opacity of the grid to 50%.
Ready! You already have your isometric plane. With this, you can start doing incredible projects. You already know that to complement and improve your Iso-painting technique, Professor Rubén will be waiting for you in his online course.

Design has branches in which special techniques are required to obtain a great project. The Iso-painting technique is valid in several of those branches, among which are:
Table of Contents
Iso-painting in Videogames
It is one of the main industries in which you can apply the Iso-painting technique. Several years Isometric perspective (or 3/4 perspective) began to be used in video games, like Age of Empires or SimCity, to name a few examples.
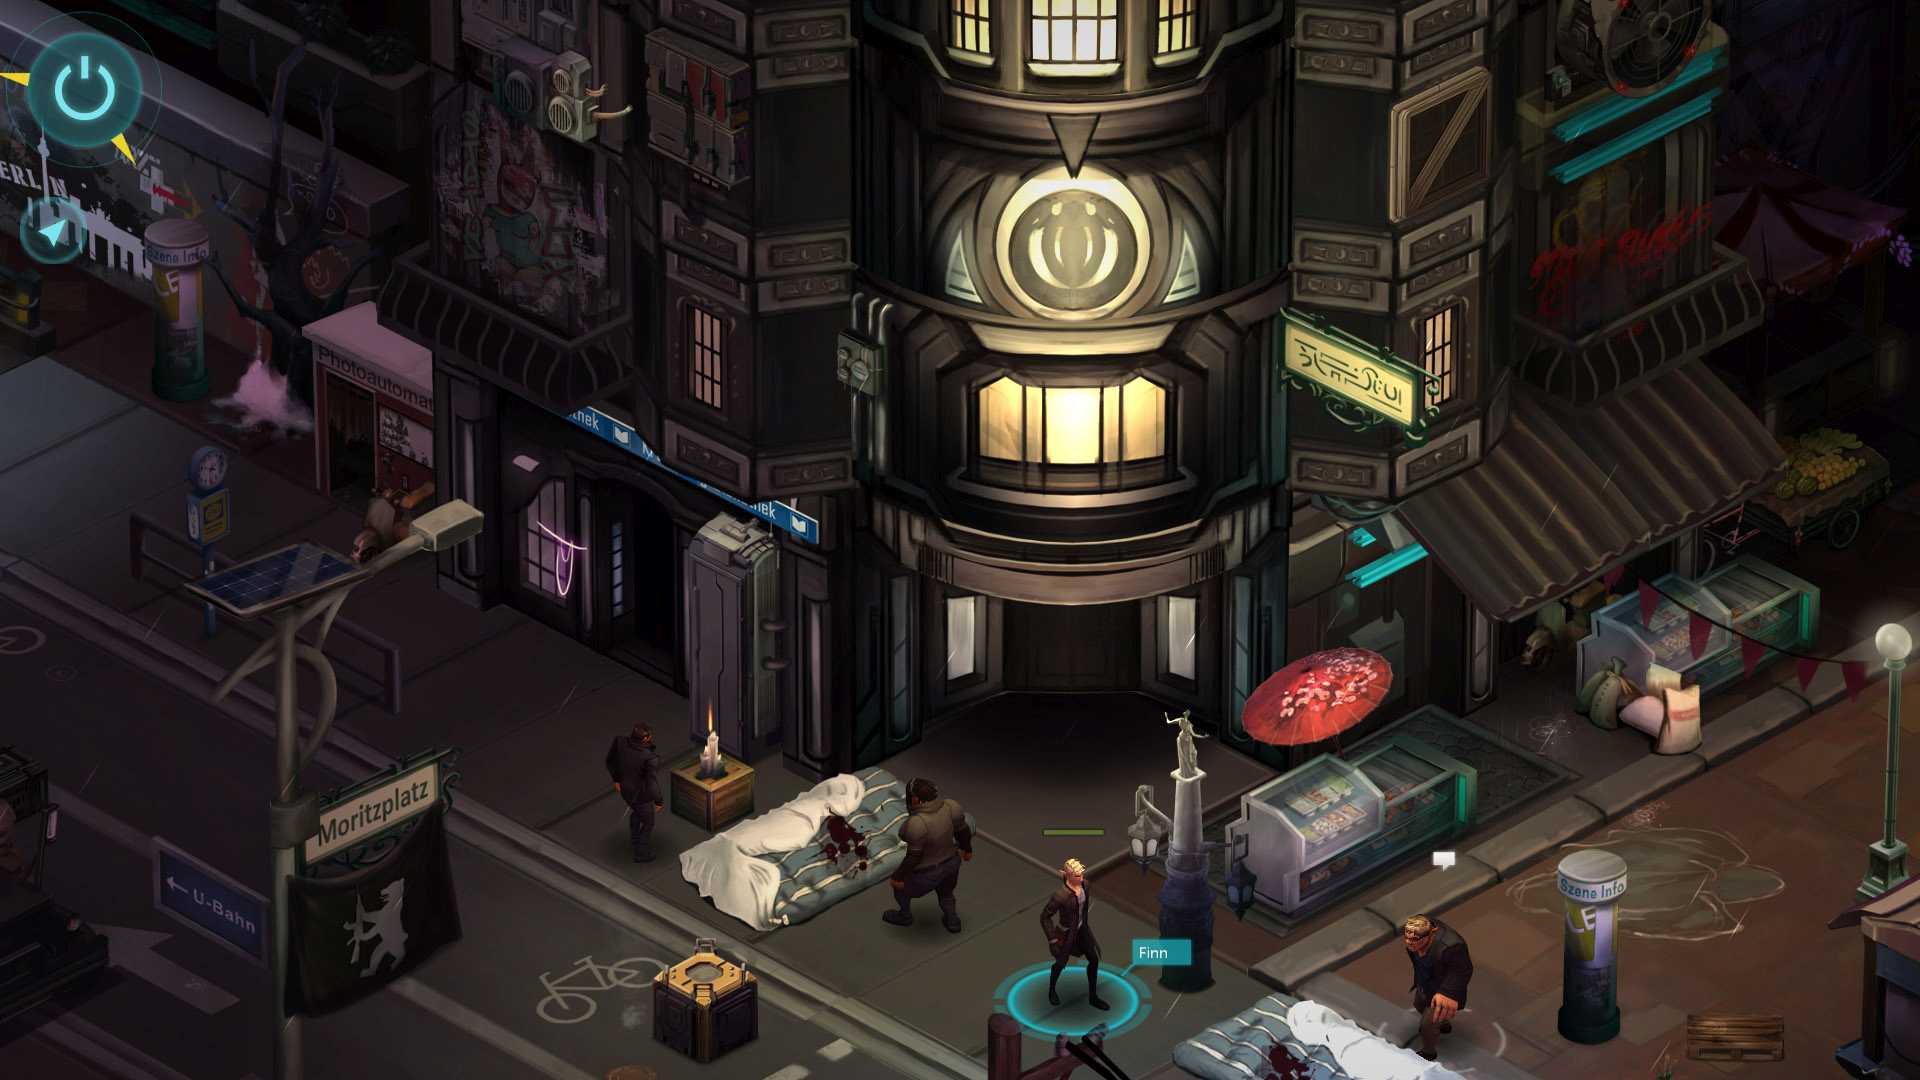
Image: Shadowrun Returns
Although video games with better graphics no longer usually apply Iso-painting, it seems that the trend could return. Proof of this are some relatively recent video games in which Iso-painting was used, such as Shadowrun Returns, developed by Harebrained Schemes.
Industrial Design and Iso-painting
To the having to present pieces from different points of view, the Iso-painting technique in Photoshop will be of great help to show your prototypes and they can be understood perfectly.
However, these Industrial Design courses will complement your knowledge of the Iso-painting technique.
Iso-painting in architecture
Architecture is another profession in which you could use the Iso-painting technique to create your sketches and models.

Image: Freepik
It’s about a resource that complements the distribution plans and that will allow an aerial view of your projects.
You just learned the basis of a new Photoshop technique. Although the use of Iso-painting is common in the industries that we mentioned above, it is a technique that you can apply in absolutely all your projects to give them a unique and incredible touch 😎. See you!


![🖌️ Iso-Painting: Everything you need to know about this incredible technique [2021]](https://graphichow.com/wp-content/uploads/2021/01/1611868061_Iso-Painting-Everything-you-need-to-know-about-this-incredible-technique-750x536.jpg)