If you have come here, it is because you are passionate about illustrating with Paint Tool SAI or you have just started drawing with this program and you want to expand your knowledge about it. And that includes: learn more about brushes for Paint Tool UPS, right?
Well, in this note you will learn to configure some of the most sought-after and useful Paint Tool SAI brushes and, in addition, you will know what are the main tools that will help you customize them.
On the other hand, if you are an artist who wants to enter the world of digital illustration and you are looking for a light option (and not so complex) to start illustrating your first projects, Paint Tool SAI may be that program you need to try today.
Did you know that Paint Tool Sai is mostly used by artists who dominate the manga style? So, if you like this drawing style, what do you expect to try it?
Do you already know all our Illustration courses? Look at them
Table of Contents
What is Paint Tool SAI?
It is a drawing and illustration program for Microsoft Windows. The Easy Paint Tool SAI, better known as Paint Tool Sai, is characterized by three things: it has many options, is light and works easily.
Its intuitive design, its stroke stabilizer, its configurable brushes, its uses (with graphic tablet or mouse) and its low consumption of resources have made this program one of the most popular in the digital world.
For many novice artists it is a good option compared to other more complex design programs such as Photoshop.
Drawing tools
Before learning to configure brushes in Paint Tool Sai, it is important that you are familiar with the Drawing Tools panel. What will you find in this space? The following tools: Sketch, Pen, Color, Pixel, Eraser, Bucket, Select, Deselect, Blur, AirBrush and Marker, among others.
Keep in mind that you can change the settings of these tools as many times as you want, so you will have several drawing options with just one brush. But, eye, although all the tools can be customized, do not forget that each one has its own specialty.
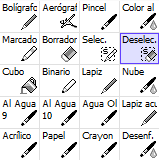
How to create a brush in Paint Tool SAI
Now you can create a brush:
– Go to the Drawing Tools panel and place yourself in one of the blank boxes (at the end).
– Right click on the box to display the options. To create a brush, choose “Brush.”
– Well, to make the adjustments you need, you just have to select it. Look at all the adjustments you can make to this brush. Here you can change the paint mode, brush hardness, brush size, density and texture, among others.
How to configure brushes for Paint Tool SAI
To configure brushes in Paint Tool SAI 2, you need to know the main tools that will allow you to customize it.
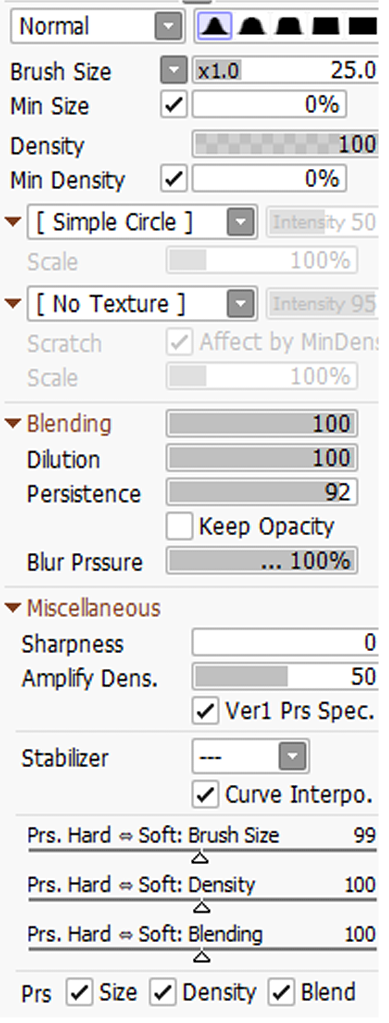
– In the Tools panel you will find the “Paint Mod”. The one that appears by default is “Normal” (the color tone is maintained). But if you deploy there is more: “Vivid” (the color tone intensifies), “Deep” (the color tone darkens) and “Multiply” (the color tone darkens completely).
– In “Hardness” (the shapes of the edge of your brush) you will find five options. Depending on the one you choose, your lines will be soft or hard. These appear on the right side of “Paint Mod”.
– “Blush Size” allows you to vary the size of the brush from 1 to 100.
– “Min Size” allows you to adjust the amount of color that will fill the edges of your stroke.
– With “Density” you can control the opacity of the color.
– “Min Density” works like this: if you set it to 0% and don’t put pressure on the drawing, the line will be thinner. On the other hand, if you press, the line will be thicker.
– You can also choose the shapes of your brush: simple circle, watercolor, acrylic, etc. This option is found under “Min Density.” Followed by the texture option. Both options have the option of scale and intensity.
– The “Blending” option allows us to combine colors. To do this, you just have to raise the percentage. Here you will also find “Dilution” and “Persistence”. The first is like adding water to the watercolor and the second combines the color you have chosen with the one that comes in contact.
– Then we will find the sizes of our brush (from 0.6 to 5000)
– Finally, we have the “Stabilizer” option for each tool.
Get a Premium Membership and raise your education to another level
Install brushes in Paint Tool SAI
It is super simple. If you have Paint Tool SAI 2, you just have to copy and paste the brushes to the folder called “blotmap” (which is inside the Paint Tool UPS folder), and that’s it. To see your brushes, go to “Simple circle.”
Now, it is time to set brushes. Here are some settings that will help you a lot.
Paint Tool SAI Brushes
Watercolor brush
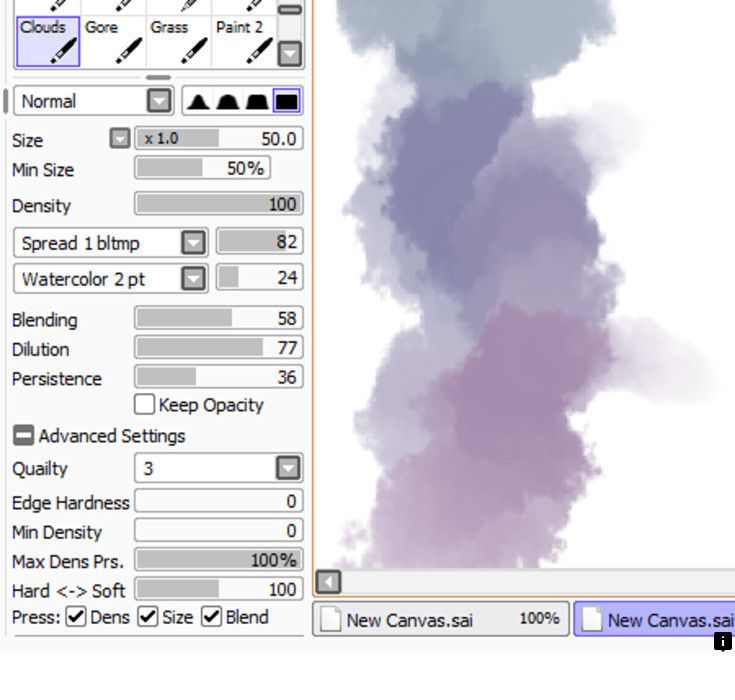
Image: Pinterest
Hair or Grass Brush
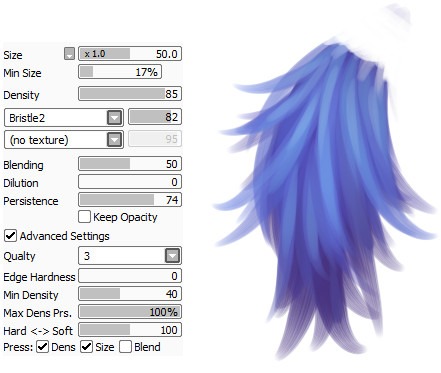
Image: Tumblr
Chalk effect brush

Image: crayonchewer
Download this free pack of Photoshop brushes
2B pencil effect brush
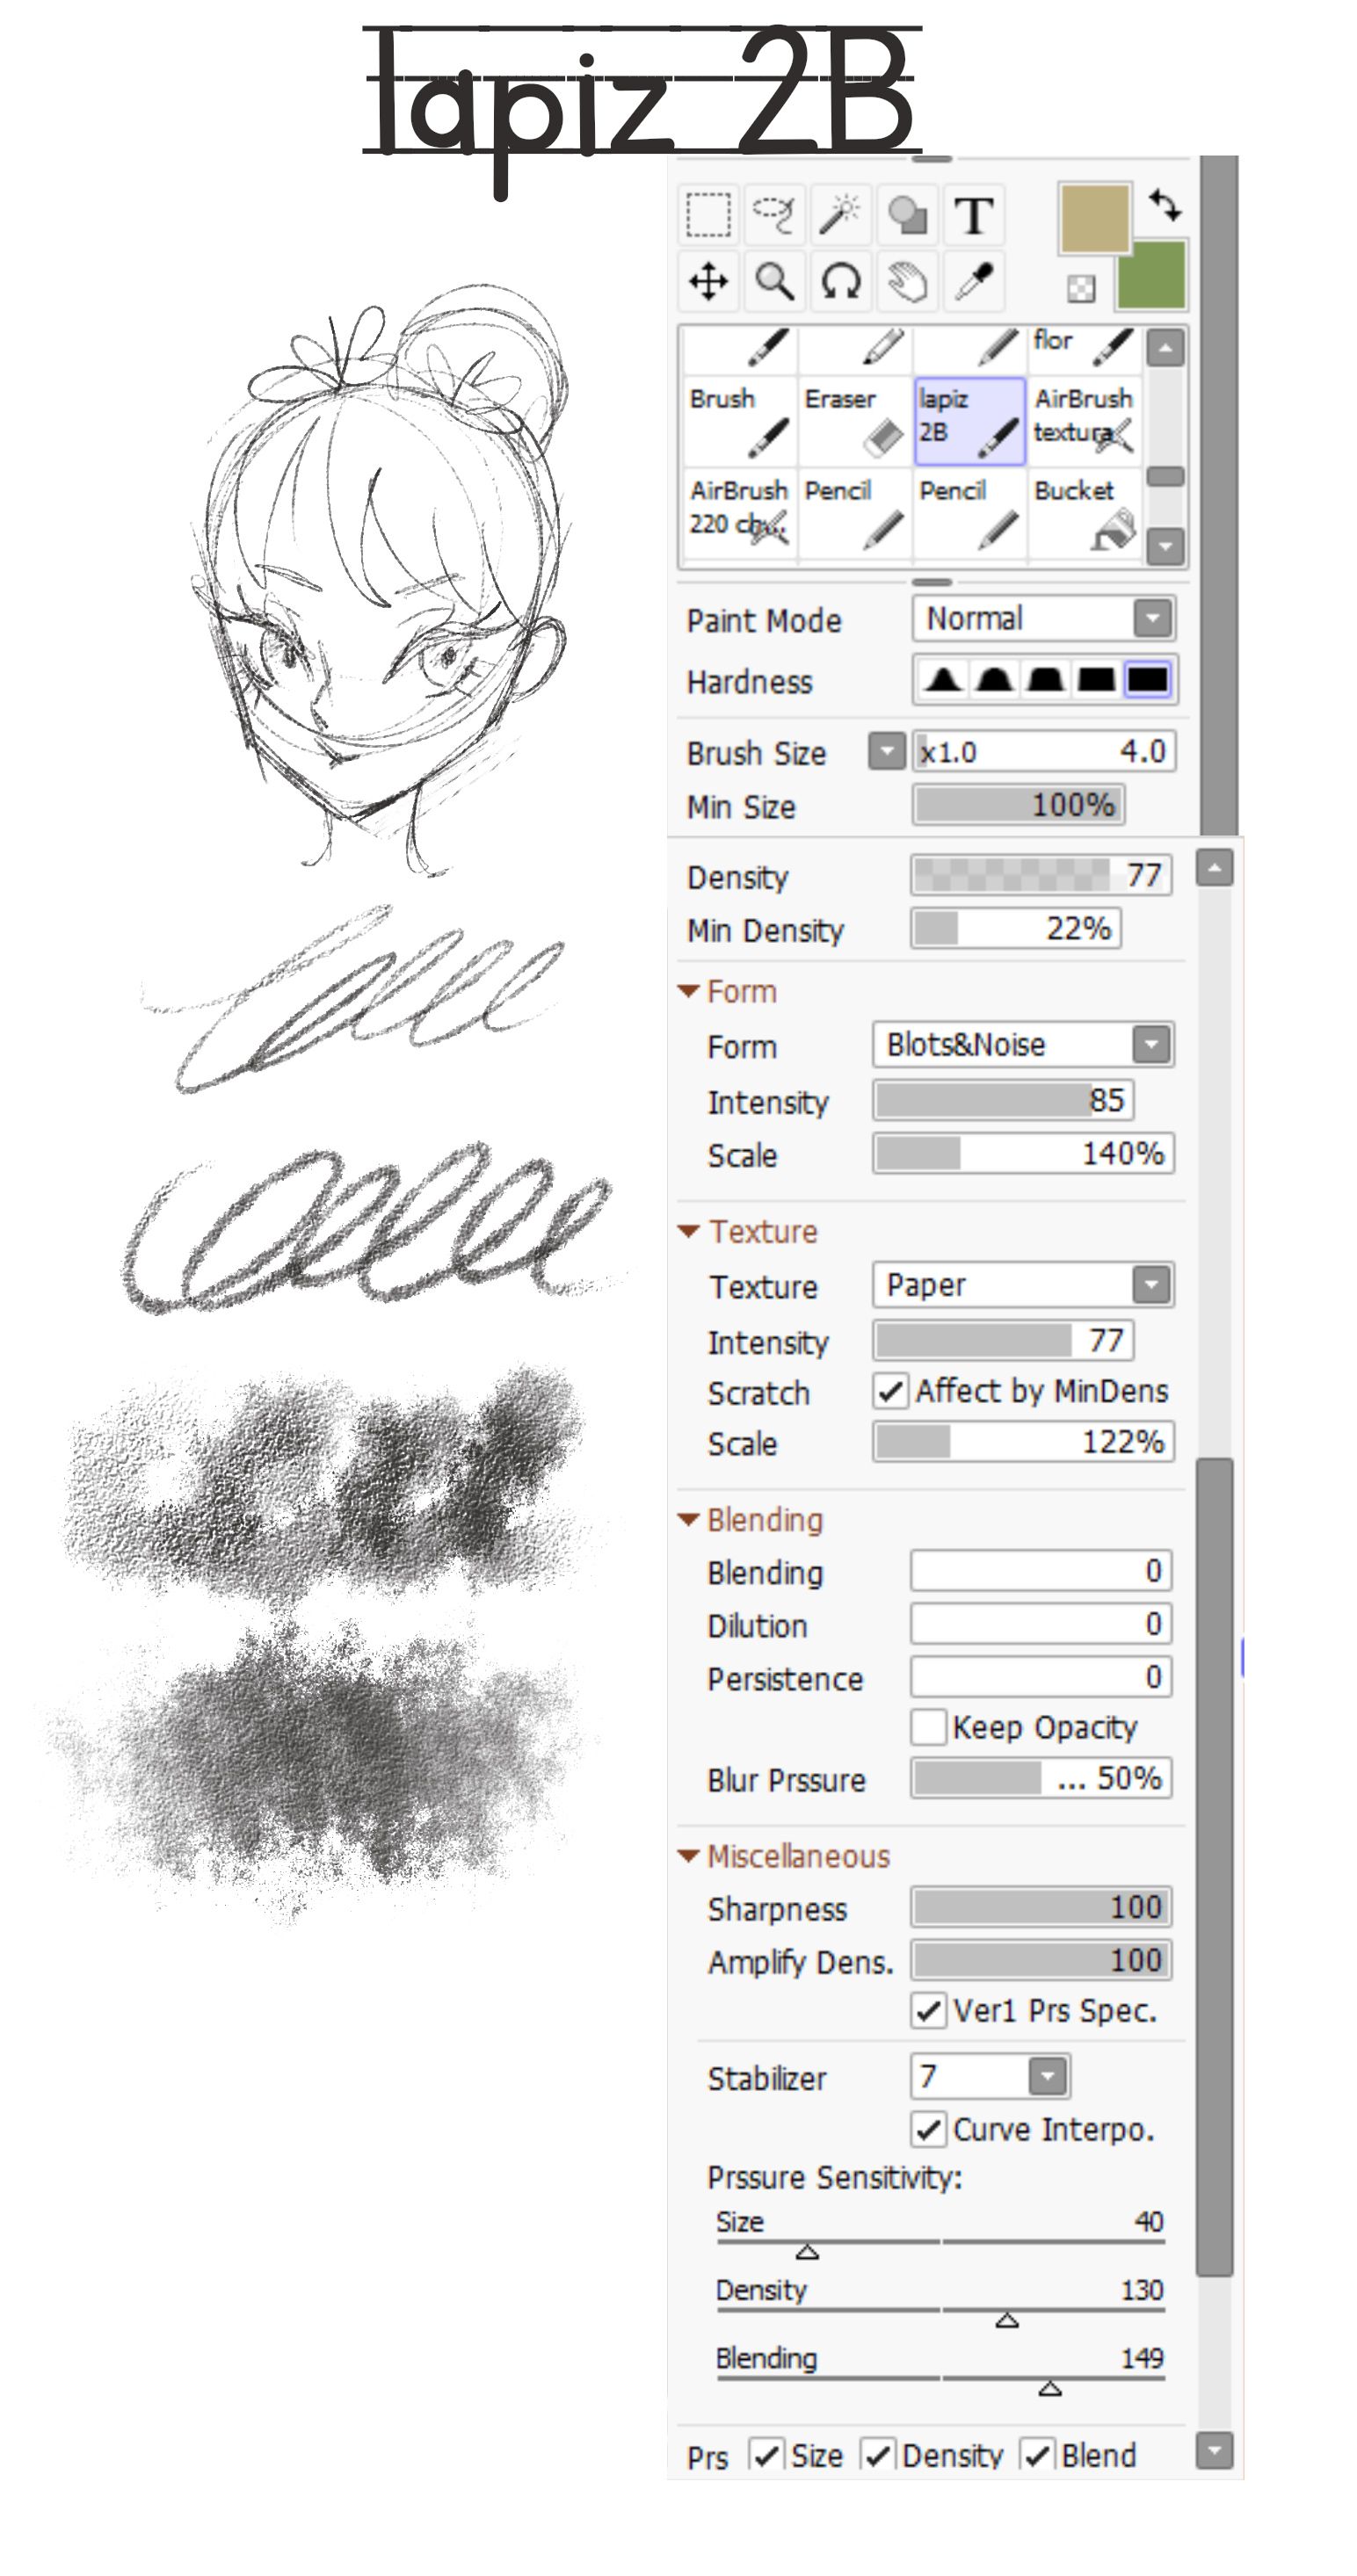
Image: Maya Miau
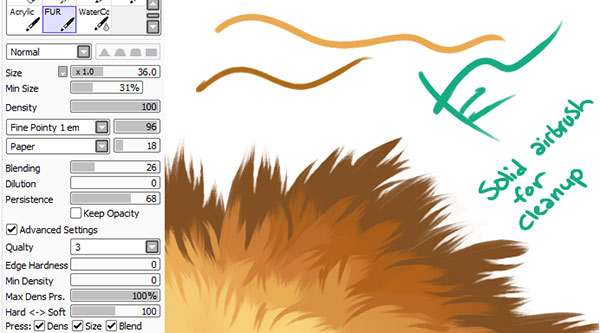
Animal hair brush
Image: pngshare.com
Cloud and sky brush
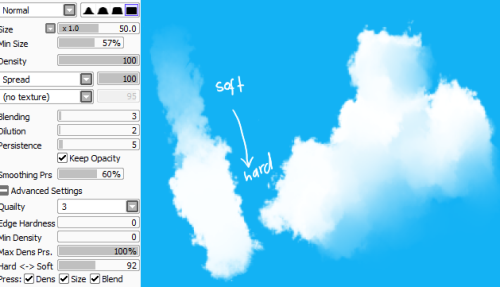
Image: pngshare.com
Face brush

What other brush settings for Paint Tool UPS do you know? Did you dare to try it? We hope this note has expanded your knowledge about this program or has served as an introduction for you to be encouraged to use it. Until the next article!


