home
>
Blog
>
Design
>
Learn how to make a gradient in Illustrator and everything you need to know about this tool
Learn how to make a d …
In the world of graphic design, colors take center stage. That is why learning how to make a gradient in Illustrator and achieve unique tones can be a great tool for the realization of all your compositions. If you are just starting to use this Adobe program, today we will show you an important functionality of the popular graphic design software.
We’ll start by explaining the function of the gradient tool, before going deeper into all the customization options that this function offers. If you want to know directly how to make a gradient in Illustrator, you can jump to point 4.
Index
- What is an Illustrator gradient?
- Knowing the gradient tool in Illustrator
- Gradient types in Illustrator
- How to make a gradient in Illustrator?
- How to change the gradient colors?
- I don’t see the Gradient Menu, how do I make it appear?
- How to modify a gradient?
- How to make a gradient in Illustrator that has three colors?
- How to remove a gradient slider?
- Tips for making a gradient in Illustrator
- I already know how to make a gradient in Illustrator, now what?
To get started, you need to know what gradient is and how you can use it to your advantage in the Illustrator environment. Gradient is an Illustrator tool that will allow you to create color transitions in your composition.
Gradienting using Illustrator can help you achieve various effects on your pieces. You can use it to create a background, fill a shape, or make a part of your composition stand out. With this effect you will be able to capture the attention of your audience, give depth to an image and reinforce a message in your design.
Before we start learning how to make a gradient in Illustrator, we’ll show you what the Gradient tool is. This way you are ready to get the most out of its function.
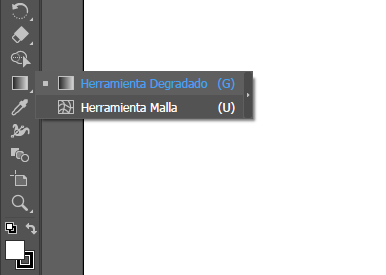
This option is available on the Illustrator toolbar. The button looks like a square that goes from black to white, precisely like a gradient. To activate its use you will only have to click on that box.
(Image: Crehana)
It is also important to know the gradient options that Illustrator can offer you and that will be very easy to configure. In the Gradient Menu you will find three variants among which you can choose the way to make your gradient. Next, we tell you what they are.
Table of Contents
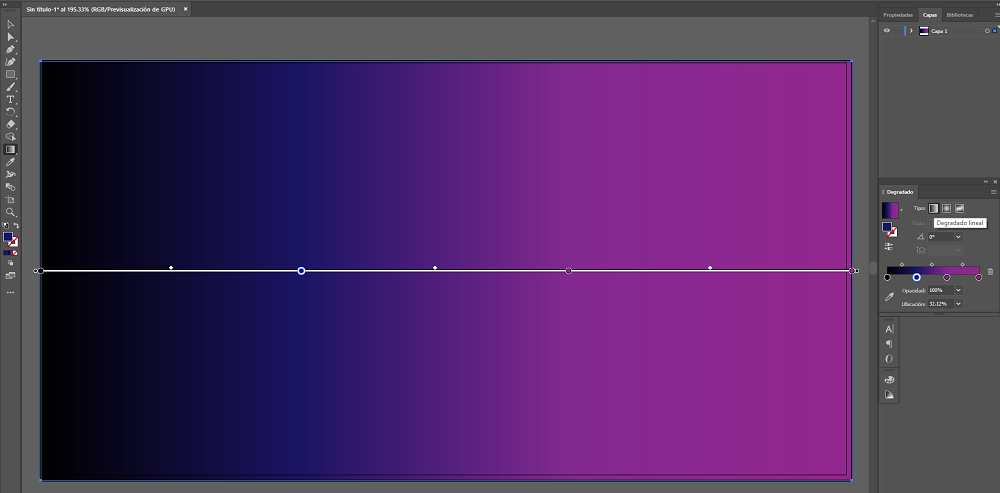
Linear gradient
This type of gradient is used to show the transition of colors in a straight line, one color followed by the other.
(Image: Crehana)
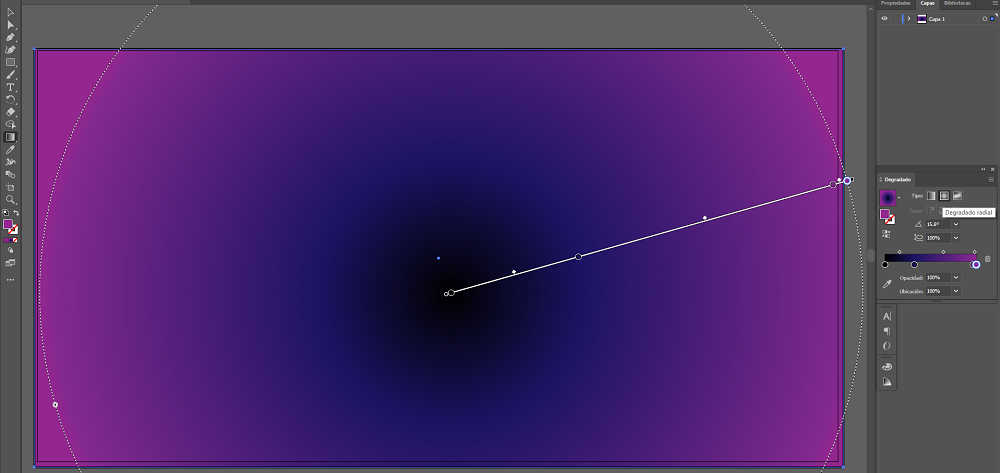
Radial gradient
Regarding this gradient, we can say that it shows each of the colors starting from the center in a circular mode.
(Image: Crehana)
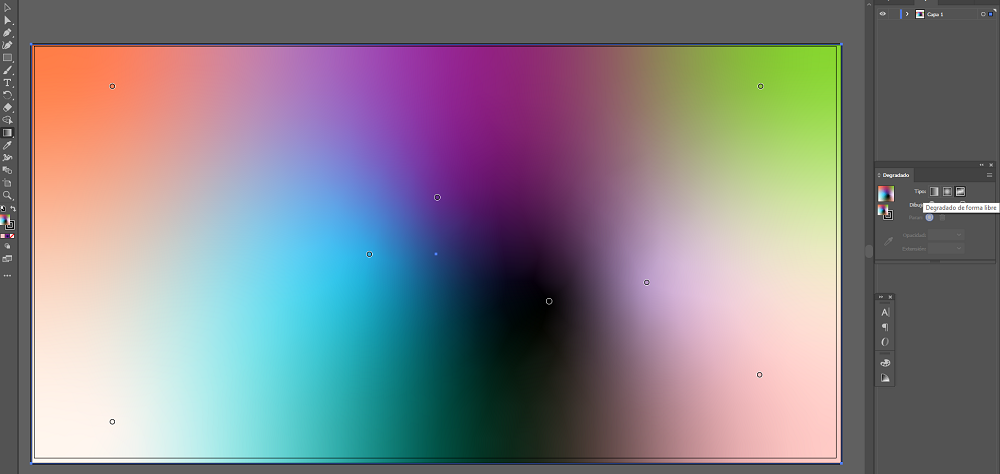
Freeform gradient
Finally, this type of gradient to create a blend following a random sequence. It can be applied in point or line mode.
(Image: Crehana)
These three types of gradient will help you get different textures that you can try to get the best result.
Now the time has come to find out how to make a gradient in Illustrator! You will see that it is a fairly simple process, just follow the steps below.
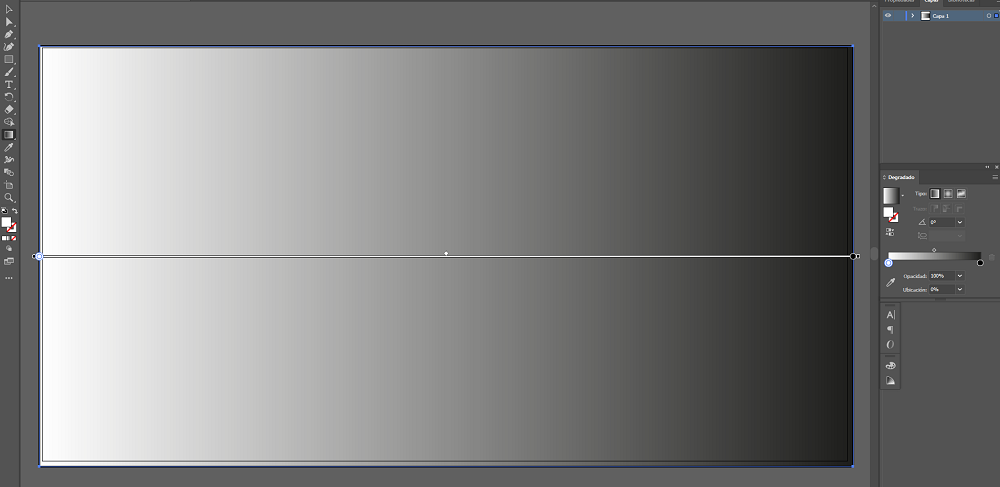
- Select the Gradient tool from the toolbar.
- Then click on the object you want to apply the effect to.
(Image: Crehana)
With just those two clicks you will see that your composition will get a black and white gradient. These are probably not the colors you had in mind for your design, but there is no problem. This is very easy to configure.
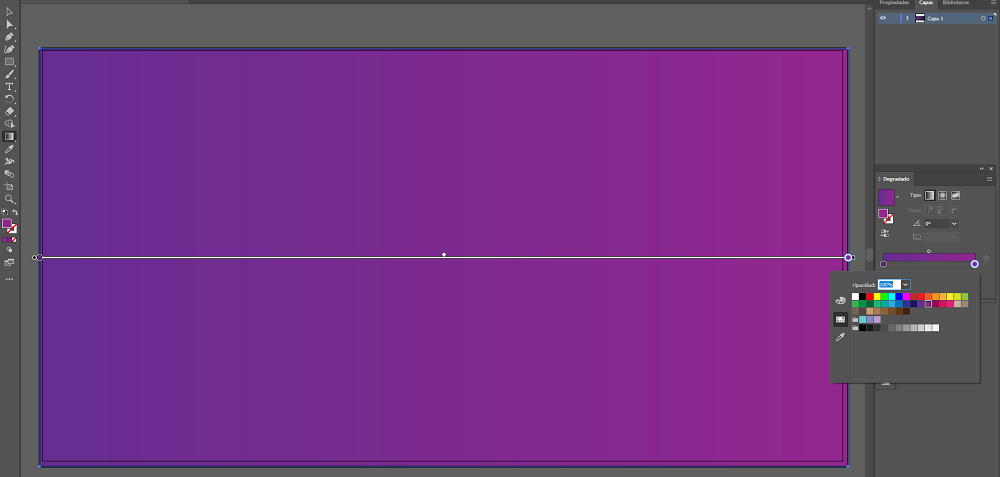
Once you’ve managed to make a gradient in Illustrator, you’ll probably want to start experimenting with the colors that best fit your design. If you want to make that change, these are the steps you must follow from the Gradient Menu.
- Double click on the colors that appear in the Gradient Menu.
- Select the tones that you will incorporate into your composition.
- Adjust the gradient slider until you are satisfied with the result.
(Image: Crehana)
In some occasions, the menus that we want to use in Adobe Illustrator are not visible. But this will not be a problem for you because we will teach you how to fix it with two quick and fairly easy actions.
- Click on the Window option on the menu bar.
- Select Gradient until you see a check on the left side.
With these two steps, the Gradient Menu will already be visible and you will be able to make the necessary settings to adapt the colors. Just be sure to position this menu in a position that is comfortable for you to work with.

If you already learned how to make a gradient in Illustrator, but you did not get the result you expected, it is important that you remember that you can modify it. To change the direction of the gradient that you already made, you will use the edges of the gradient line that appears on your canvas.
Ready to learn how to change the direction of a gradient? All you have to do is hover your mouse over the starting point of the gradient and drag it to move it.
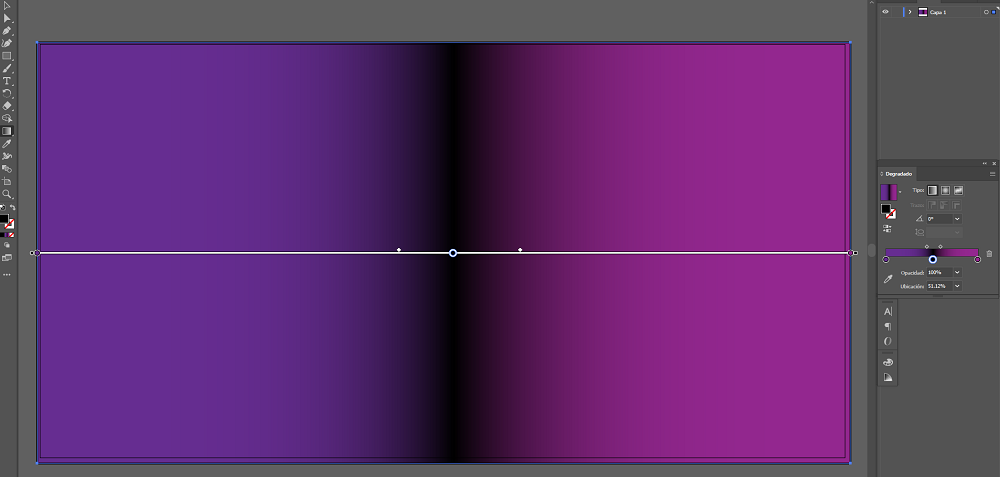
In addition to the classic option consisting of two variants, it is also possible to create a gradient of three colors or even more. Once again, you will have to work from the Gradient Menu with two simple steps.
- Click on the gradient slider to make a new color circle appear.
- Double click on the circle to change color.
(Image: Crehana)
That’s all! You can repeat this action as many times as necessary to be able to add more colors to your illustration.
You already know how to put gradient colors in Illustrator, but what happens if you accidentally add another one? Removing a slider is pretty easy and quick, even faster than making a gradient.
To remove one of the colors from your gradient, just click on the circle you want to remove and drag it down. In this way you will be able to eliminate that tonality from your illustration.
With all these lessons, you already know how to make a gradient in Illustrator and modify all its functions to achieve incredible results. Now it’s your turn to keep exploring this Illustrator tool.
Keep the following Illustrator tips in mind when designing your visual piece.
- If you are not very convinced of the position, keep in mind that you can modify the location of the colors by dragging the circles along the gradient slider.
- It is also possible to configure the angle of the gradient, to do this you just have to change the angle value that appears in the Gradient Menu.
- You can use other functions available in the Gradient Menu, such as opacity and placement. These will allow you to get shades of transparency in your gradient.
- You can also do gradient with the options you have in the swatch library. Try one of these variants to get new results.

After knowing all the uses that you can give to the gradient tool, from its most basic use to more personalized options, you could take a new step. We recommend you take the virtual course Introduction to Adobe Illustrator, to continue discovering this powerful Adobe program.
It is important that you familiarize yourself with the Illustrator interface and all the tools that it can provide, in this way you can get the most out of your design. Whether you want to specialize in digital illustration or perhaps lettering, using Illustrator will be the best way to get creative and polished results.
If you are already more familiar with the use of Illustrator, you can study options of a higher level, such as virtual courses focused on Vector Illustration or Visual Style. In the meantime, you can also discover how to color in Illustrator and some useful cropping tools in the program.
The possibilities are endless with this graphic design software. Remember that you can tell us through our social networks what other tutorials you would like to read on this blog. We are attentive to your suggestions! Once you have the gradient result ready, you can tag us to see your results. Until next time, readers!


