Are you having connection problems? Can’t access some websites? You systematically get an error (This site is inaccessible – DNS_PROBE_STARTED / DNS_PROBE_FINISHED_BAD_CONFIG)? The problem could be caused by an outdated or corrupted local DNS cache. In most of the cases, these issues can be resolved by clearing DNS cache in Windows 11. We then speak of flush DNS cache (Where DNS flush).
There are several methods for flush DNS cache in Windows 11. You can use Command Prompt, Windows PowerShell, Run command or do it directly in your web browser (Chrome, Firefox, Opera, Safari, etc.).
Flushing the DNS cache in Windows 11 is a very simple process that does not require any special skills. In this article we will see together the different methods that allow you to clear the DNS cache on your Windows 11 PC. Carefully follow the few detailed steps and you should be fine 😉. Let’s go !
Table of Contents
What is DNS cache?
DNS stands for Domain Name System, which can be translated into French as “system of domain names”. The main function of DNS is to translate domain names (for example, www.google.com) into an IP address (142.250.179.99).
When you browse the Internet, your web browser queries the DNS servers (kinds of directories) configured on your device to retrieve the IP addresses of the pages you want to access.
Once a connection is established between your device and the website, your computer stores the information in a temporary file called a “DNS cache”. The DNS cache contains the domain names and IP addresses of the websites you have visited.
This file allows your computer to avoid polling DNS servers each time you try to visit the same websites. Instead, your computer will refer to the DNS cache for resolve domain names to IP addresses faster. Thus, the loading time of the websites that you are used to visiting will be much faster.
There you have it, now you know what the DNS cache is for. Now let’s see the importance of flushing the DNS cache every now and then.
Why flush the DNS cache?
Your computer automatically and periodically updates the DNS cache. However, over time, DNS cache may have unnecessary or corrupt records with wrong information. This can cause slowdowns or prevent access to certain websites.
Indeed, it is possible that websites that you used to visit change domain name or IP address due to a change of host for example. The existing data in the DNS cache therefore becomes obsolete or invalid. And as a result, you will no longer be able to access the websites in question.
Flushing the DNS cache is like removing all the IP addresses associated with the domain names you have visited. This way, DNS records start from scratch so that your computer has the latest updates. This step can solve possible problems connecting to some websites.
Now that you know why it’s important to flush the DNS cache, let’s get to the practical part: how to flush DNS cache in Windows 11.
Clear DNS cache on Windows 11
Below are the different methods to delete or flush DNS cache on Windows 11. No matter which method you choose, the result will be the same.
Via Command Prompt
You can use the command prompt to delete or reset the DNS cache in Windows 11. To do this, follow these steps:
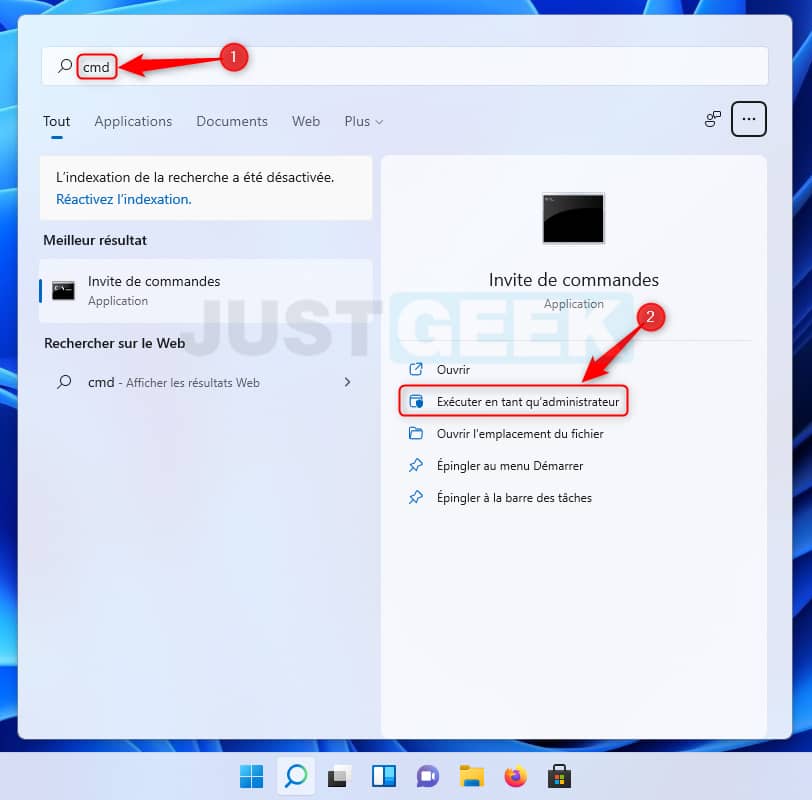
1. First of all, open a Command Prompt window as administrator. To do this, click on the Start menu, then search for “Command Prompt” or ” cmd “. Then select the option ” Execute as administrator In the right pane.
2. Before clearing the DNS cache, you can view all current DNS entries saved on your Windows computer. To do this, type or copy / paste the following command and press Entrance.
ipconfig / displaydns
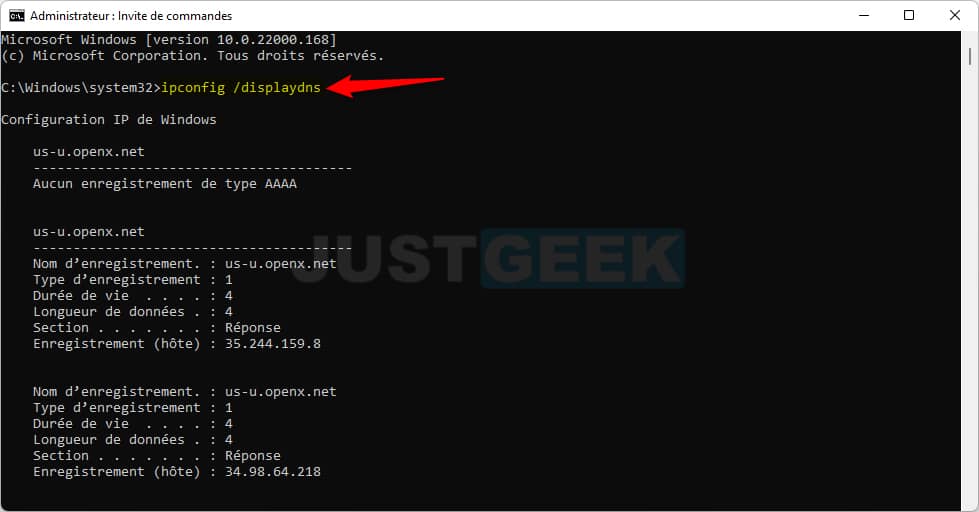
As you can see, this command displays all the DNS information on your computer. If you just want to flush the DNS cache, use the following command.
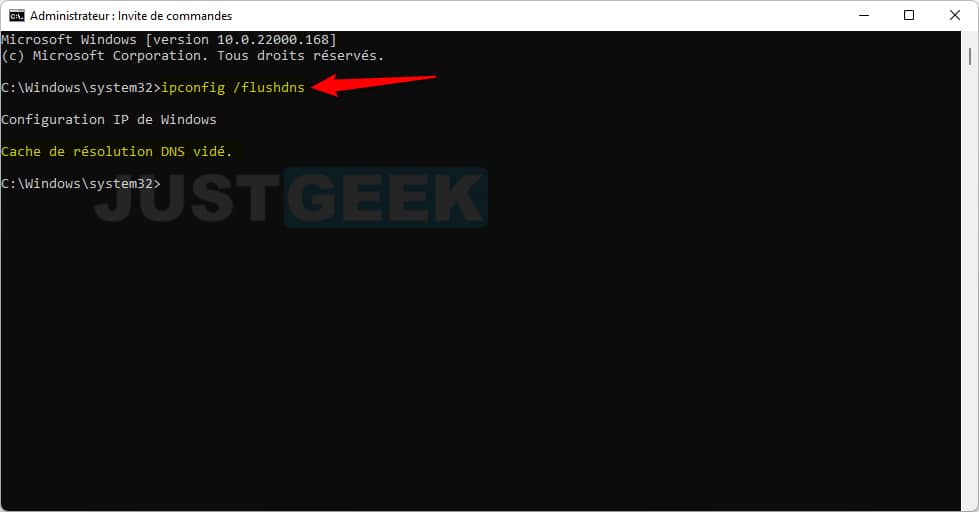
3. For flush DNS cache, type or copy / paste the following command into the command prompt:
ipconfig / flushdns
When the task is complete, you will receive a message indicating that DNS resolver cache was successfully flushed.
Via Windows PowerShell
The second method to flush DNS in Windows 11 is to use Windows PowerShell. Here’s how to do it.
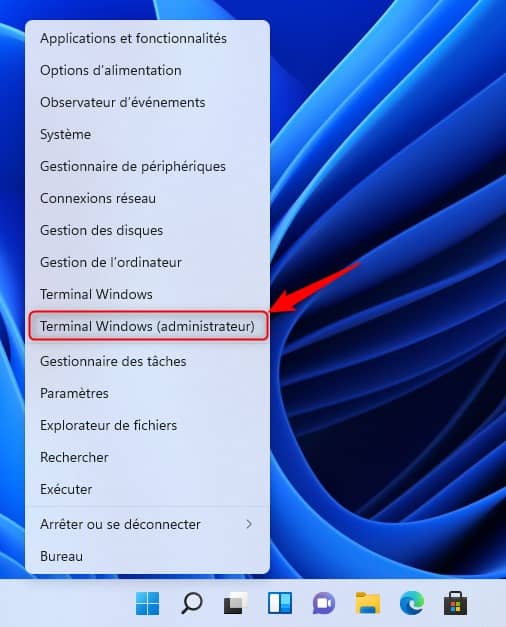
1. Open the Windows PowerShell in administrator mode. To do this, right-click on the Start menu or simultaneously press the keys Windows + X, then click on ” Windows Terminal (administrator) “.
2. Type or copy and paste the following command into the Windows PowerShell window, and then press Entrance.
Clear-DnsClientCache
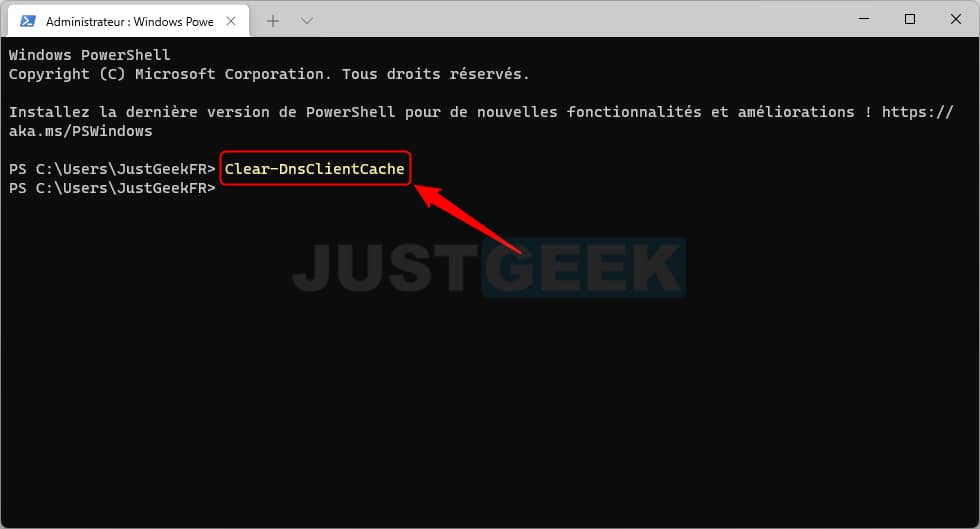
Unlike Command Prompt, you won’t get a message telling you the DNS cache has been deleted successfully.
Via the Run command
Another easy method to flush the DNS cache is to use the Run command. Here is how to do it.
1. Open the Run command by simultaneously pressing the keys Windows + R.
2. Then type the following command and click on ” OK »Or press Entrance.
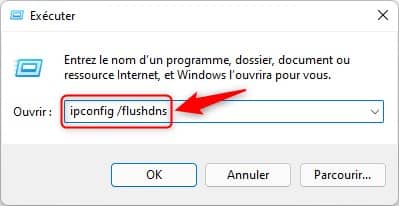
This will have the effect of clearing the DNS cache on your Windows 11 PC.
Clear DNS cache in your web browser
Web browsers such as Google Chrome and Firefox store their own DNS cache. And be aware that the DNS cache saved by your web browser may be different from that of Windows 11. Therefore, if a particular website does not work on Google Chrome, but opens with another browser, you can clear Chrome browser DNS cache to potentially resolve the issue. Of course, this is only an example, but you have understood the principle.
In Google Chrome
1. Start by launching the Google Chrome web browser.
2. Then type or copy and paste the following url in the address bar and press Entrance.
chrome: // net-internals / # dns
3. Finally, click on the ” Clear host cache To clear the DNS cache in Google Chrome.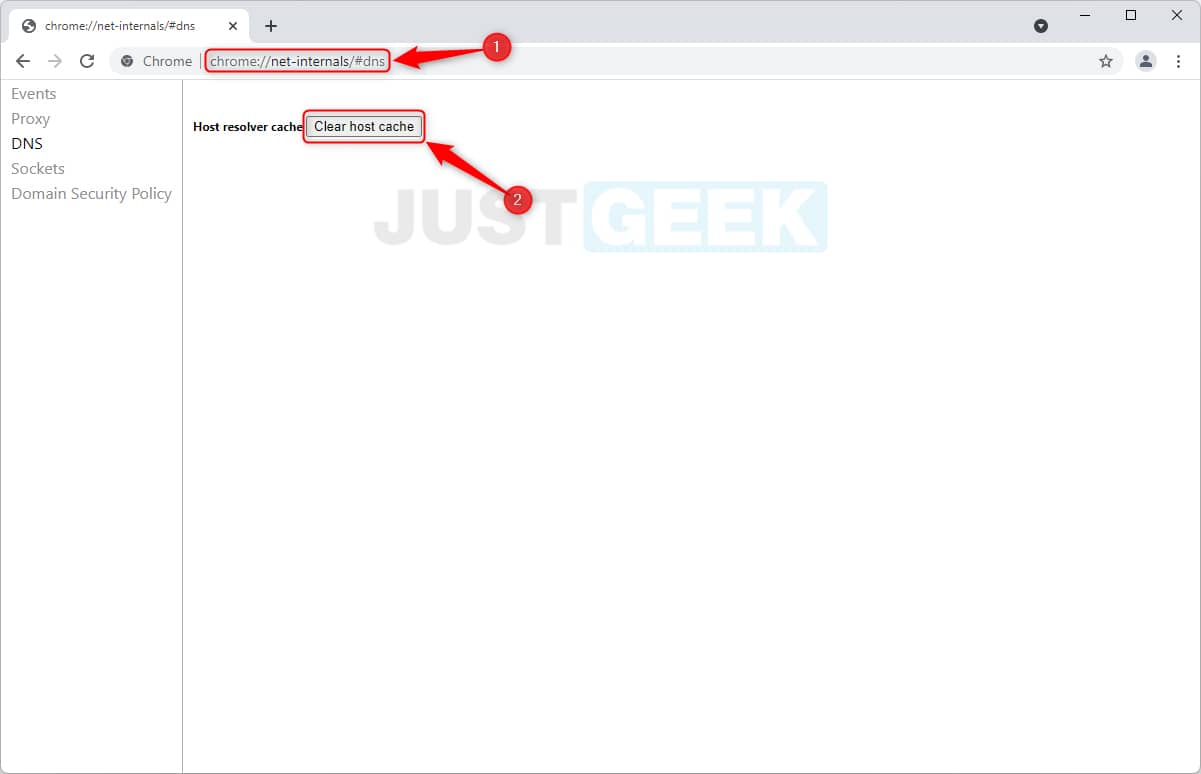
In Mozilla Firefox
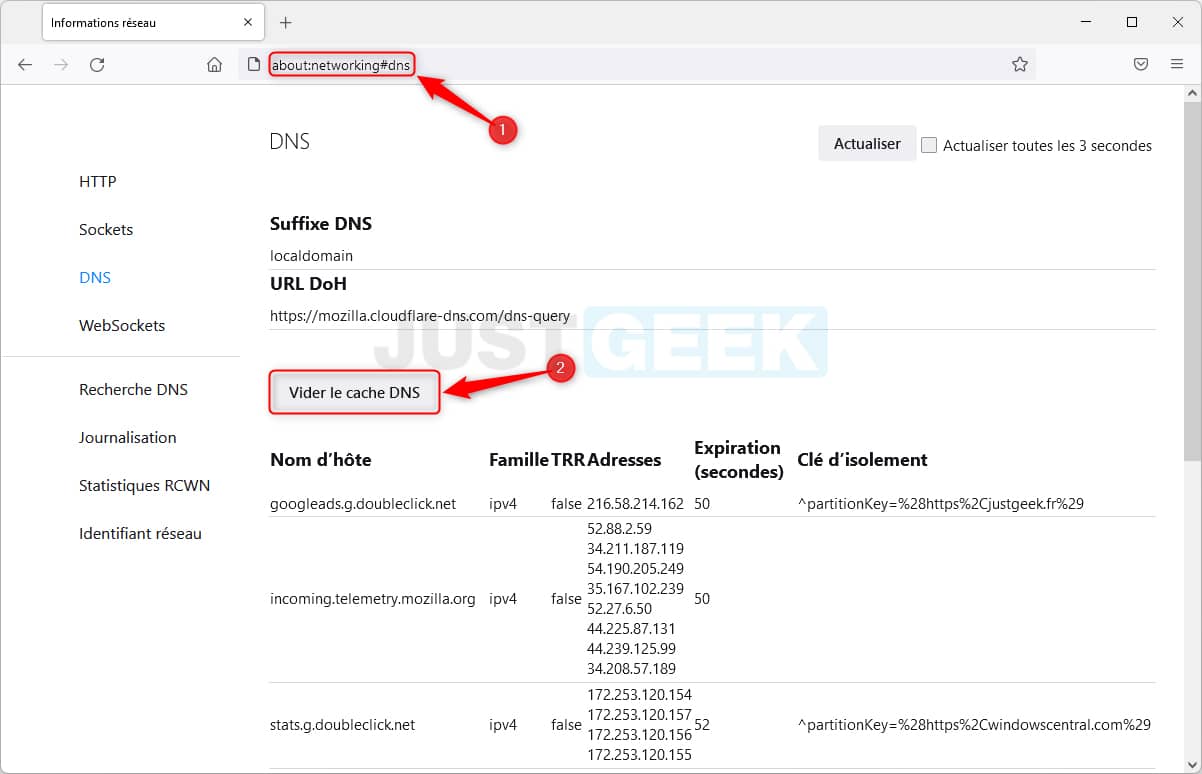
For clear the DNS cache in Firefox, the principle is the same as with the Chrome browser.
1. Open the Mozilla Firefox web browser on your computer.
2. Type or copy and paste the following URL into the address bar and press Entrance.
about: networking # dns
3. Finally, click on the ” Clear DNS cache To clear the DNS cache in Firefox.
Here you are, you now know the different methods to empty the DNS cache (DNS flush) on your Windows 11 PC. 😎


