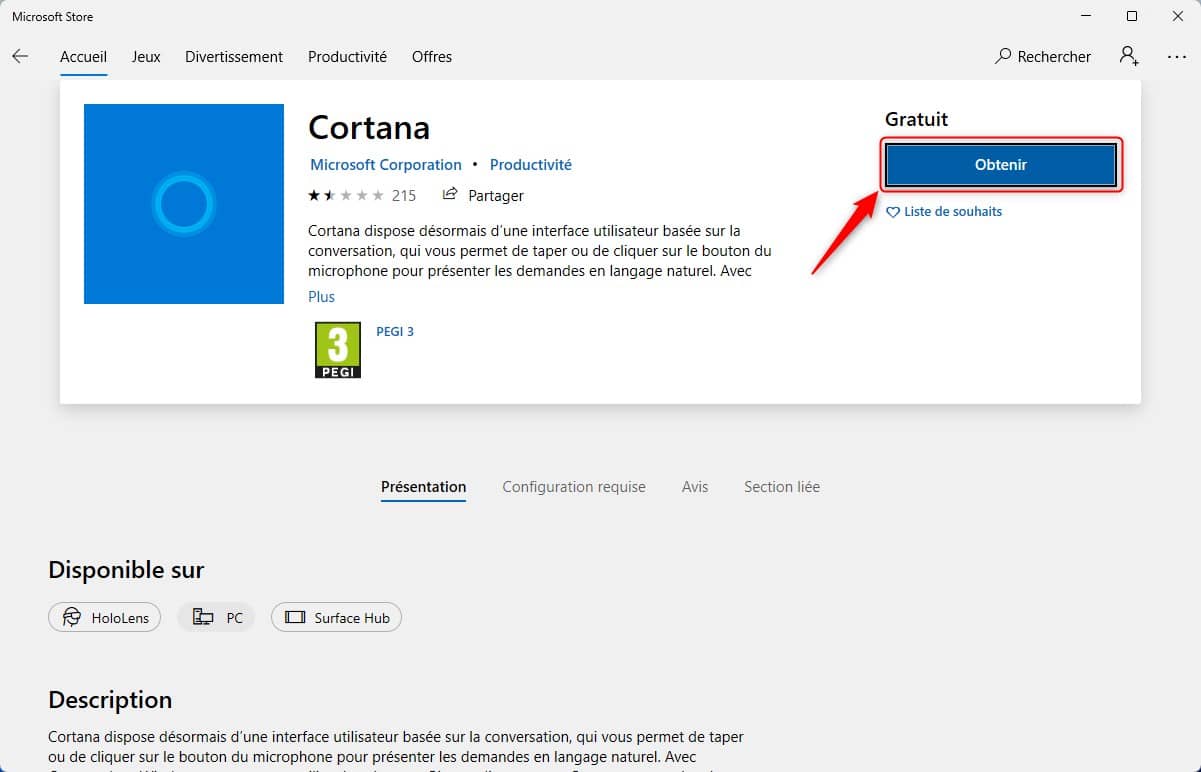
Microsoft’s digital assistant namely, Cortana is always installed by default in Windows 11. If for you this application does not have any use, well know that you can get rid of it very easily. In this article, we will see together how temporarily disable Cortana, but also how completely uninstall Cortana in Windows 11. Follow the guide !
Table of Contents
What is Cortana?
Cortana is Microsoft’s cloud-based virtual assistant that assists users with voice commands. For example, you can use Cortana to find files, folders, and apps. You can also use this digital assistant to set reminders, search the web, configure settings on your PC, and more.
However, Cortana is far from being unanimous among users. Indeed, the application has been widely criticized for its lack of confidentiality. It must be said that Cortana collects a lot of information about you: location, search history, emails, and so on.
The good news is that Microsoft has decided to remove Cortana from the startup experience and the taskbar in Windows 11. Cortana is no longer the default search engine in Windows 11, but just an application. However, Cortana is still installed by default and runs in the background in Windows 11, in the hope that one day it will be called …
If you don’t like Microsoft’s digital assistant, you can very easily disable the app or even completely uninstall Cortana in Windows 11. To do that, I invite you to follow the few steps below.
Disable Cortana on startup in Windows 11
By default, Cortana starts automatically when you start your Windows 11 session. If you want to prevent Cortana from running when Windows 11 starts, here’s how.
1. First, open Windows 11 settings by pressing the keys simultaneously Windows + I on your keyboard.
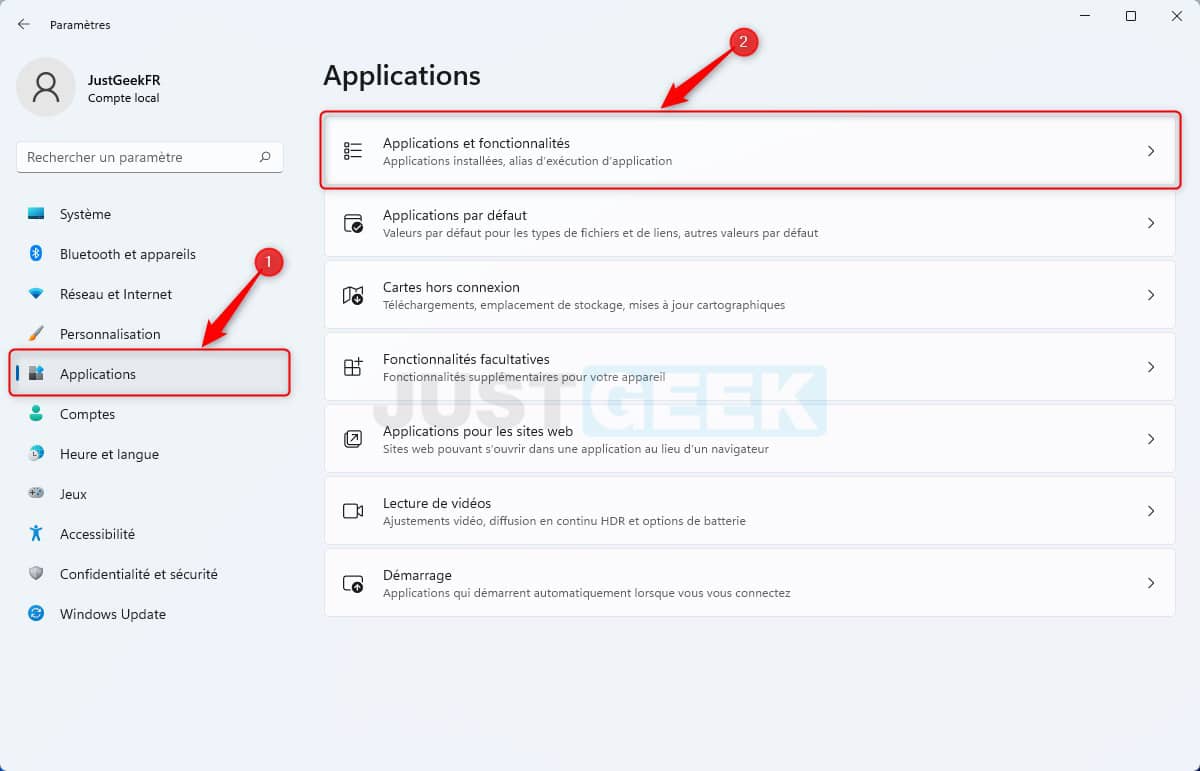
2. Then go to ” Applications “, Then click” Applications and Features “.
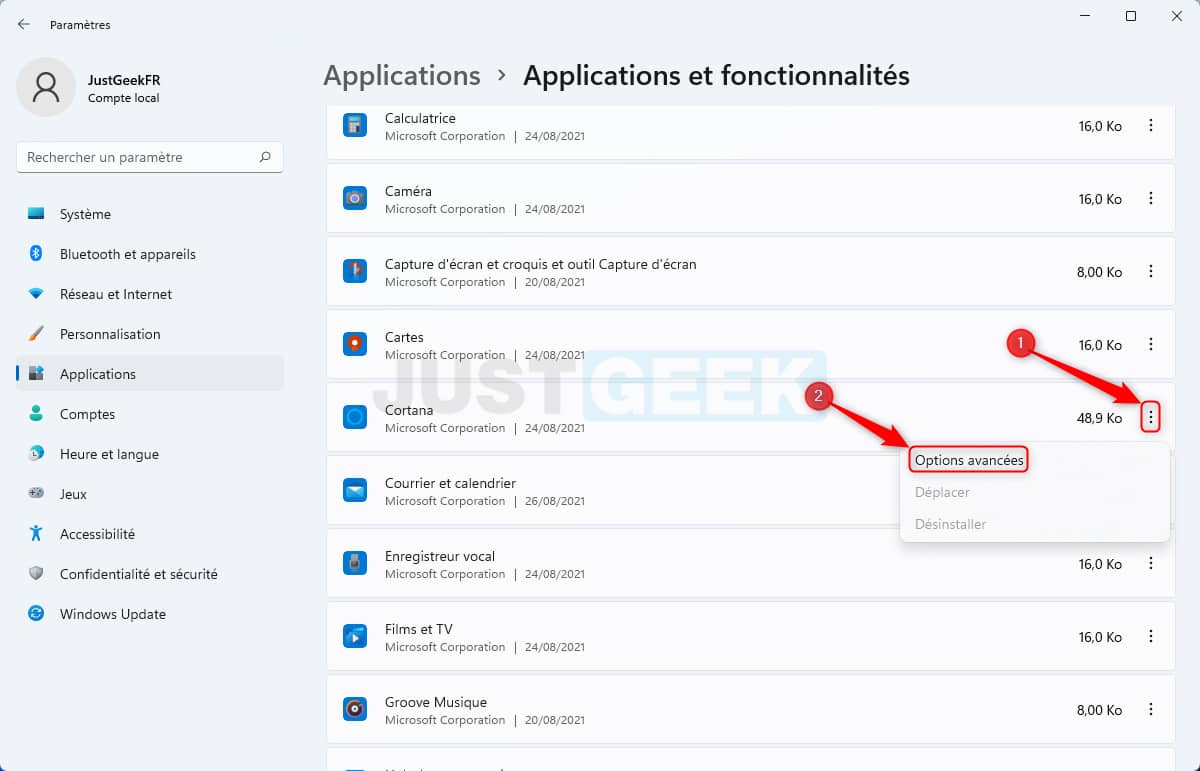
3. From the section ” Applications and Features “, Scroll through the list of applications, then click on the three-dot menu next to the” application ” Cortana “And select” Advanced options “.
4. Finally, under ” Runs on login “, Flip the switch to” Deactivated “. Restart your computer to confirm the changes.
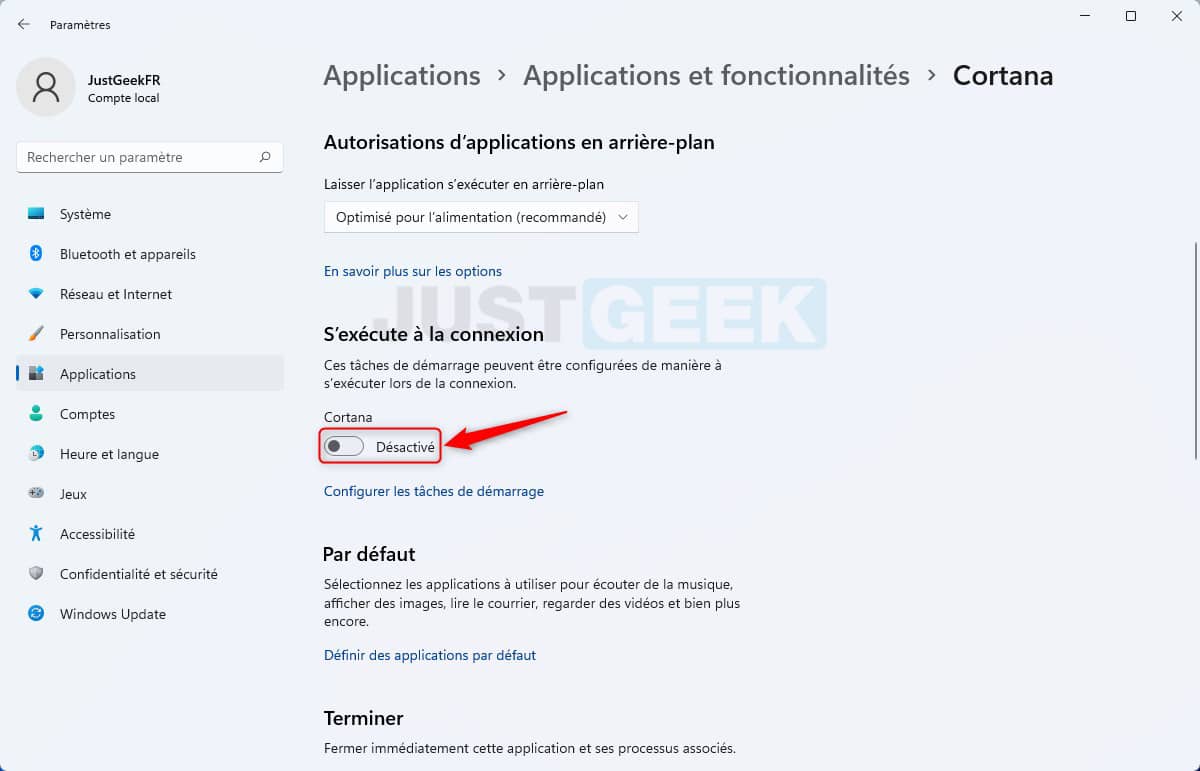
✅ The Cortana app is now disabled when you start your PC.
Uninstall Cortana from Windows 11
Although Cortana is now just an app, Microsoft still doesn’t allow uninstallation like other native apps. However, you can permanently remove Cortana from Windows 11 using a command to run in Windows PowerShell.
For uninstall Cortana from your Windows 11 PC, do the following:
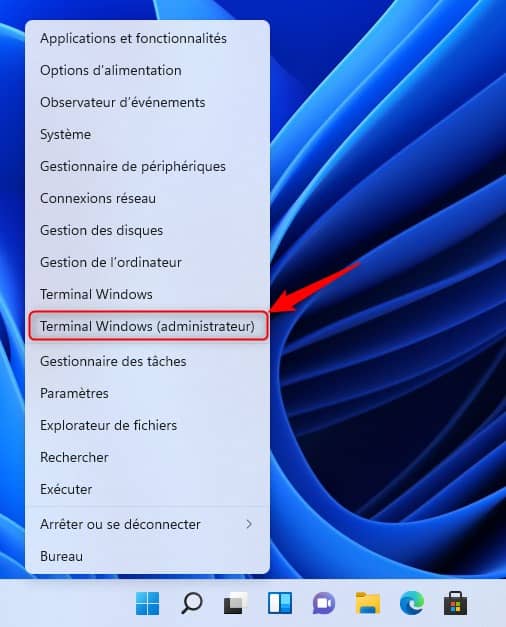
1. Start by opening Windows PowerShell. To do this, make a right click on the start menu Windows 11, then select ” Windows Terminal (administrator) In the context menu.
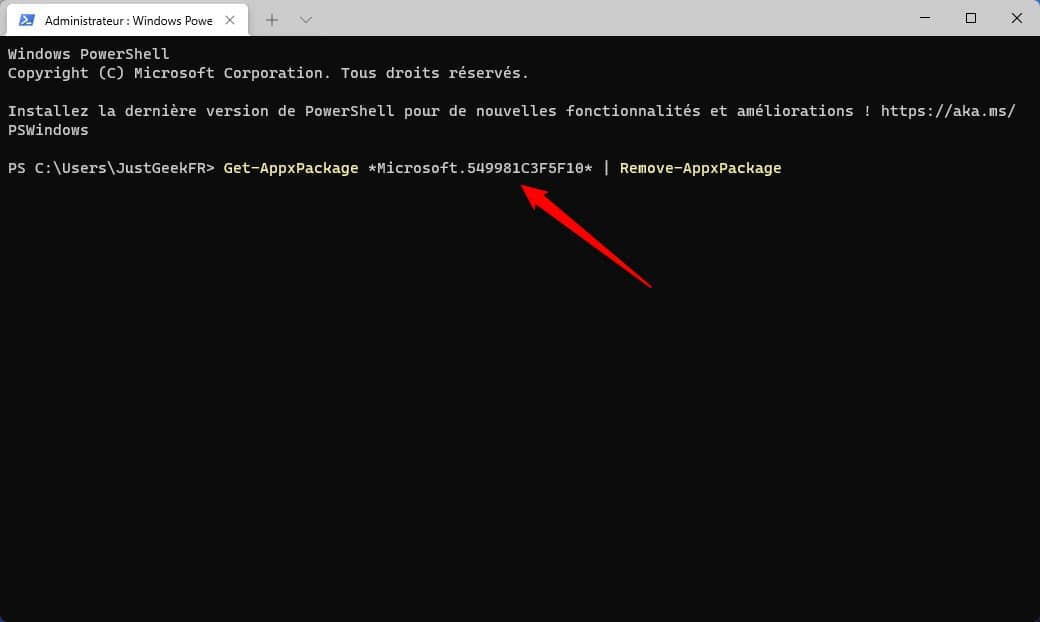
2. To uninstall Cortana only for the current user, copy and paste the following command and press Entrance.
Get-AppxPackage * Microsoft.549981C3F5F10 * | Remove-AppxPackage
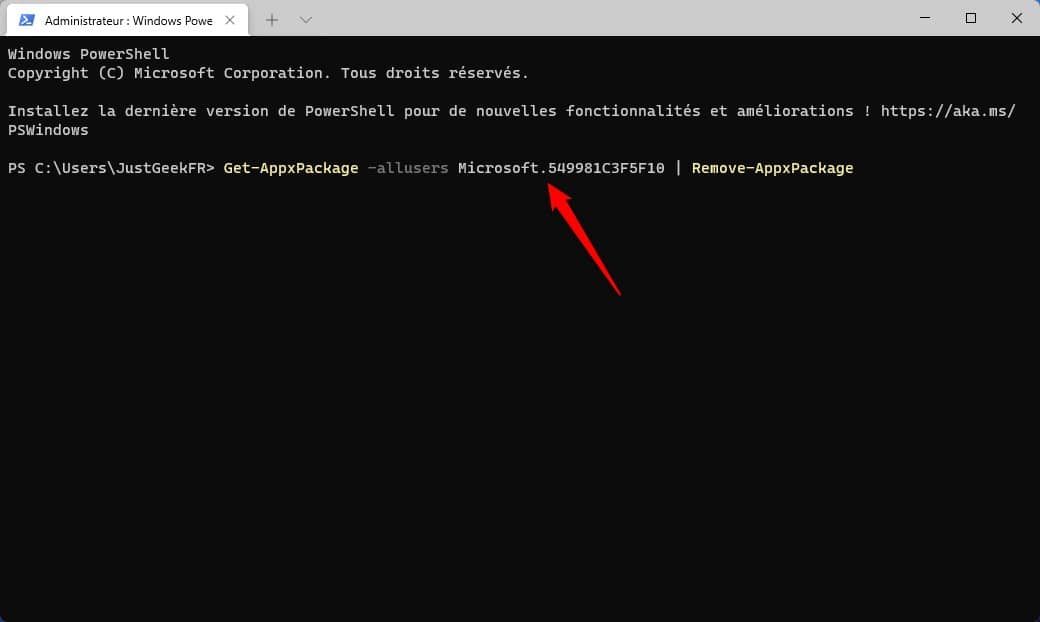
3. To remove Cortana for all users, enter the following command and press Entrance.
Get-AppxPackage -allusers Microsoft.549981C3F5F10 | Remove-AppxPackage
✅ Cortana is now uninstalled from your Windows 11 PC.
If for some reason or another you want to reinstall Cortana on your Windows 11 PC, I invite you to follow the few steps below:
1. Start with open the Microsoft Store.
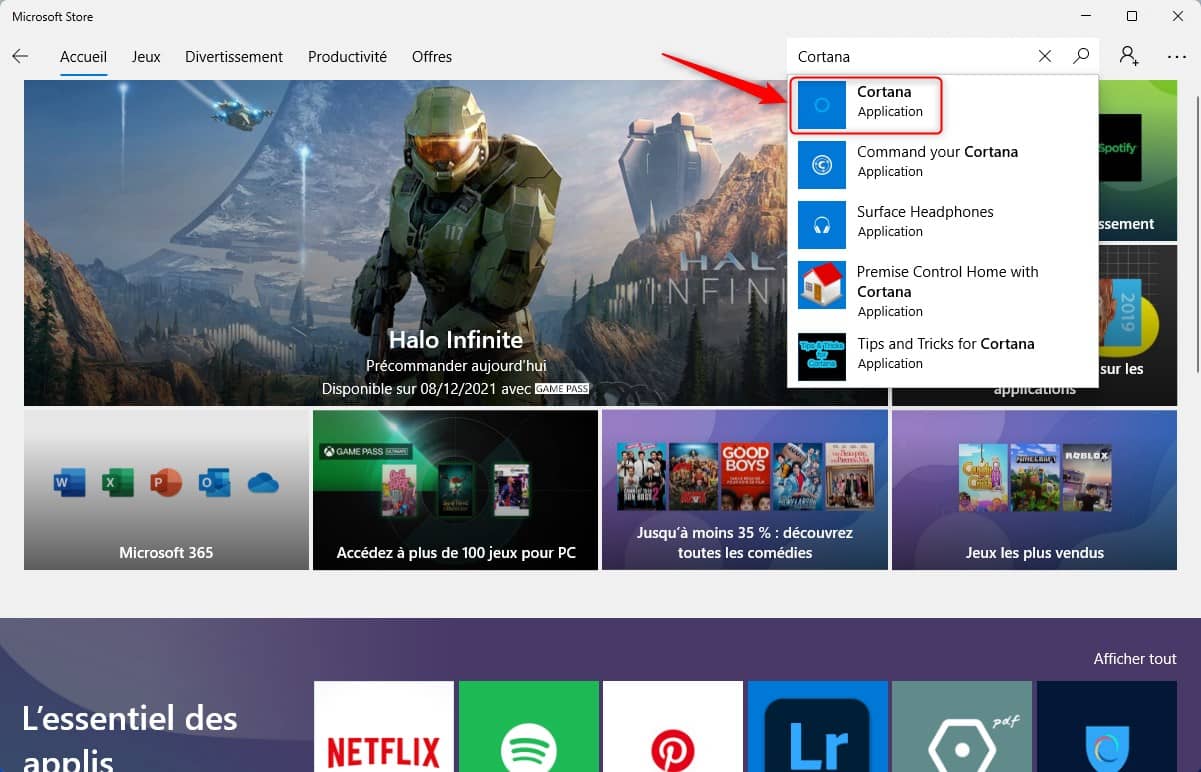
2. In the Microsoft Store, search for ” Cortana In the search box and select the Cortana app from the search results. Also, you can also go directly to the Cortana download page.
3. Finally, click on the ” Get Or “Free” on the Cortana page. Wait for the app to download and install. Once the digital assistant is installed, you can use it again.
