Today we will show you how to make a photo collage in Photoshop. This is a simple tutorial for creating a messy Polaroid-like photo collage. Read on to follow the tutorial steps.
Table of Contents
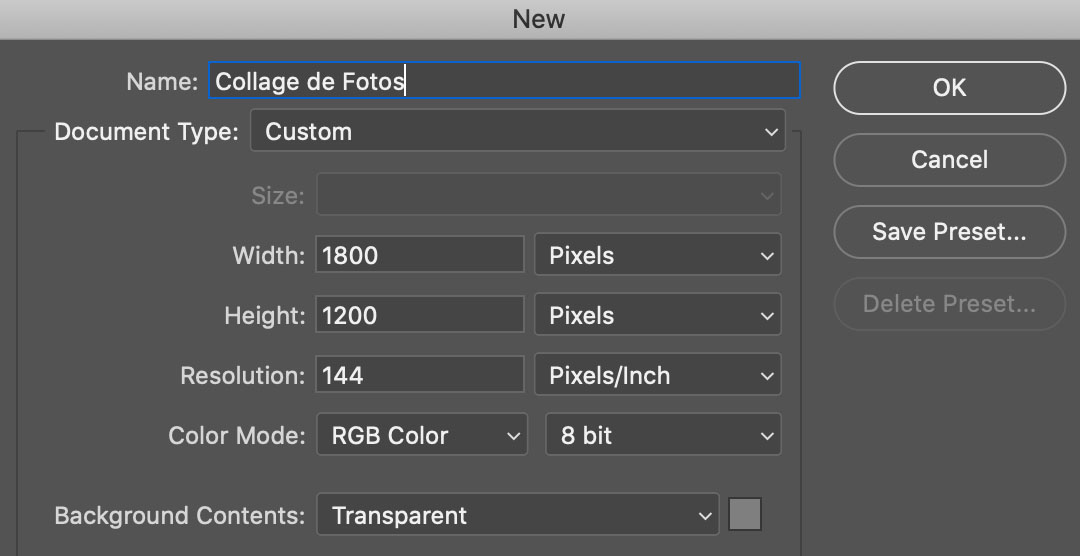
1. Create new file
In this case, we are creating a file of 1800px by 1200px with transparent background in Photoshop.
2. Make the photo frame
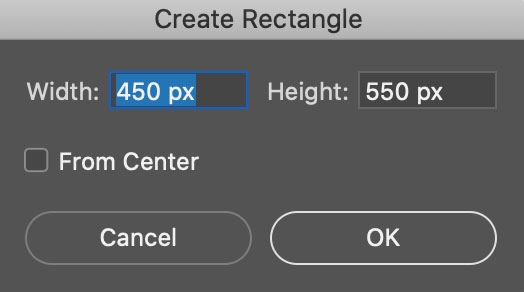
We are going to make the photo frame Polaroid style. So let’s use the Rectangle Tool (Rectangle Tool). We define the fill as white (#ffffff) and without border.

We click on any point on our canvas and define a 450px width Y 550px height.
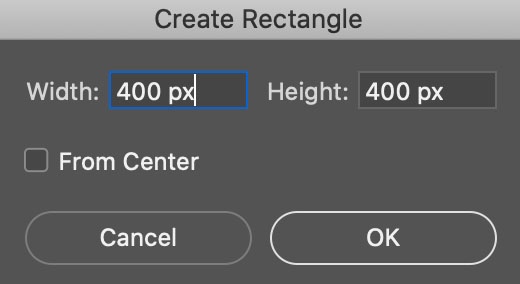
We are going to create another rectangle, clicking on any point and defining a 400px width Y 400px height. This time, the background color will be black (# 000000).

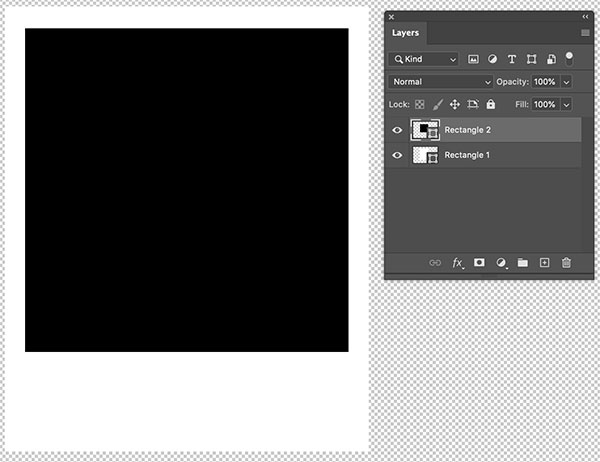
Then we can move the rectangles with the Move Tool (Move Tool), and place them as follows. It can be useful to know how to center elements.
3. Place a photo inside the frame
Now that we have the photo frame, we only have to put a photo inside.
To do this we are going to paste the photo we want on top of the layers. And we will give right click> Create Clipping Mask (Create Clipping Mask). This clipping mask takes care of cropping the photo in the shape of the black rectangle.
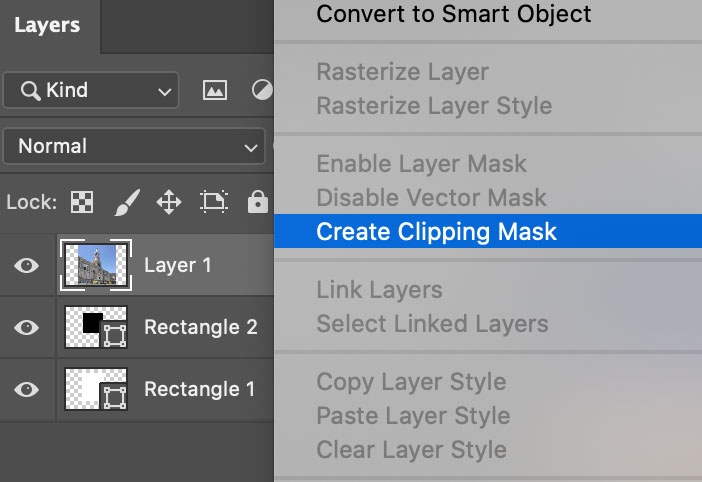
With Control + T (Command + T) we can adjust the photo to the appropriate size. Small dots will appear in the corners that we can drag to make the photo smaller. When we finish we give enter.
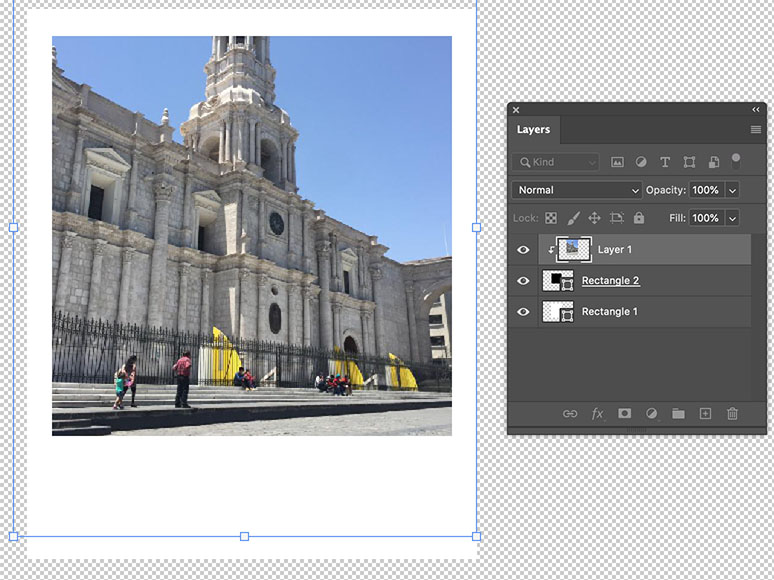
Note: The little arrow on the photo layer indicates that it is a clipping mask.
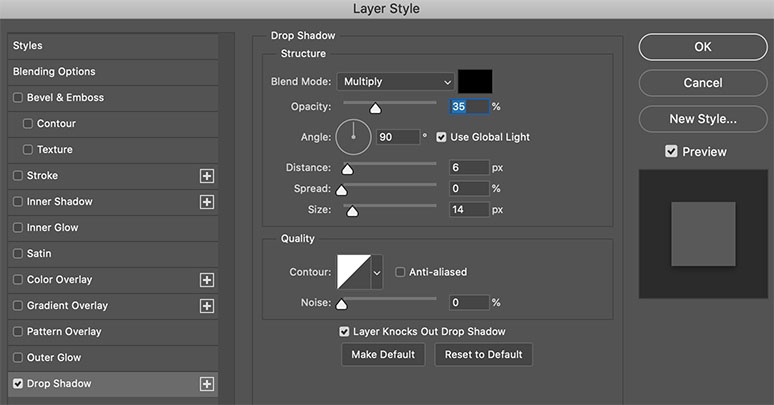
We will select the 3 layers and we will Layers> Group Layers, or just Control + G (Command + G). In addition, we are going to give the polaroid a little shadow, so we double-click the group of layers and put Drop Shadow with these parameters:
4. Make the photo collage
Now the fun part!
We will go making the collage by copying the polaroid photo over and over again. To do this we select the group of layers that we created, We use the Move Tool and holding Alt (Option) we drag to create a copy. This is how we do it over and over again.
We can make a neat collage or maybe a little messy. In this case, we have chosen to make it a bit messy. It would be like this:
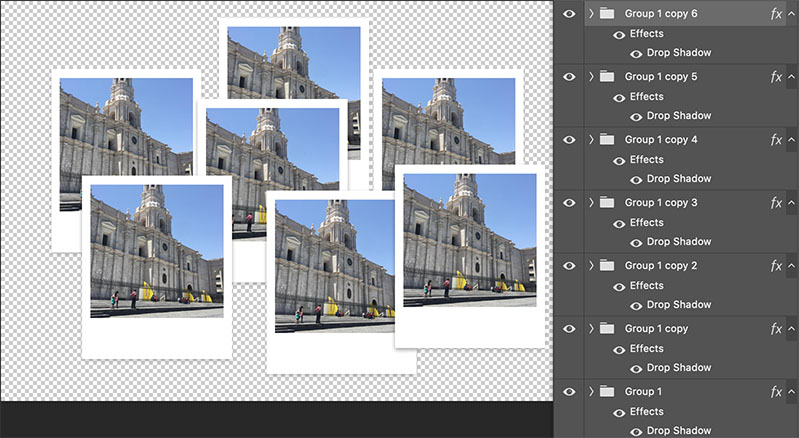
Now you have realized that we have a photo collage of the same photo. Do not worry!
To change the photos, we must go to each group of layers, put ourselves on the black rectangle layer and paste our new photo. You will see that the new photo also has the clipping mask arrow. Now we only delete the previous photo.
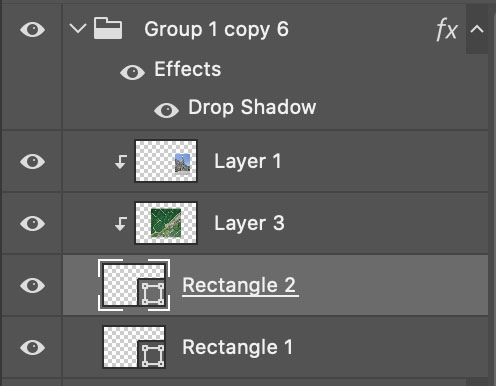
We must do this for each photo to change them. Don’t forget that with Control + T (Command + T) you can make your photos smaller and move them to fit the frame.
Final score
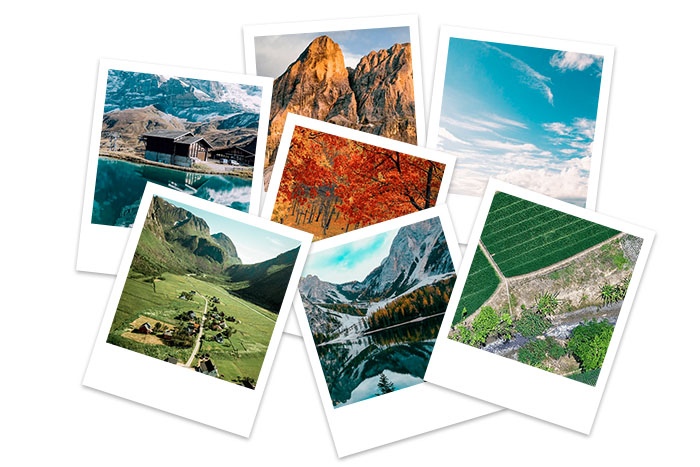
After changing the photos, the final result will be as follows:

If you want, you can rotate or rotate the polaroids a bit to have a more messy effect, something like this:
If you have any questions, please leave us a comment so we can help you.
You might also be interested …

How to blur in Photoshop: parts and the whole image

How to change in Photoshop from RGB to CMYK?

How to create a clipping mask in Photoshop?

How to add outline for stickers in Photoshop?

How to Crop an Image in Photoshop


