You wish install Windows 10 on your Mac using a virtual machine? You are in the right place ! In this article we will see together how to install Windows 10 on Mac using free virtualization software VirtualBox. Let’s go !
Table of Contents
What is a virtual machine (VM)?
Rather than going into details, here is a simple and easy to understand definition. A virtual machine is a computer within a computer built from virtualization software like VirtualBox or VMware. This makes it possible to run any operating system (OS) in a mundane software window on your current system. To do this, the virtual machine uses the power of your physical computer to function as a full-fledged computer.
Install VirtualBox on macOS
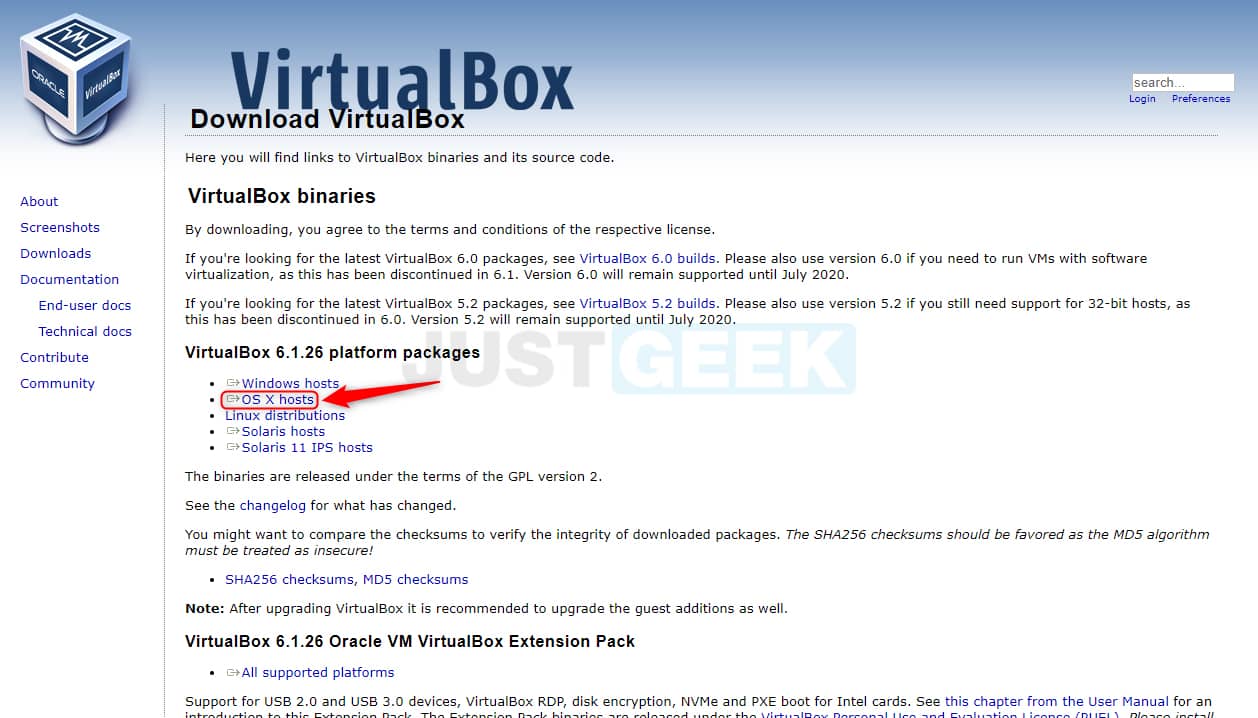
1. First, download VirtualBox for Mac from the developer’s official website. To do this, click on the link ” OS X hosts “.
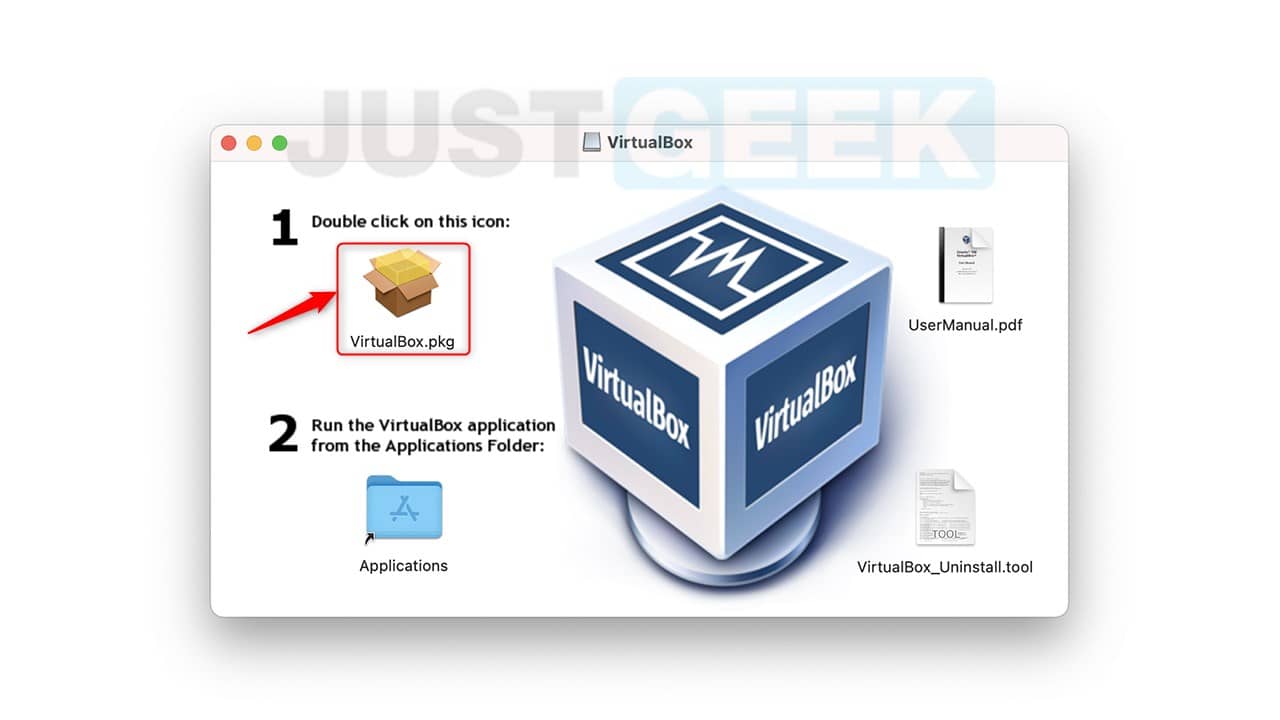
2. Open the file VirtualBox-OSX.dmg, then double-click on ” VirtualBox.pkg To start the installation process.
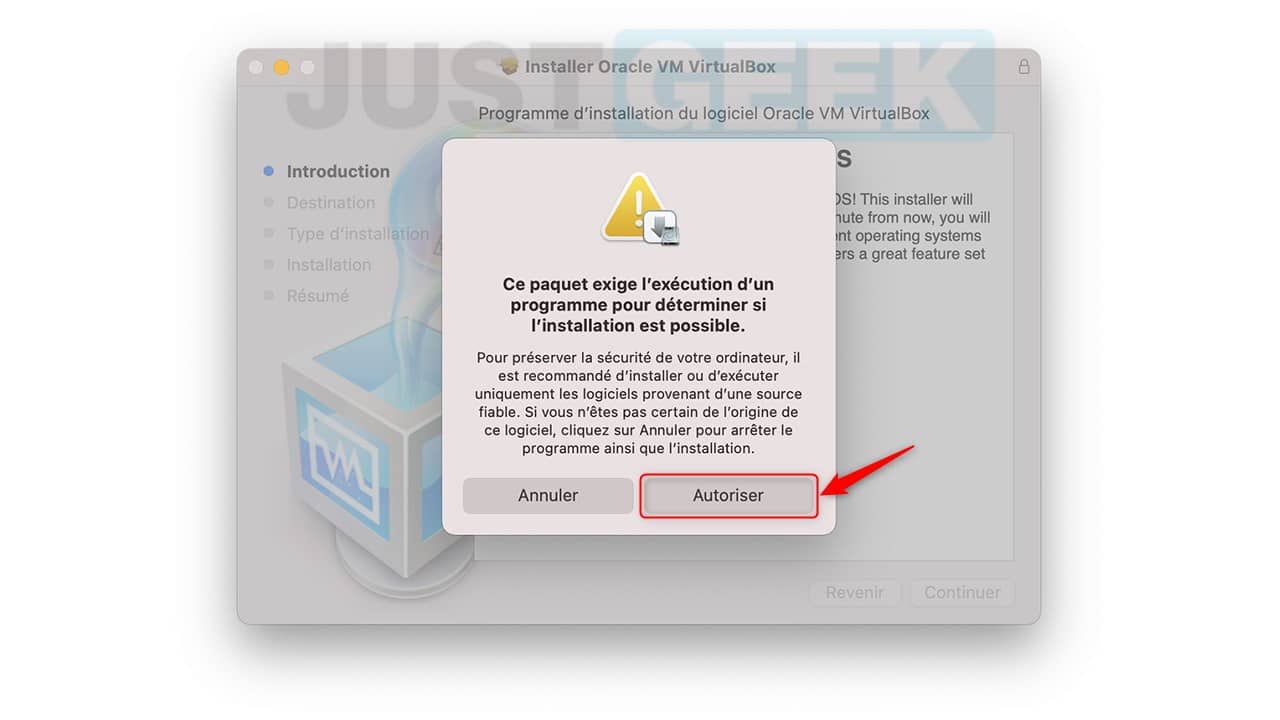
3. A security message will then be displayed, click on ” To allow To continue installing VirtualBox on Mac.
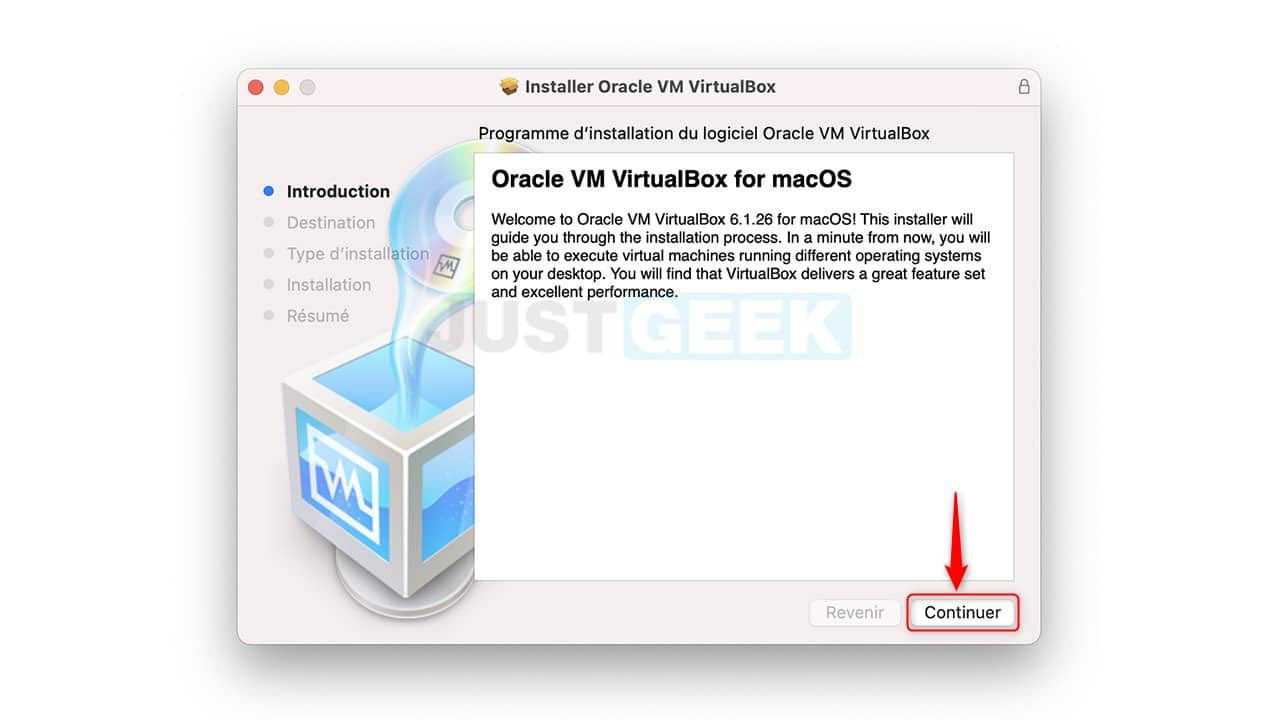
4. Then click on ” To continue “.
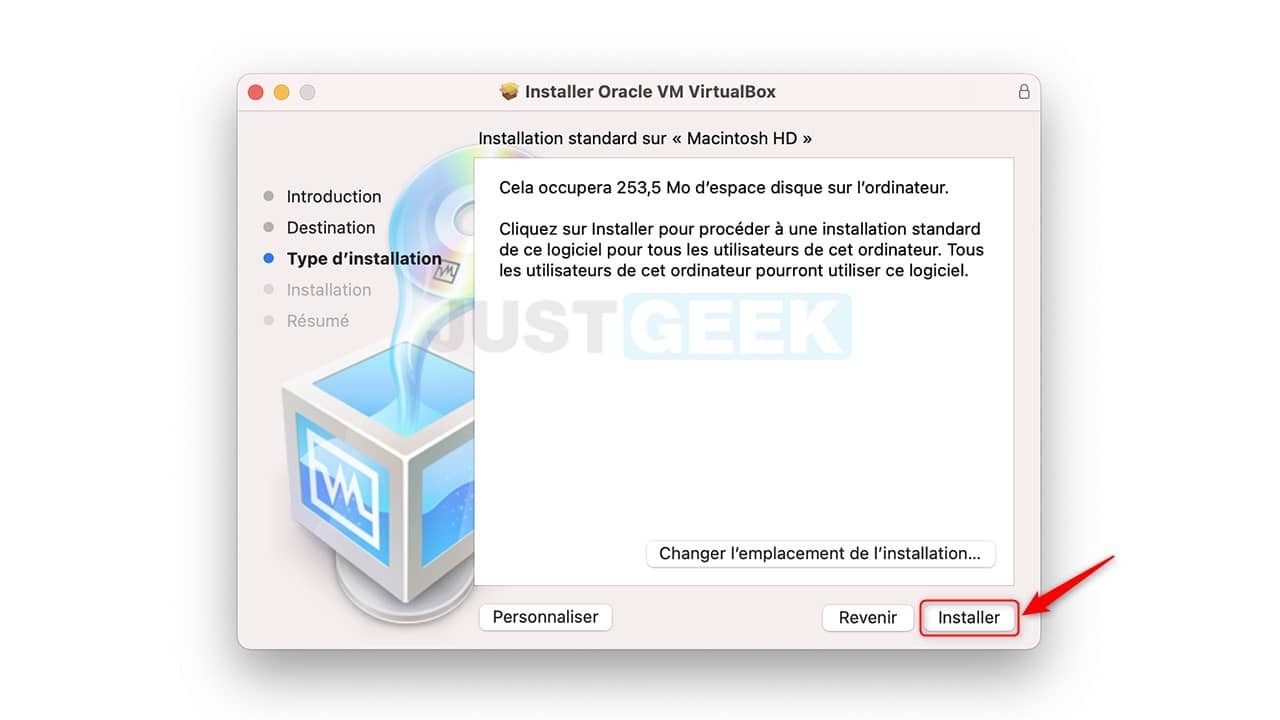
5. From there you can change the location of the VirtualBox installation (optional), then click ” To install “.
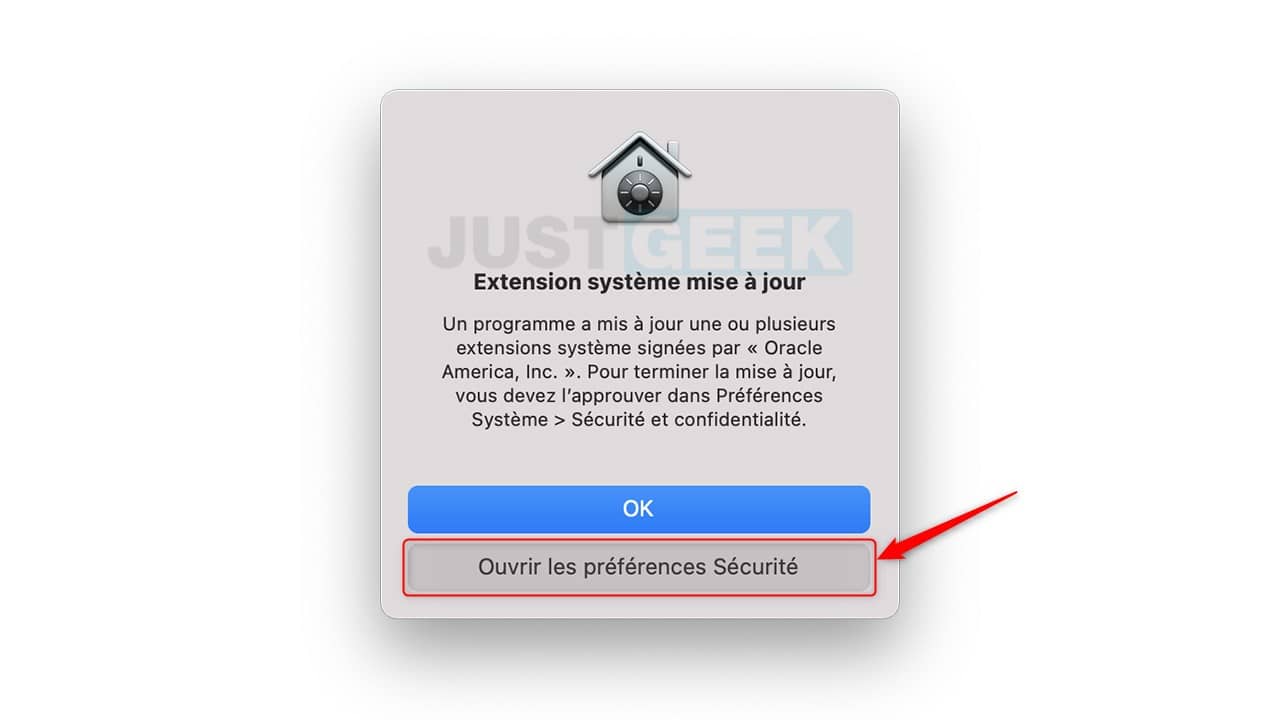
6. A new security message will appear, click on ” Open Security preferences “.
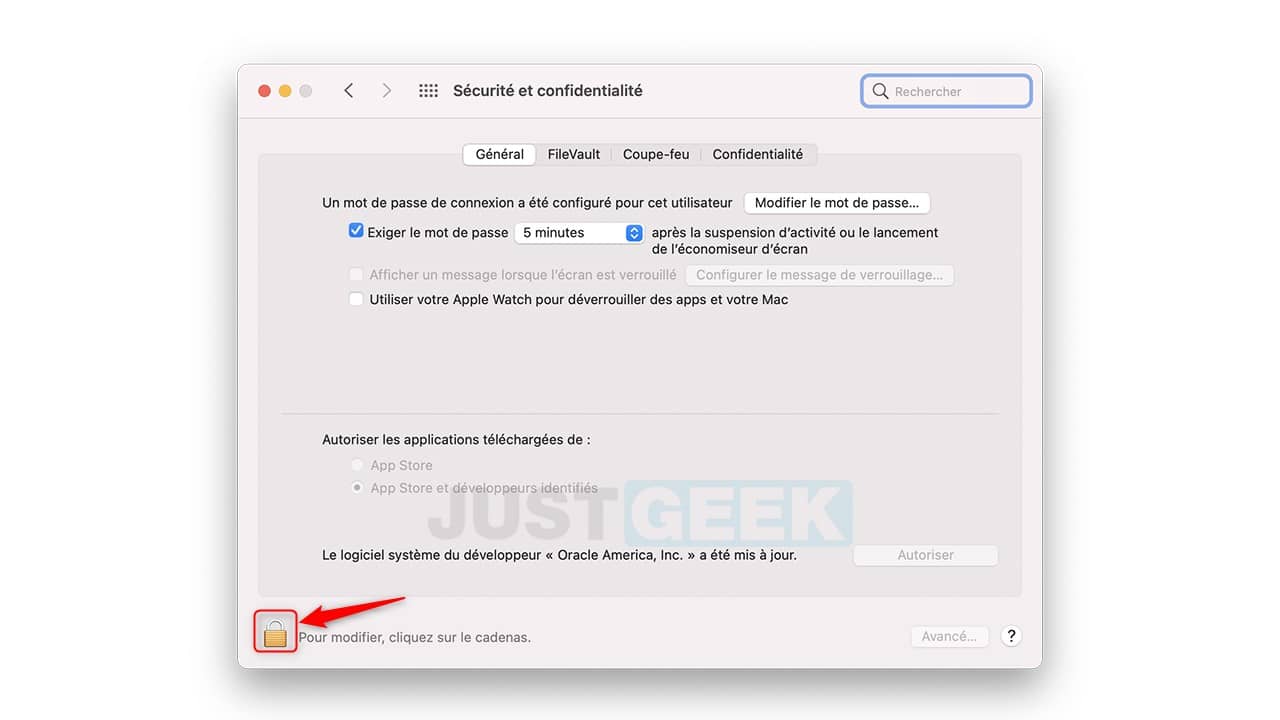
7. Then click on the small padlock located at the bottom left of the window ” Security and confidentiality “.
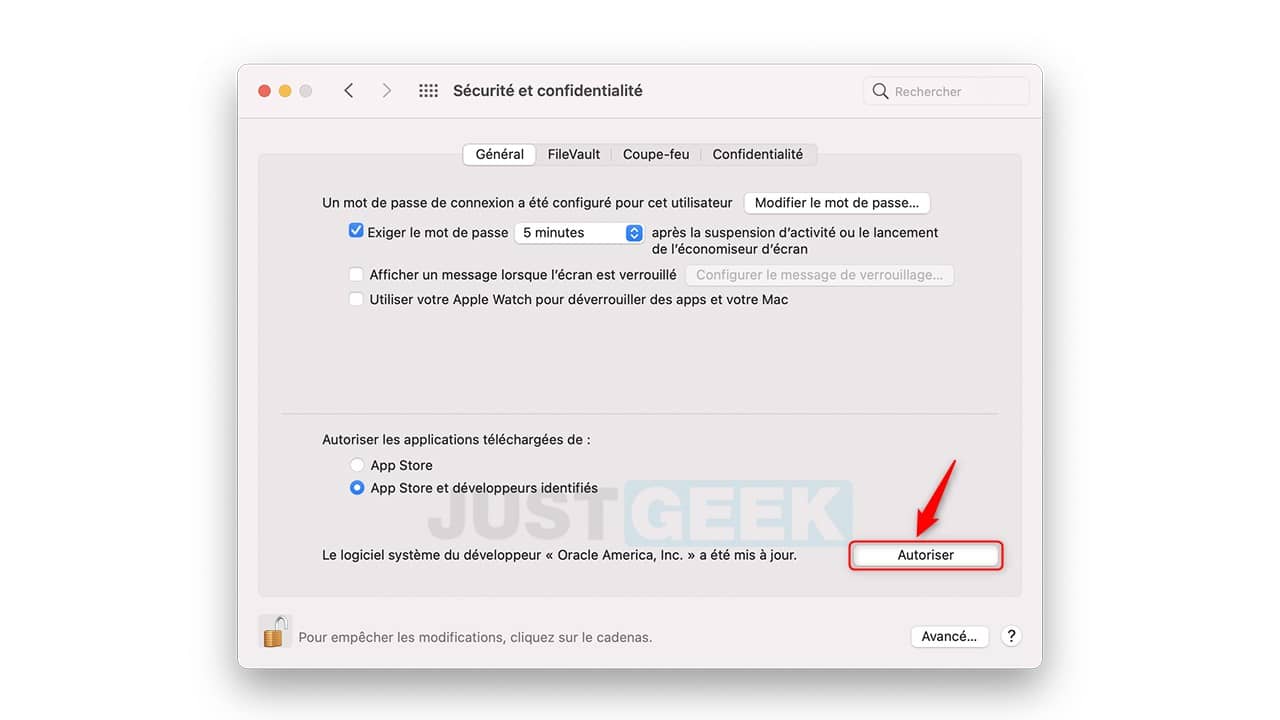
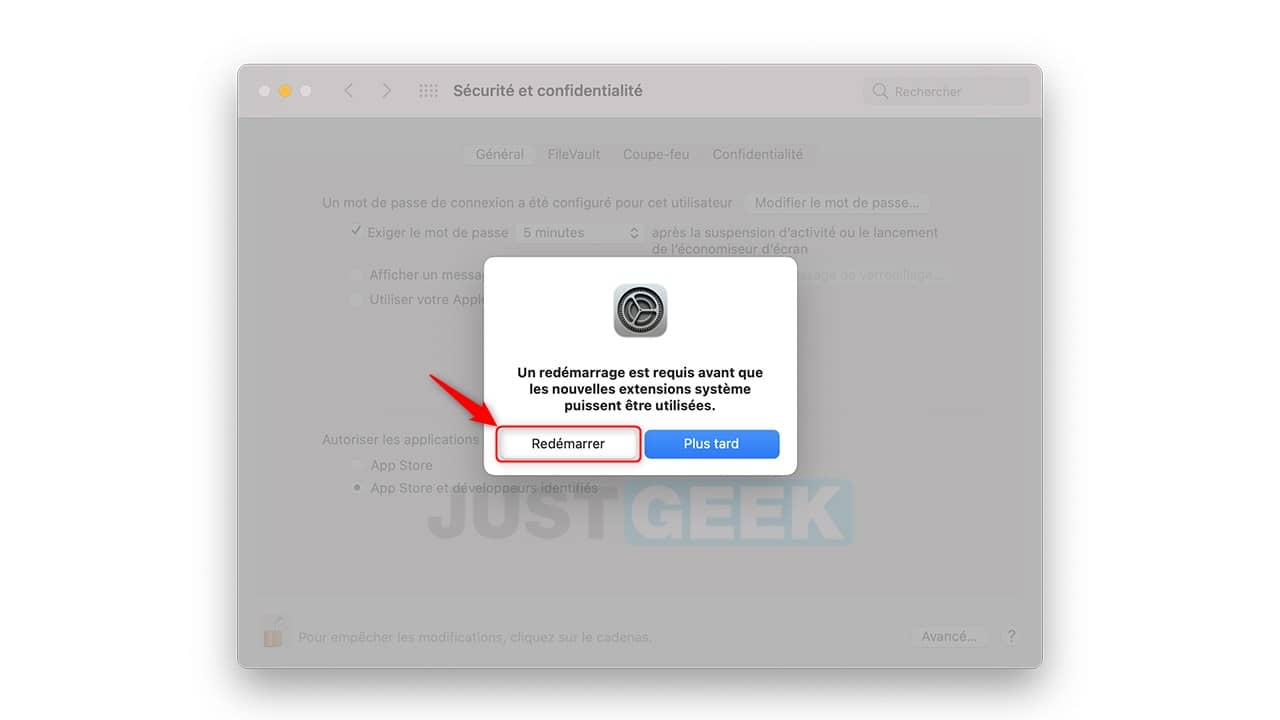
8. Then, click on ” To allow To authorize the installation of the software.
9. Finally, click on ” To restart To finish installing VirtualBox.
✅ Now that the VirtualBox virtualization software is installed on your Mac, we will proceed to install Windows 10 in a virtual machine.
Install Windows 10 on your Mac with VirtualBox
1. Open Virtual Box (via the “Applications” folder or via the Launcher).
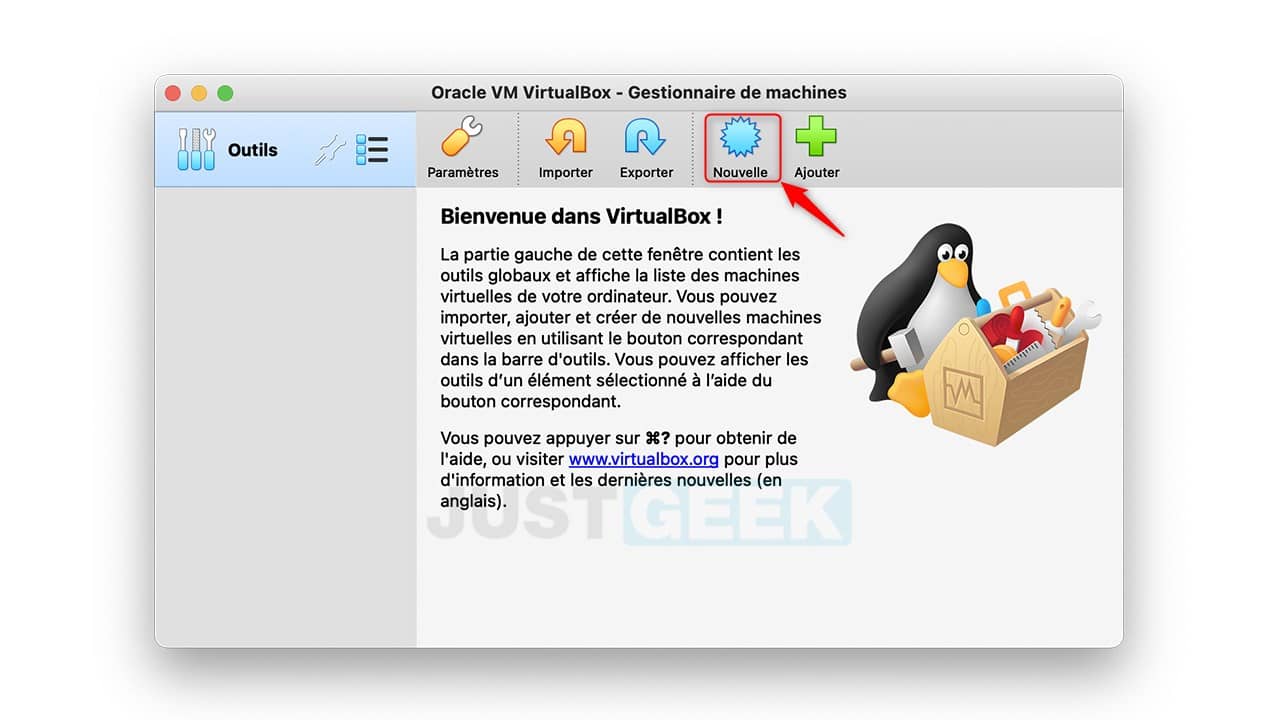
2. In VirtualBox, click on ” News “.
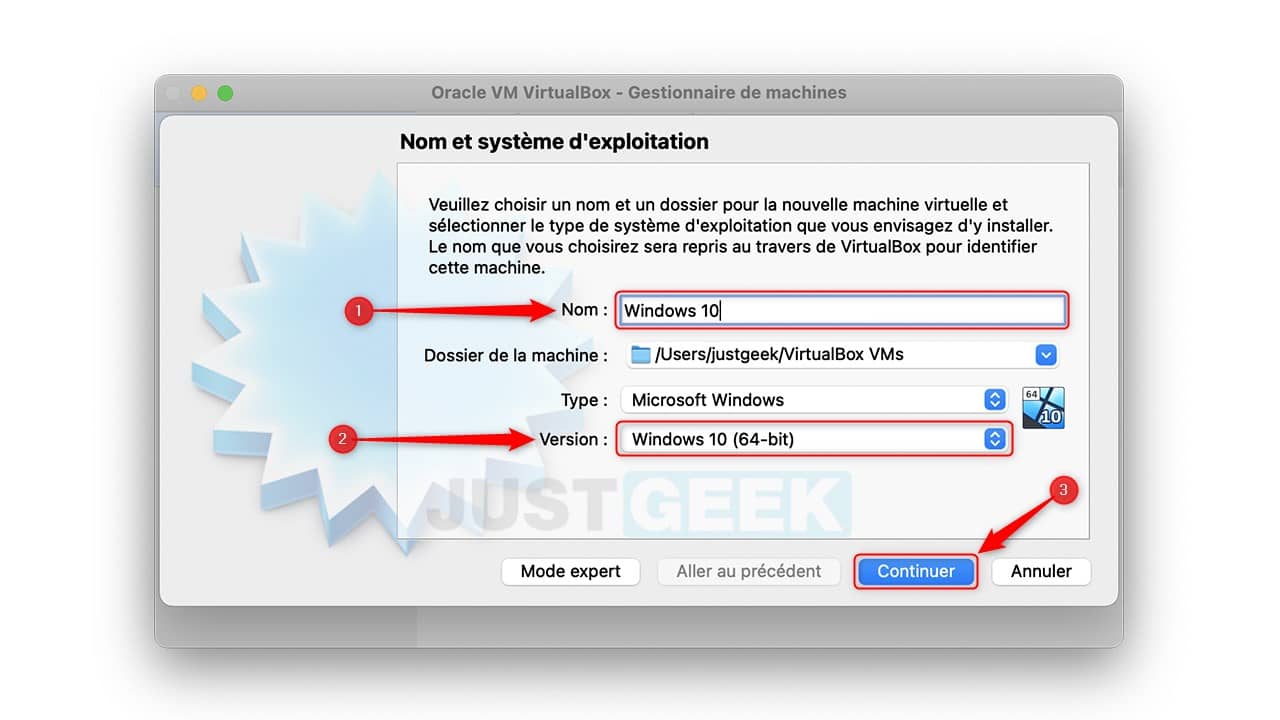
3. Choose a name for your virtual machine. If you enter for example “Windows 10”, the “Version” field automatically switches to this operating system. Note that you can choose another “machine folder” to store your virtual machines.
Then click on ” To continue “.
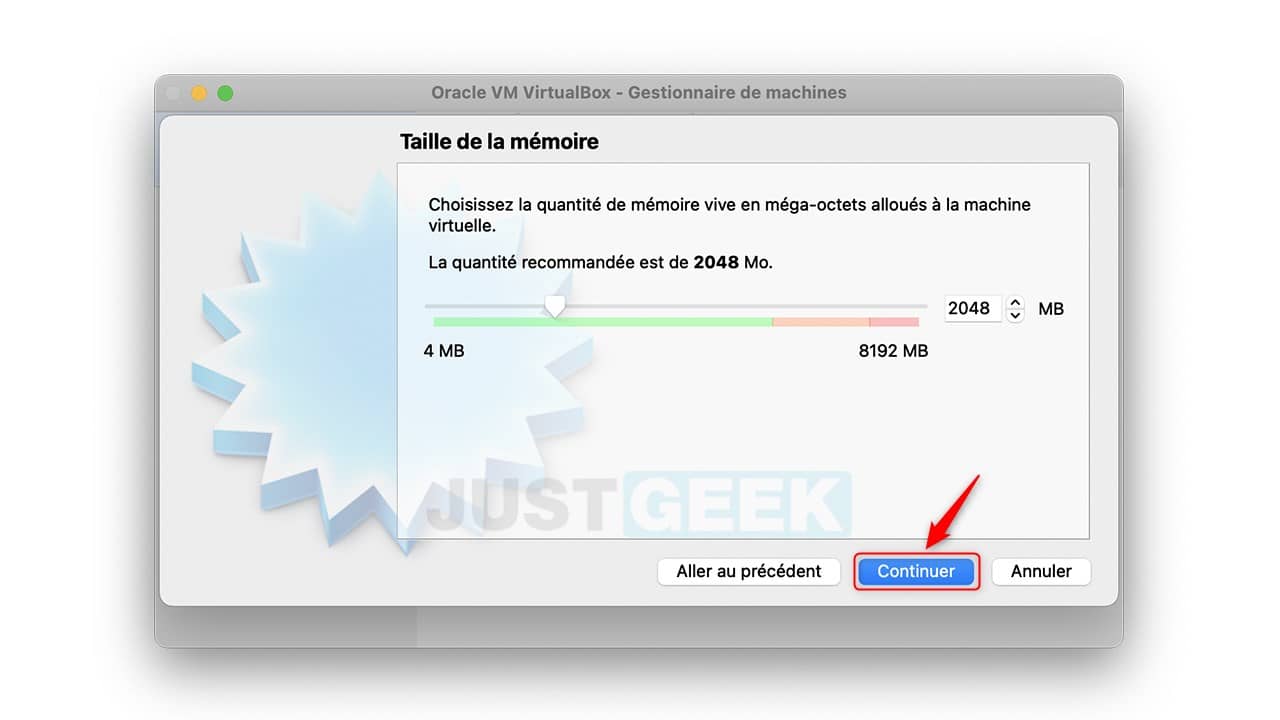
4. At this step, you can choose the amount of RAM (random access memory) you want to allocate to your virtual machine, then click ” To continue “. The choice of this setting depends on the RAM installed on your Mac. Don’t choose too high a value as your Mac will have a hard time keeping up. The default recommendation is 2048MB, which is sufficient to run most applications. If that’s not enough, you can always change this setting later.
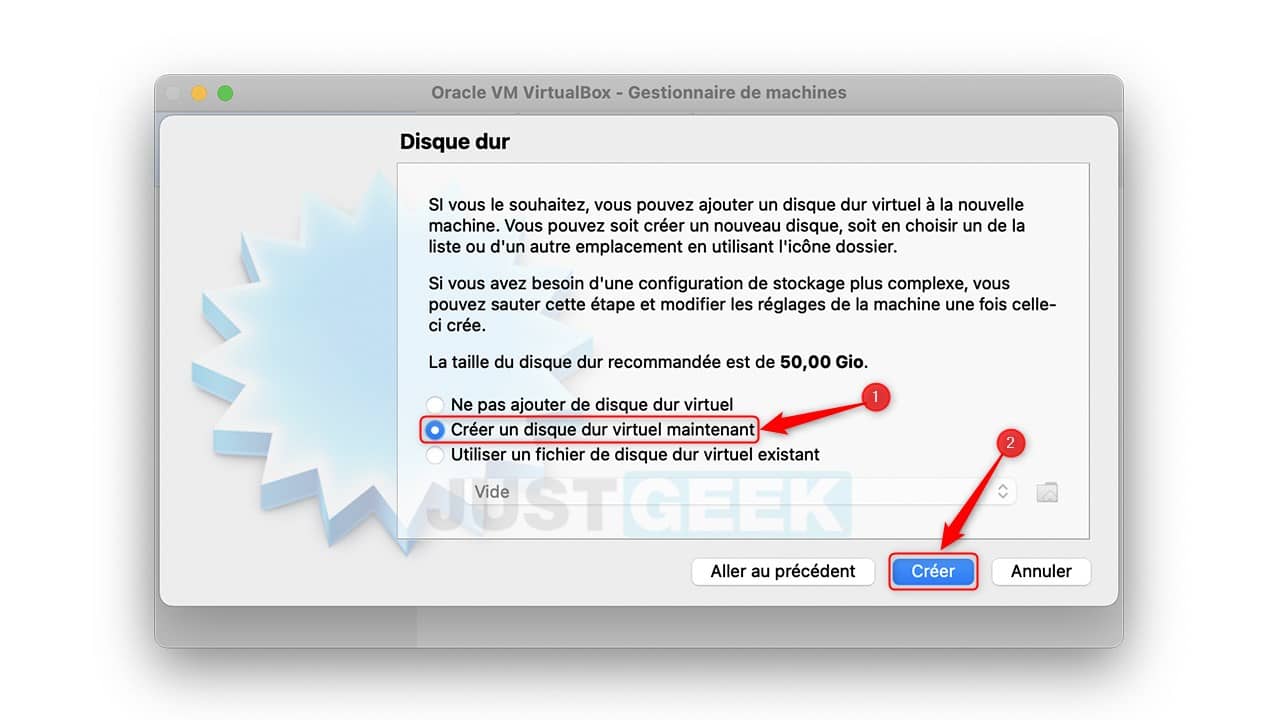
5. Now you have the option to add a virtual hard disk to your virtual machine. To do this, check the box ” Create virtual disk now “, Then click” To create “.
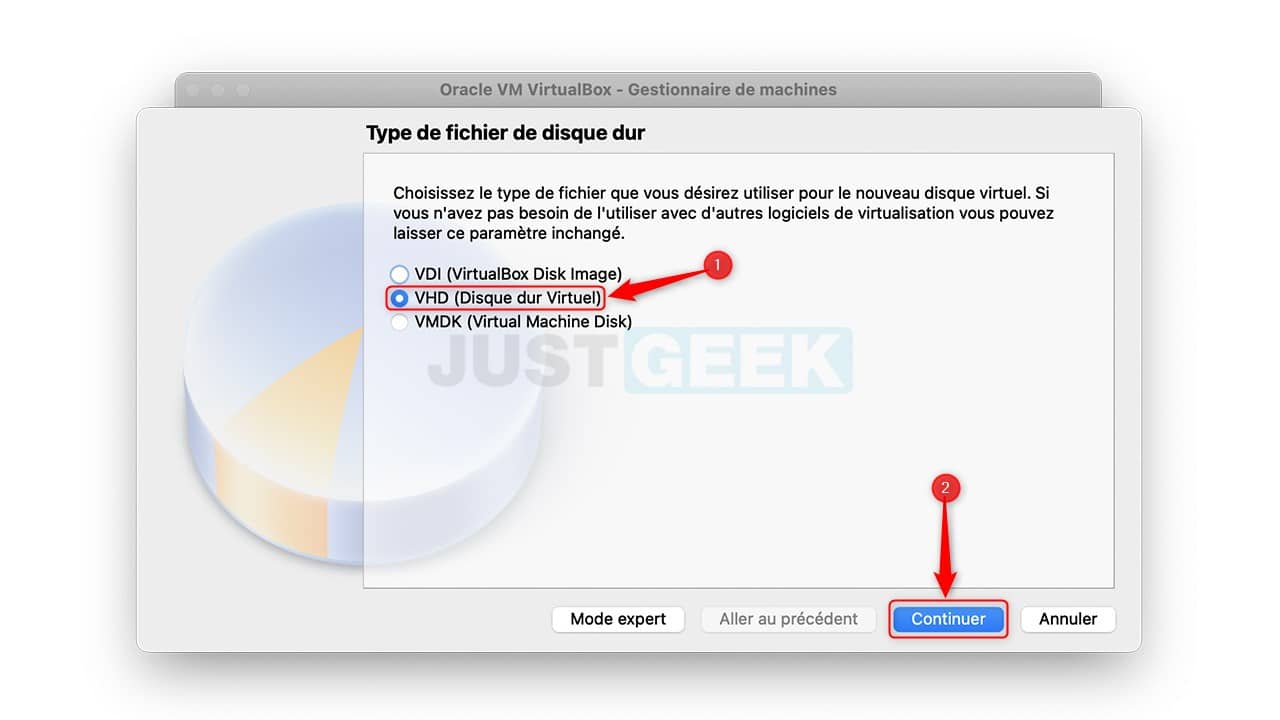
6. Then choose the type of file you want to use for the virtual disk. The default is “VDI (VirtualBox Disk Image)”, which is Oracle’s proprietary container format. However, since you are installing a Microsoft product, you must choose the format used by Windows 10 namely ” VHD (Virtual Hard Disk) “, Then click” To continue “.
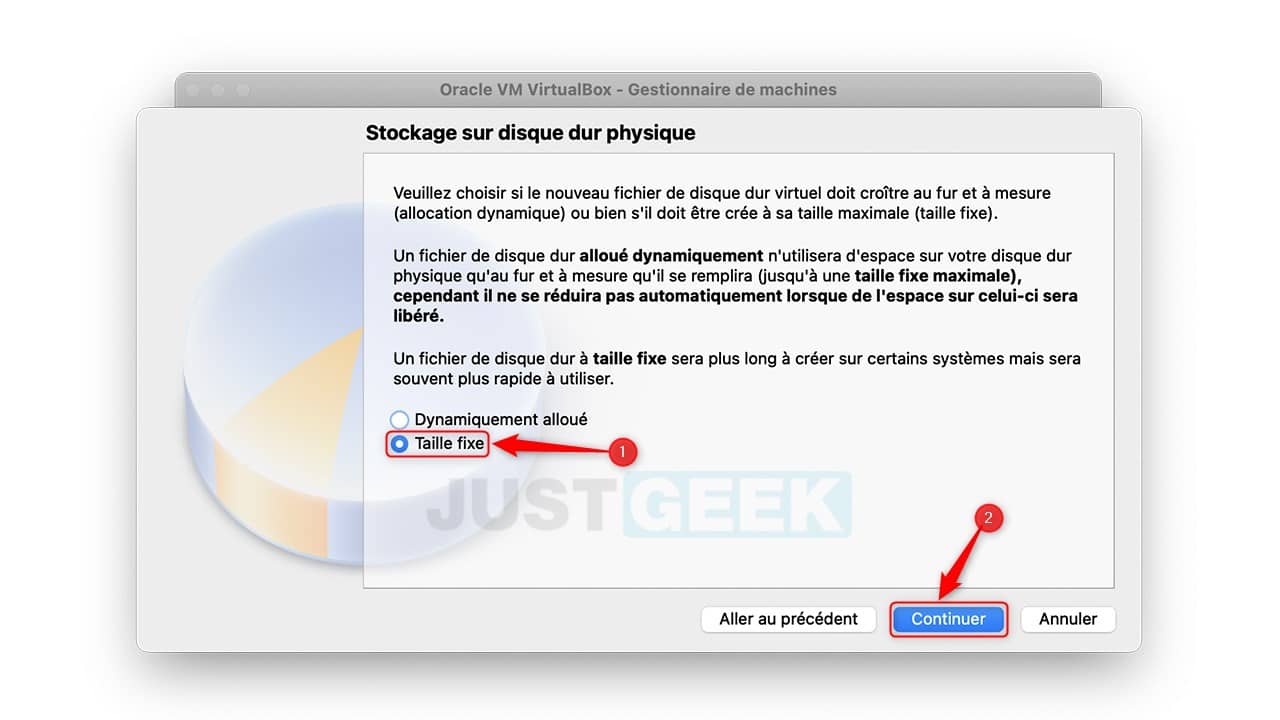
7. Then click on ” Fixed size “, Then on” To continue “.
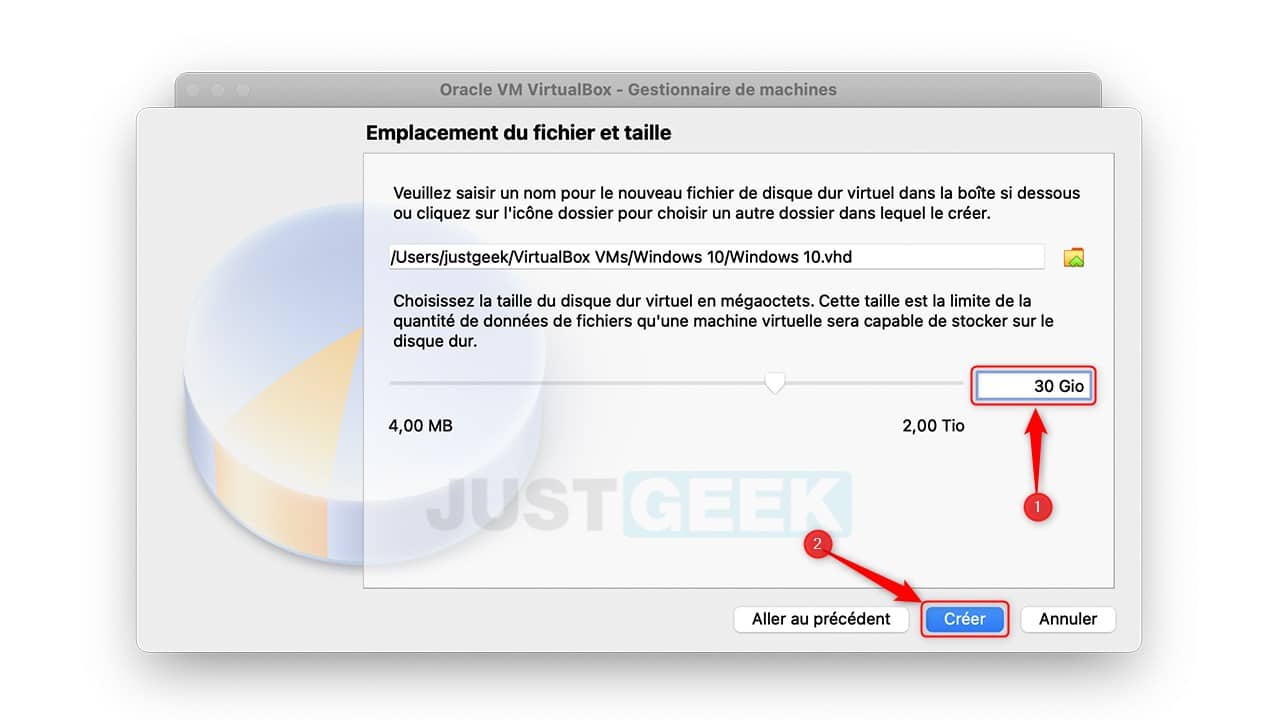
8. Set the size of your virtual hard drive. If you plan to install a lot of apps, leave the recommended default of 50 GB, then click on ” To create “. On the other hand, if you just want to test Windows 10 on your Mac and install a small amount of software, you can lower that value.
9. There you have it, your Windows 10 virtual machine is now installed in VirtualBox. Now download the Windows 10 ISO image, then go back to VirtualBox to click ” Configuration “.
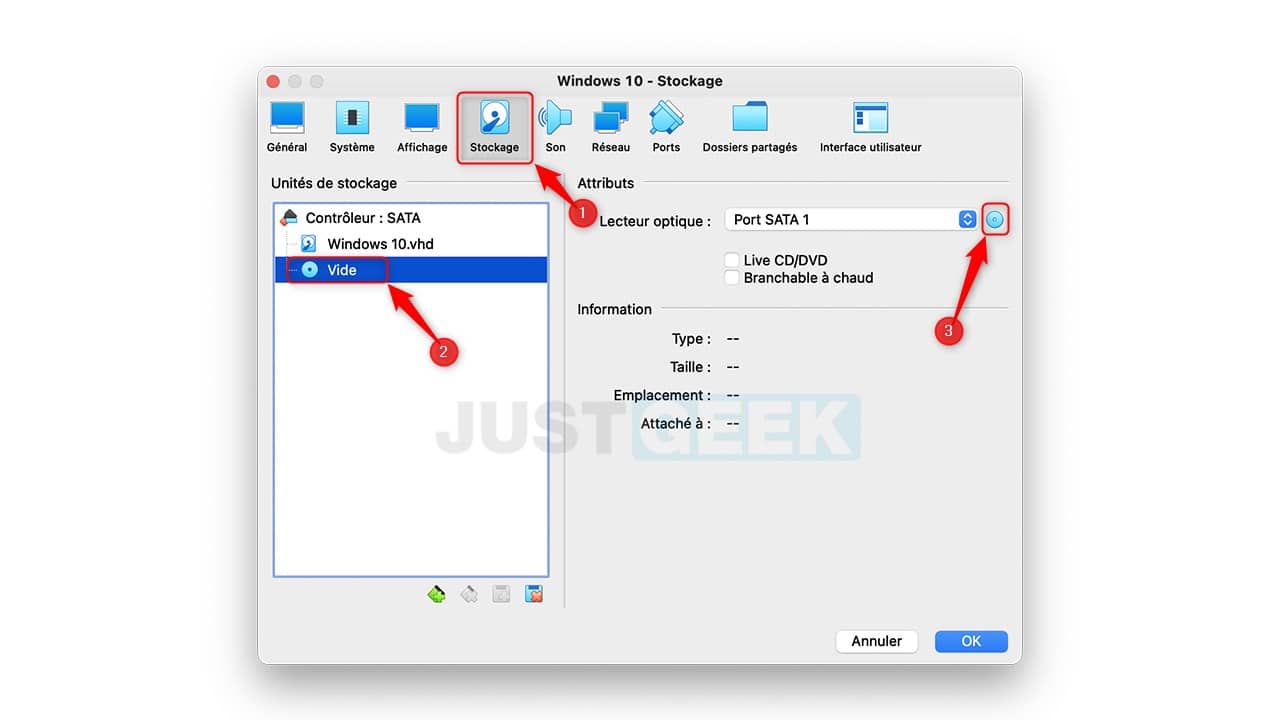
10. Then go to ” Storage , Then click the CD-shaped (Empty) icon under “Storage Drives”. Then, next to “Optical drive”, click on the CD-shaped icon, and select ” Choose a disk file “.
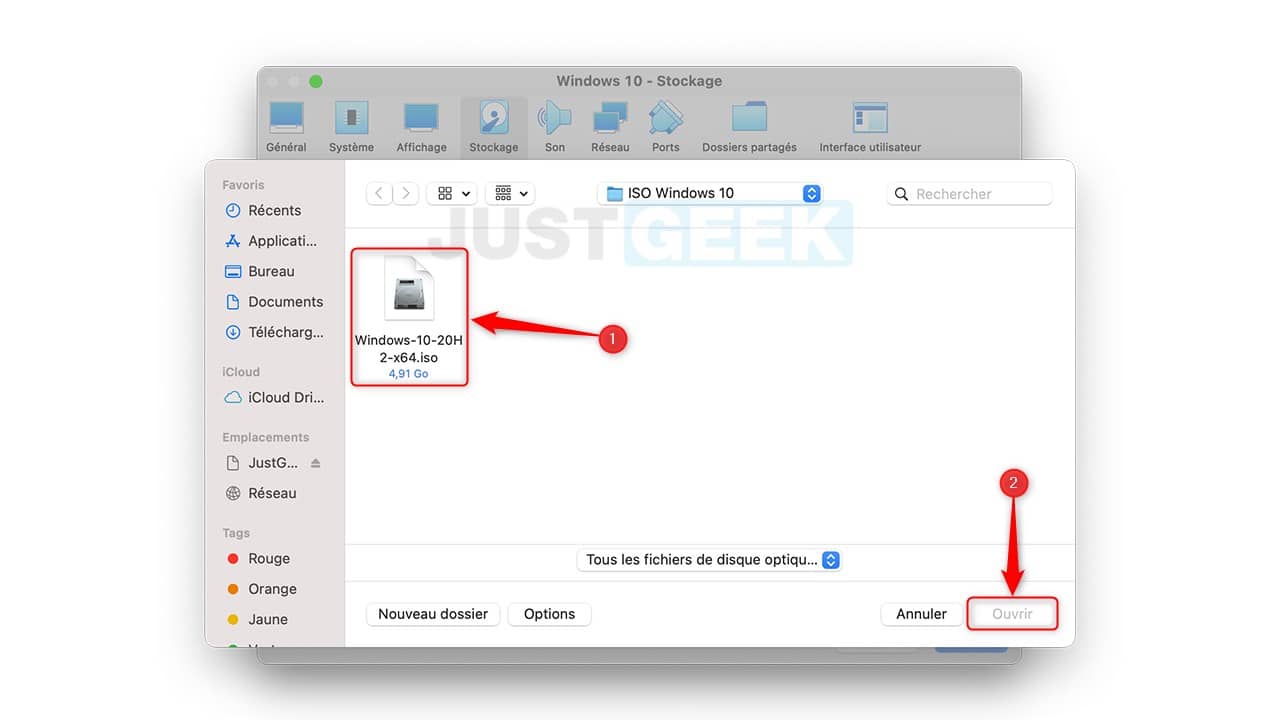
11. Select the Windows 10 ISO image, then click ” To open “.

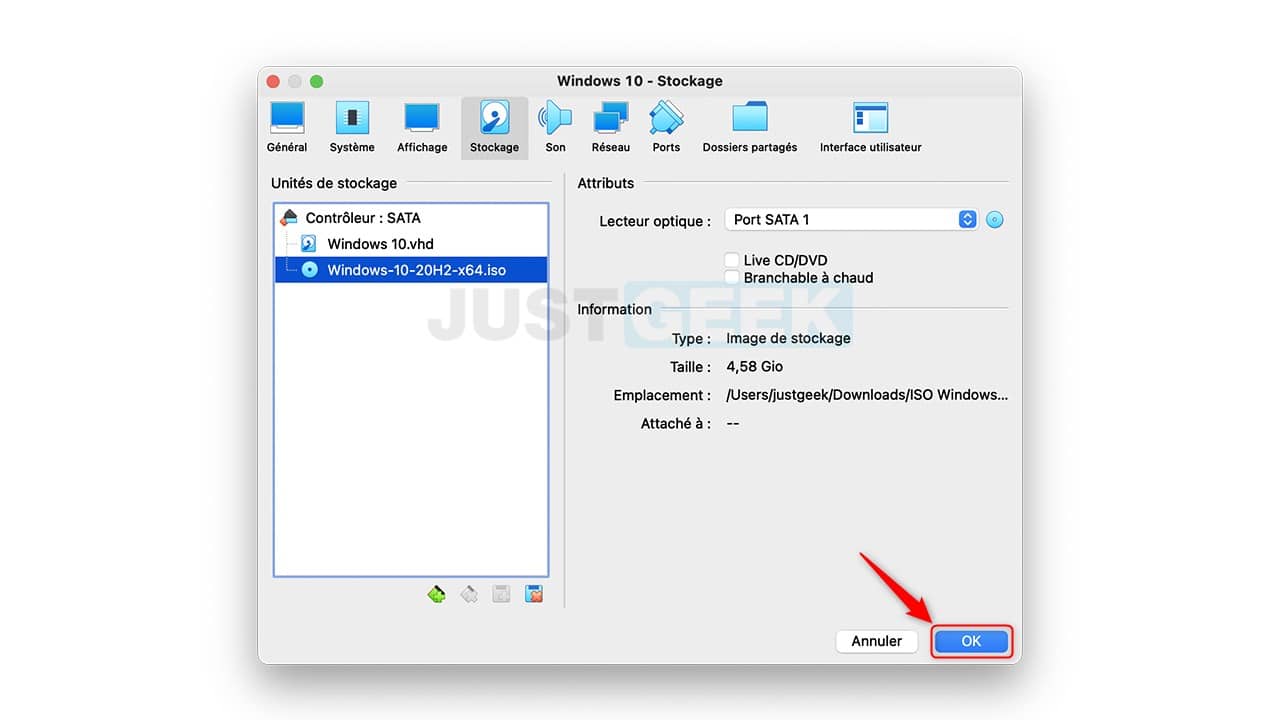
12. Click on ” OK »To validate the modifications.
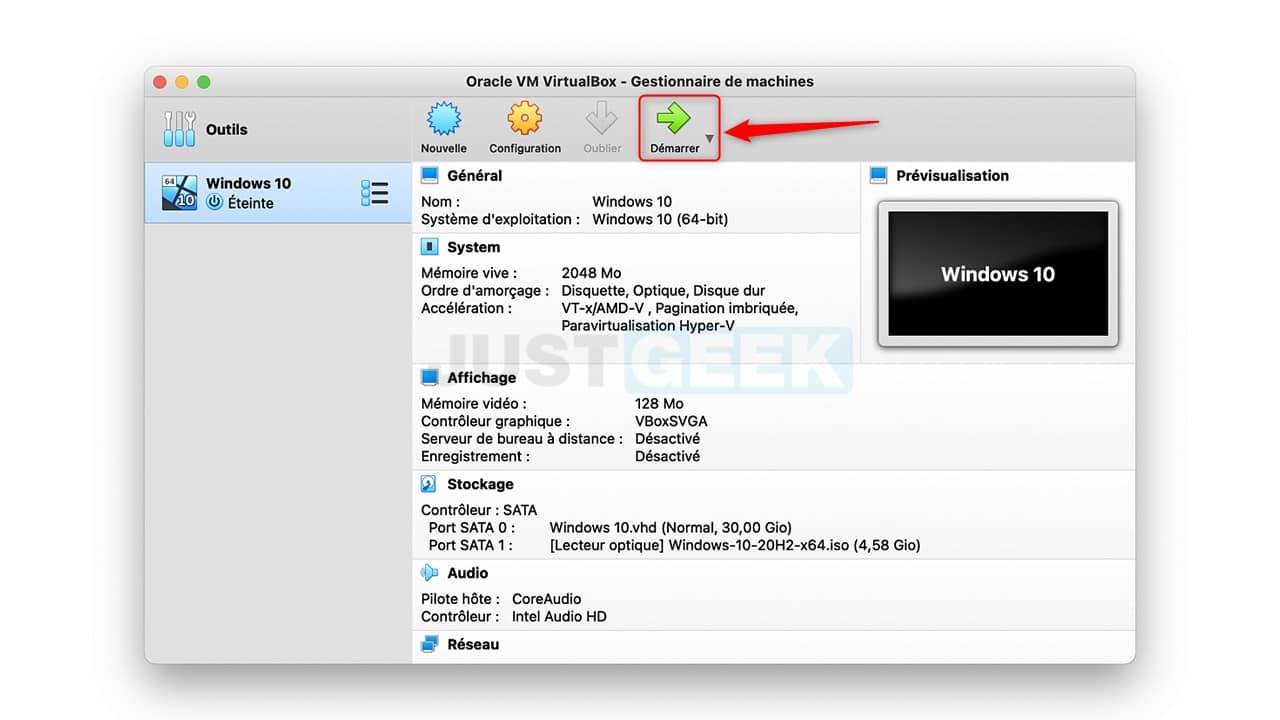
13. Finally, click on ” To start up To start the virtual machine.
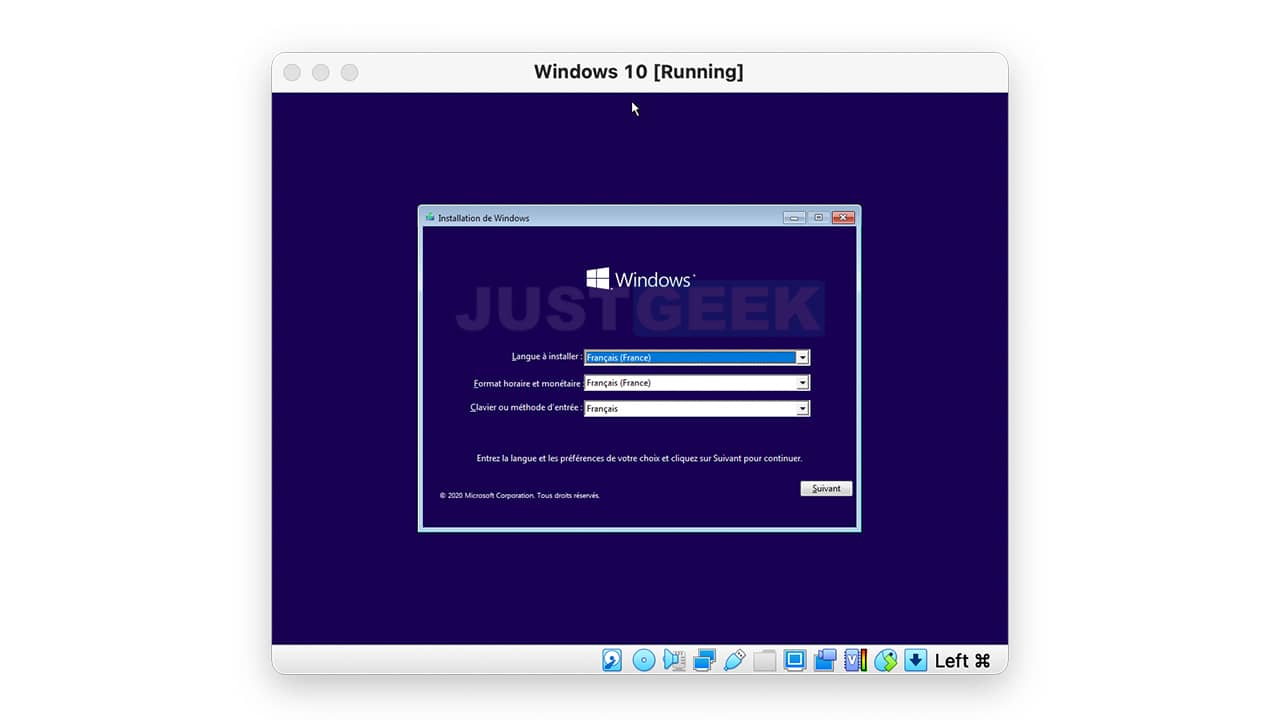
14. All you have to do is install Windows 10 on your virtual machine. Then you can use Windows 10 on your Mac as if it were a full-fledged computer.
Enjoy! 😎


